Posted on Leave a comment

Cro-tatting Lesson 5

Cro-tatting Lesson 5, or how to dispose of leftover threads of different colors.

Hello everyone! This article is a continuation of Lesson 4 . Therefore, follow the link if you have not read or watched the video of the previous lesson: https://fairylace.kozinenko.com/cro-tatting-lesson-4-how-to-make-a-split-chain-in-cro-tatting-technique/

I really enjoy reading your comments and questions on my posts. Because in this way you help me to make my blog useful and interesting. The idea of today’s lesson came to me after the publication of one of my old works – a coaster from the remnants of threads. You asked to make a video tutorial on how to make such a coaster. Of course I did this tutorial ! The link to the video is at the end of the post.

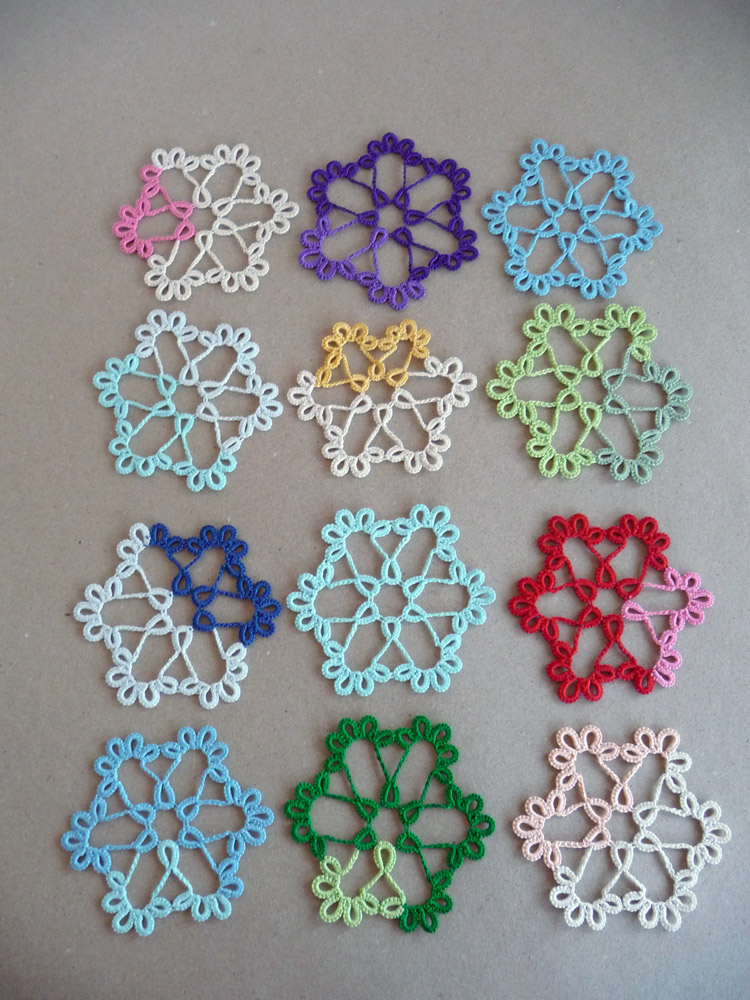
I’m sure many of you have stocks of thread. Well, how can I stop if I see threads of a beautiful color on sale?! And sometimes, for a specific project, I specifically buy threads of a very specific size and color. And in this case, I always buy a little more thread than required. You probably know how disappointing it is if a few meters of thread are not enough to complete the product. Therefore, I have there are ALWAYS leftovers threads! Of course, you can rewind the rest of the thread on smaller spools …

Cro-tatting lesson 5
cro-tatting Lesson 5

But it still takes up a lot of space.

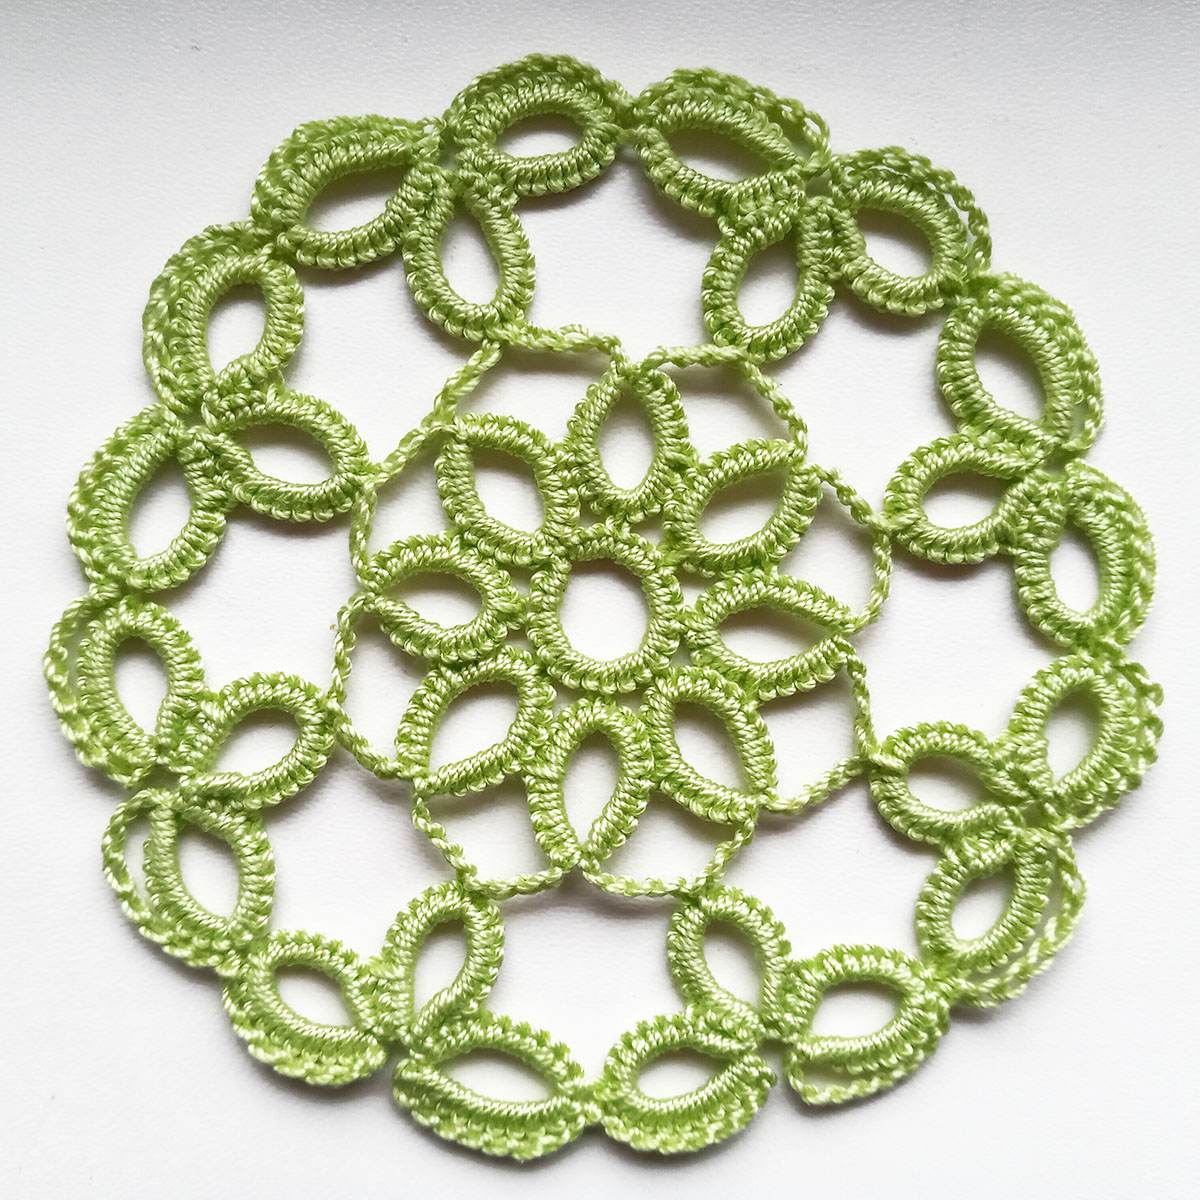
So, I decided to get rid of the remnants of the thread. To do this, I needed to combine threads of two colors in small coasters.

Simple coaster from thread of two colors

Note! We add a new thread before the ring or after the ring. In this case, it is very easy to hide both tails on both sides of the ring. And the chain is neat. I did the work with thread of one color until the thread ran out. As you can see, the thread can end anywhere, haha! By the way, I was lucky twice – two coasters turned out to be the same color!

Cro-tatting, free cro-tatting pattern

How many words! Where is Cro-tatting Lesson 5, you ask? You can download the pattern by clicking on the link: https://drive.google.com/file/d/1i7TlPsECywGl5j-y81wuiV4_NvMEwmlA/view?usp=share_link Or just take a screenshot.

Free pattern cro-tatting

Watch an additional video for the lesson here: https://www.youtube.com/watch?v=3ggzsan6n3g&list=UULF3dn4_9pp7tIKA2k564wLBQ

By the way, pay attention to the connection of rings of different colors. How to make the perfect connection, I will tell in the next lesson. So do not forget to subscribe to my blog and YouTube channel, so as “not to be late” for the lesson!

Posted on Leave a comment

Cro-tatting Lesson 4

Cro-tatting Lesson 4 , or how to make a split chain in cro-tatting technique.

Hello everyone! This article is a continuation of Lesson 3 . Therefore, follow the link if you have not read or watched the video of the previous lesson: https://fairylace.kozinenko.com/cro-tatting-lesson-3/

Cro-tatting Lesson 4

Ah, I tried my best in the previous lesson! I sought to convince all my readers of the need to master the reception of the split ring. By the way, this is necessary not only for cro-tatting, but also for the tatting shuttle and for the tatting needle. I hope many tatters will “follow me” in this matter, haha! And today I want to suggest that you use a split chain too as often as possible as well. But alas, I have no new arguments. I’m just sure that we must develop, improve and look for new ways and methods. Do you agree with me? Then you will benefit from my new video, I hope.

I use two methods to perform a split chain.

First method

So, fhe first method is good when you move from row to row through chains. You hide the tail of the thread at the beginning of work and, as the second part of the split chain, perform a double crochet. The number of yarn overs should be 1 less than the number of loops in the first half of the split chain. In my video, this is 5sc and Triple Treble Crochet ( or Double Treble Crochet ). Here again I ask for your help. How is this element correctly indicated in English. Write to me in the comments, please.

Second method

But the second method is ideal if you are going to the next row through a split chain + split ring combination. So, in the video, you will see two threads after the split chain is completed. First thread – ball, and the second – long tail of the thread, which I left at the beginning of work. Therefore we can use these two threads to make a split ring.

Wow! I can imagine how tired you are of reading this! Of course, it’s better to watch the video. Don’t forget to leave a comment and subscribe to my YouTube channel! https://www.youtube.com/watch?v=OvR8NaB1-c4&list=UULF3dn4_9pp7tIKA2k564wLBQ

Posted on 2 Comments

Cro-tatting Lesson 3

Cro-tatting Lesson 3 , or why master the split ring.

Hello everyone! This article is a continuation of Lesson 2 . Please check the link: https://fairylace.kozinenko.com/cro-tatting-lesson-2/

Cro tatting lesson 3

My regular readers know I’m lazy! Haha! Because I don’t like to hide the ends of the threads. Oh, it’s almost as terrible as unraveling the threads in a finished tatting. I’m sure a lot of tatters understand me. If you agree, please write in the comments. After all, each of your comments helps to make my blog more interesting and useful. In addition, in this way you will raise this article higher in the search and give more readers the opportunity to get acquainted with useful material. (Oh, I hope this is helpful!)

Why you need a split ring

Firstly, the use of a split ring helps us to move from one row to another WITHOUT cutting the thread. I like to use this trick. In this way, I get much less tails of threads, which have to be hidden with great pain. By the way, you can not hide polyester threads. You can cut them short and melt them with a lighter. But be careful, otherwise you can ruin the product!

Secondly, the split ring helps in creating very original patterns. By the way, the split rings bookmark looks pretty cute, doesn’t it!

Cro tatting lesson 3

Thirdly, the split ring can be made with a shuttle, needle or crochet. For all these three tatting tools, I have already published videos on my You Tube channel. Thank you in advance for all the likes, comments and subscriptions! Today I added a separate video for cro-tatting. I hope Cro-tatting Lesson 3 was interesting and useful for you. You can watch all the videos on Split Ring by clicking on the link: https://www.youtube.com/watch?v=ZM5ONjnKNOI&list=UULF3dn4_9pp7tIKA2k564wLBQ

The topic of my next lesson is a split chain for cro-tatting. I’m sure you’ll like it! Also you will enjoy visiting my store, please check! https://fairylace.kozinenko.com/