Posted on Leave a comment

To do or not to do, that is the question

Red tatting bracelet with white beads

To do or not to do, that is the question! Or again about the front and back sides of tatting.

Hello, everyone! Today I want to touch again on the topic of front and back side of tatting. Ah, don’t get angry and don’t throw slippers at me! This dispute reminded me of the dispute between midgets from the novel by Jonathan Swift. On which side should the egg be cracked? I don’t think it matters. Because it is important to get to the delicious middle! Of course, every tatter is free to do as you like. But how I always want to get a “delicious”, beautiful, tender and perfect result!

I personally prefer to always distinguish between the front and back of my work. It’s probably a habit. This is especially true when you need to connect rows of different colors. I am sure you will agree with me, because if the connection is wrong, the product may not look very beautiful. But we strive for perfection, don’t we?

By the way, I was inspired to write this post by my new pattern, in which I connect the rows of white and red: https://fairylace.kozinenko.com/product/fish-heart-tatting-pattern/

To do or not to do the front and back sides of tatting

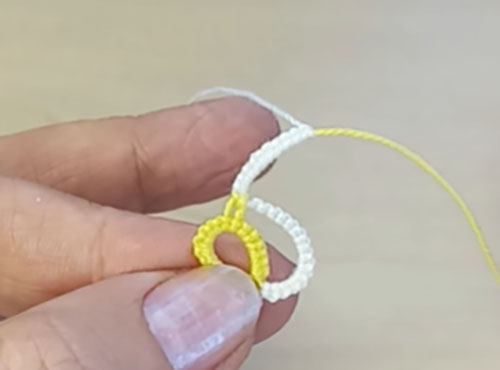
So, look closely at the photo.

In the first case, the connection is correct. Light threads do not peek out between the green ones.

And in the second case, the light thread is a small strip between the green ones.

But sometimes, you may need just such “wrong” strokes. After all, the fantasy of tatters is limitless and who knows what else we can come up with! So, decide for yourself, to do or not to do the front or back side of tatting! And as another argument, watch my video, please. Subscribe to my YouTube channel and follow my blog, welcome! https://www.youtube.com/watch?v=98FYbzTfzZE&list=UU3dn4_9pp7tIKA2k564wLBQ

Posted on 2 Comments

The perfect start to two-tone lace

Perfect start for two tone lace

The perfect start to two-tone lace, or how to hide the threads at the beginning of work.

Hello, everyone! In today’s post, I want to tell you how I hide the threads at the beginning of working with two colors.

I’m sure you all know that in the beginning we may have several options. It all depends on the pattern, of course! With a product of one color, everything is simple. This is either a shuttle – a ball, or two shuttles. Although there may actually be three, four shuttles or more, I’ve tried it! But let’s not delve into the impenetrable forest, ha ha!

If we start working with threads of two colors, we usually tie two threads.

Perhaps, if the threads are very thin, this initial knot is almost invisible. But I know about him! Ah, my perfectionism does not let me get bored! At the end of the work, I tried to untie this connecting knot in order to tie, hide and cut two pairs of threads. So instead of three nodes, I got only two. But I didn’t like that either. In addition, hiding FOUR ends of a thread at once is not for me, I sooooooo really don’t like hiding threads. But of course you will not find “tails” of threads sticking out in all directions anywhere in my products, lol! Because I love the option when the threads are hidden during the weaving process. By the way, you can watch my video on this topic.

I made this video for three tatting methods: shuttle, needle and cro-tatting. I hope you come back here after watching this video and read the post to the end: https://www.youtube.com/watch?v=K_fWxN3THBc&list=UU3dn4_9pp7tIKA2k564wLBQ&index=26

Ah, Mozart’s music is perfect for creating creative projects, isn’t it? Please write in the comments if you are hiding threads during work or only after the completion of the project.

But I’m a little distracted. Our theme is how to make the perfect start to two-tone lace. So, I don’t do the connecting knot at the start. I also hide both tails of the threads at once. At the end of the work, I connect the last element to the beginning with a crochet hook or needle. And in the end, I only have two tails of threads at the end of the work, which I hide with a sewing needle. Voila!

I showed the beginning of the process of weaving a tatting in two colors in my new video, welcome!
I will be glad to new subscribers, your questions and comments. https://www.youtube.com/watch?v=oZkXevylGAc&list=UU3dn4_9pp7tIKA2k564wLBQ&index=1


Also don’t forget to visit my store:

https://fairylace.kozinenko.com/product-category/patterns-tutorials/patterns-and-tutorials/