Tips for beginner tatters, or how to distinguish the front and back sides of tatting and is it worth paying attention to this.
Hello everyone! This is the second part of my advice for beginner tatters. You can read the first part here: https://fairylace.kozinenko.com/tips-for-beginner-needle-tatters/
I admit, I’m a little discouraged. The previous article was read by 156 visitors (according to site statistics). And only ONE left a comment. Perhaps my article was not useful and interesting? Therefore, I doubt whether it is worth continuing this topic.

Or you don’t know how to leave a comment? It’s very simple! Scroll UP the screen. Click on the word “Comments” above the article title.

When you go down, you will see a window for your comment.
Believe me, your feedback is very important to me. Because it helps me make the site more interesting and useful. And also your comments will raise my site in the search rankings. This means that more beginner tatters will be able to find these articles. Sorry for going off topic and thanks in advance for your support!
Front and back sides of tatting

Have you noticed the placement of the “caps” above the double stitches? On the front and back sides their location does NOT match. Although from both sides it looks absolutely identical. I’m sure there are special terms in English for these “things”. But I don’t know them, sorry. I hope you understand what I mean.

Therefore, you can determine the side by picots. It’s very simple. Take a close look at how the two picots are located relative to the chain. The difference is very noticeable, isn’t it? On the left is the picot that is obtained on the front side. On the right is the picot, which is obtained on back side.

If you turn your work over and continue to do double stitches in the usual way, you will end up with a “picot mix.” In this case, it will be completely indifferent which side is which. This is probably not critical! But only as long as you weave with single-color threads.

Look what we get when working with threads of two colors. When two rows are joined on one side, small stitches of a different color are obtained. Imagine what your work will look like if small multi-colored stitches peek out from all sides. Again, this is not dogma, but creativity. And any of us can say: I am an artist, I see so! In any case, the choice is yours!

I’ll tell you how easy it is to switch to the front and back method. It’s sooooo simple. When you turn the work to the opposite side (we already know how to distinguish both sides!), you weave double stitches in the reverse order. That is, first you need to do the second half of the stitch, and then the first. As always, I made a short video demonstrating this technique. This video demonstrates the method for needle tatting. But for the shuttle the reception is absolutely identical. https://www.youtube.com/watch?v=QGF8pzR3tJk&list=UULF3dn4_9pp7tIKA2k564wLBQ
Please don’t forget to come back after watching and leave a comment!


Thank you. I follow you and your teaching is very important and useful to me. Thank you.
Thank you so much for your kind words and for supporting my blog, Ana Alice! I’m glad my articles are interesting and useful!
Thank you, you are teaching me so much. I’ve watched other needle tatting videos but none of them go into the finer details like you do.
I’m so pleased to hear such positive feedback about my blog and my YouTube channel, Caroline! Thank you so much!
I’ll tell you a secret: I have a life principle: if I want to do something, I have to do it very well! This also applies to my tatting lessons. I started learning lacemaking when there was practically no internet or magazines about this type of craft in our country. I “invented” a lot of it myself. Of course, I made a lot of mistakes and spent a lot of time on it. But it was a very useful experience! That’s why I try to explain all the techniques in as much detail as possible so that my readers and subscribers can benefit from my experience and knowledge without wasting time correcting mistakes.
thank you for this post and the information, I am starting to learn shuttle and whilst I knew about the back and front of work, knowing how to distinguish them is very helpful.
I’m glad you found this article helpful, Tracy!
There are many subtleties that beginning tatterers should know; they make learning easier and help in the work! Happy tatting!
Hi Elena. 🌷Tysm for this article. It is so helpful. Keep up the good work.
I couldn’t like it because I would need to create account for WordPress.
Your comment and kind words are better than any like! Thank you, Gwendolyn!
Elena I have a question. I am a beginner of less than 2 years, I think? (I’m old) 😊I find your teaching to be easy to understand. My question is is there a way to not RW when working on, say a doily. I think I saw something that said there is but not sure of step by step how to. Thank you. 🌺
It all depends on the pattern. Sometimes the chart is written without turning the work. But more often than not, if the Ring is followed by a Chain, you’ll still need to turn the work. I hope I’ll get better soon and be able to make a detailed video on this topic.
Thanks
Always a pleasure!
Thank you for the tips. I am new to tatting and about half way through my very first project, which I now realize was a very ambitious project for a beginner. I am an accomplished crocheter and knitter, so I thought, “how much different can this be? fiber is fiber.” Hahahahahaha! I’m finding out that there is a learning curve for everything! lol.
I am grateful for the tips regarding the more subtle aspects of the art. Thanks and keep ’em coming!
You are very right, Stacey! There is a big difference between all these types of needlework. And I congratulate you on finishing your first project. Especially since, as I understand, it was not an easy pattern for a beginner. Thank you for the wonderful feedback on my article. Your kind words are very inspiring to me. It means that my efforts are not in vain!
Thank you your teachings as I am new to tatting and now realize what a difference that this will make . I look forward to browsing through more of your posts.
I am glad you liked my article, Patricia! Of course, there are many nuances and subtleties in tatting, knowledge of which will help a beginner!
I’m still practicing.
That’s right, Leslie! Tatting is a very beautiful, but rather difficult activity that requires practice.
I’m just learning shuttle tatting. thank you
Thank You, Christy? for the kind word and support!
Thank-you! This was very helpful! I am an intermediate shuttle tatter and have largely ignored « front and back » method as I did not really see the necessity of doing it in the small pieces that I make. I have tried needle tatting in the past, but have set it aside for the shuttle. I may now give your method a try as I can tell your work is tighter than I recall mine ever being which is why I prefer the shuttle.
I will certainly pay attention to the « front and back » now 😉 Thank-you!
Thank you for your kind words, Irene! Your feedback helps me make the blog better. I am glad my articles are useful and interesting!
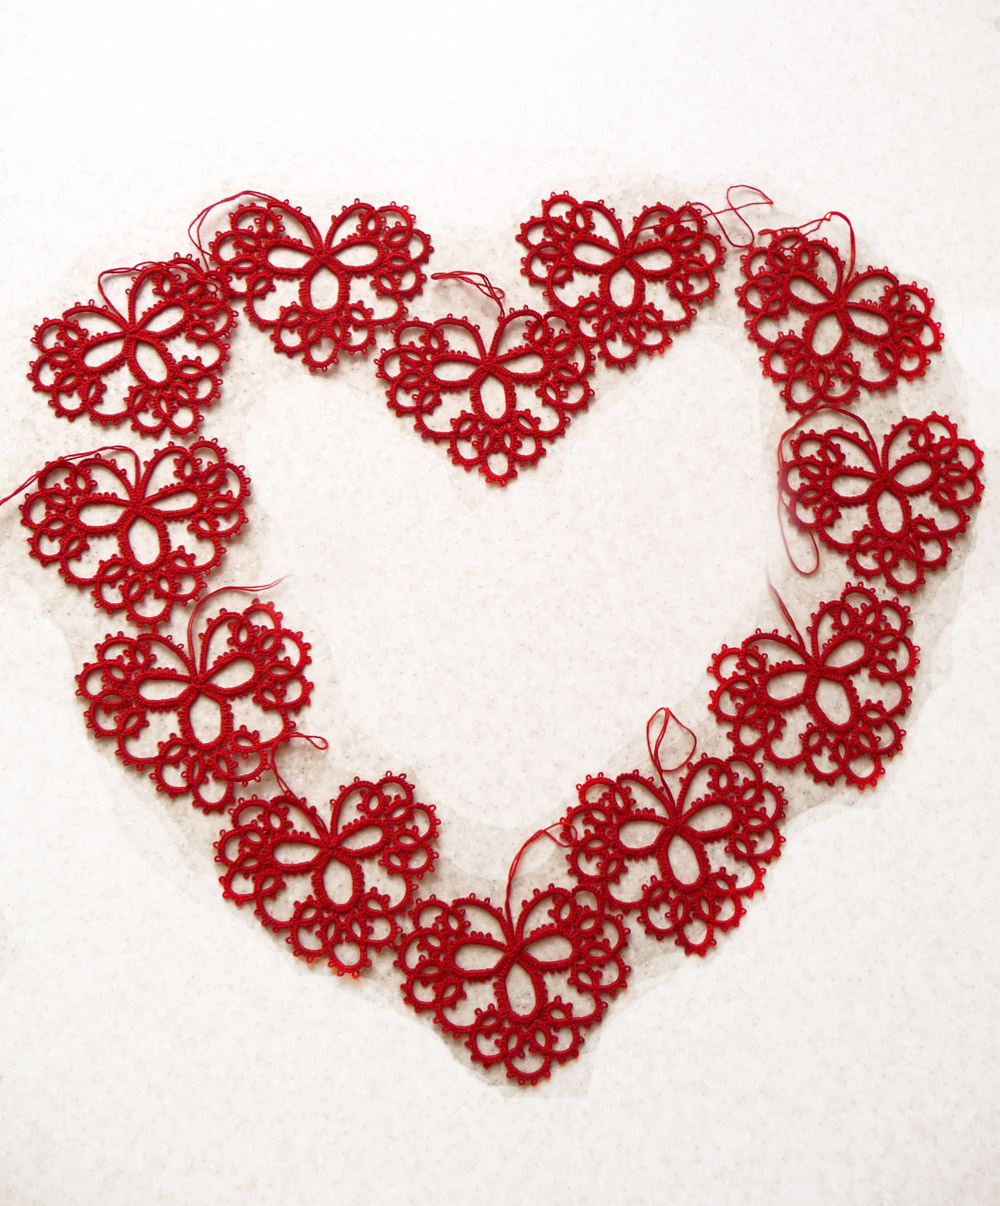
I have done a little needle tatting several years ago. Now seeing your work has inspired me to pull out my needles once again and give it a go. You have beautiful work. I especially love the red heart. Thank you for peaking my interest. Keep up the wonderful work.
Thank you so much, Betty, for your kind words! I am so glad that my work has inspired you to take up tatting again. Because my main goal is to popularize this wonderful craft. Tatting is an art!
Great article and explanation. Thanks, as I’m new in tatting, this información is very appriciated. Greetings from Jalisco, Mexico
I am very happy, my articles are interesting and useful, Mzrcela! And I am also very pleased to have subscribers from Mexico!
Дуже корисна інформація! Дякую! 🥰
Дуже рада, що інформація корисна! І дякую за підписку!
Thank you!!! This tip helps to do better projects.
Thank You so much for the kind words, Diana! I’m glad my tips are useful!
Very informative! I never realized that there was a front/back consideration!
Thank You for the comment, Amy! I almost always use this method. And I never tire of telling my readers about it.
Вітаю! Я лише планую спробувати щось створити. Розумію техніку, але зупиняє з’єднання та перехід на другий ряд. Хочеться додати більше бусин та бісеру. Поки що обираю схему та концентровану інформацію. Вдячна за гарний текст і фото.
Гандзю, дякую за підтримку мого блогу! Як то кажуть: очі бояться, руки роблять! Нехай Вас не лякає перехід на другий ряд. Для початківців краще за все відрізати нитки після першого ряду і починати другий, так само з наступними рядами. Ви можете пошукати відповіді на Ваші питання в моїх відео на ЮТубі.
The tips you post are always very helpful and I appreciate that you take the time to do them.
I am very pleased to read my posts are useful`, Karen! This inspires me to continue working in this direction. I started tatting when it was completely unknown in our country. There were no tools, no patterns, and the Internet was in its “infancy”. So you can say that I am self-taught. And I often had to correct my mistakes. So I understand how important it is to get advice.
Very clear
Thank you, I tried my best!
This was so helpful! Thanks!
Thanks so much for your comment, Patti! I’m glad to be useful!
My first visit to your blog and very happy to have found it! Such a lovely teaching post! And I like how you mentioned that we are artists and the choice is ours.
I am very pleased to read words of praise from such a talented tatting master like you, Marilee! Looking at your works, I am even more convinced that we are not artisans, we are artists!
This clearly explains front and back, when I was shown before I did not understand, very interesting blog
This is probably my professional feature – I am a teacher. Therefore, I always try to explain the material simply and clearly. Thank you so much for your comment and kind words, Peggy!
your explanation of front side/back side tatting was very helpful.
Thank you for your support and kind words, Susi!
Thank you for the very detailed information. I have saved this and will go back and back to study.
Thanks for the comment, Sharlene! I wish you easy and fun learning!
Grazie per il suggerimento e per il video, buon pomeriggio 😊
Grazie per il commento e le belle parole, Rita!
Huh. I never noticed the difference on the picot! Thank you for your informative blog; I’m a beginner at tatting and this is a trove of wonderful information.
Thank you so much for your wonderful words, Susan! I’m glad my articles are useful. If you have any questions about tatting, I will try to answer. Feel free to ask in the comments!
I am new as off November 2023 tonneedle tatting. I noticed this happening on a Medallion I made.
Thank you for your tips for needle tatters. I am older so my progress is slow as I get tired quickly. 🪡
Time doesn’t matter! The main thing is that you HAVE PROGRESS! Thanks for your comment, Gwendolyn! I am very glad when there are more and more tatters!
Enjoy your tips and hints. Love your pieces 🙂
Wow wow wow! Thank you so much for your wonderful words, Mercy! This really inspires me! So it’s not in vain that I’m trying.
thank you! i will need to rewatch this when i have a needle in hand!
Evan, I’m sure you will like this method. Thanks so much for the support!
According to the Tatters Across Time program, the two methods are called Traditional Tatting and
Front Side/Backside Tatting. I learned FS/BS years ago and prefer the look of that method. I read your blog posts, but am lazy about commenting.
Sharon, I’m sorry you haven’t commented on my articles before. From your comment today, I learned about the Tatters Across Time program. Thanks for the new knowledge!
Elena! I never noticed this and from now on I will see it forever! 😀
If I remember I will switch to your method, not sure I will remember…
Very interesting post!
Thank you and hugs!
/Gunilla
Thank you so much Gunilla for the comment and hugs! I will remind my readers of this method often on the blog. Therefore, You will master it very soon, I am sure.
Sorry did not comment on first email …….. But did find this email and video very interesting never thought about the turning in this way but I’m a very newbie thanks for your help
Thanks so much for the comment, Linda! Perhaps you have questions that I can answer? Write in the comments, I’m always happy to help!
Thank you for the wonderful tips. This is really helpful for me in work. I love all your pieces that you write and blog about. It is thought provoking. It is inspiration for me on pieces I want to try so thank you so kindly.
Oh, these are such beautiful words! Thanks so much, Cynthia! This kind of praise inspires me and really supports me. I’m ready to make new articles and videos to be useful!