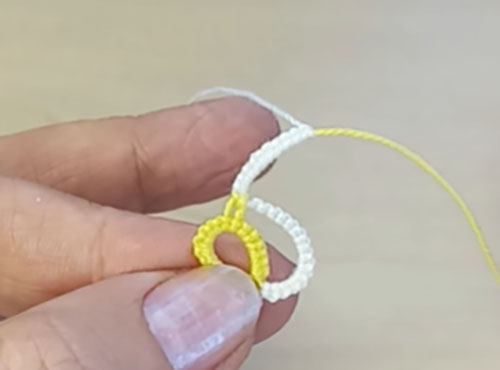
Tatting for beginners, base knot
Hello, everyone! I’m sure many of my readers are not new tatters. And some very famous and skilled craftsmen of this handicraft. By the way, I am very proud of each of my subscribers! I am also grateful to everyone for supporting my blog.
I also have a YouTube channel, you can subscribe to keep abreast of updates. And today I just added a new video: Tatting for beginners, base knot. https://www.youtube.com/watch?v=ISTEQI1ud1k&list=UU3dn4_9pp7tIKA2k564wLBQ&index=1
Oh, why repeat the same thing, you ask. Of course, I don’t argue. So many videos show how to make a basic tatting node. Each master shows his favorite technique. Some people like the shuttle, others prefer the needle. Everyone may have a different method of tying the knot. I know many newbies can get confused not knowing what to choose. Therefore, I decided to collect in one video 4 methods of how to make a double stitch tatting.
Base knot with shuttle
The first method is for the shuttle. This method is the most ergonomic in my opinion. You will have to hold the shuttle with only two fingers at all times. Therefore, this method is convenient for small and lightweight shuttles. Or you have to take a break from work if your fingers get tired 🙂

The second method is also for the shuttle. But you can use this method with a netting needle quite successfully.

Base knot with needle
The third and fourth methods are for tatting with a needle. The only difference is the use of different fingers to form a knot on the needle.

You can choose any method, of course. But I advise you to learn everything. The more you know, the wider your possibilities are!
Don’t forget to check my store. By the way, the 10% discount for all patterns on the Coupon Code is still valid. Coupon Code: OFF10HAPPYPATTERN
Welcome!
https://fairylace.kozinenko.com/product-category/patterns-tutorials/patterns-and-tutorials/
Subscribe to my blog to keep abreast of updates. Likes, comments and sharing are welcome! Thank you!