My articles are also accompanied by video tutorials. Along with the article, I add them to my YouTube channel.
Please write in the comments what subtleties you would like to learn. Then it will be easier for me to make a lesson plan.
You can also ask me questions in the comments, I am ready to help!
Today is a very short article. But I added a lot of links to video tutorials. And please don’t throw slippers at me when you start watching today’s video! LOL Because in order not to make this video last up to an hour, I showed short excerpts from my detailed tutorials “How to make a split ring”. But, these excerpts are very much sped up and shortened. Of course, I’m sure you’ll agree, it makes no sense to duplicate what is already on my channel.
I know 9 way how to make Split Ring. Maybe you know another one? Please write in the comments. It will be very interesting. In addition, in the descriptions under the video you can read the names of each method (at least the names that I know). I will also be glad if you write in the comments under the video the names that I do not know for the methods demonstrated.
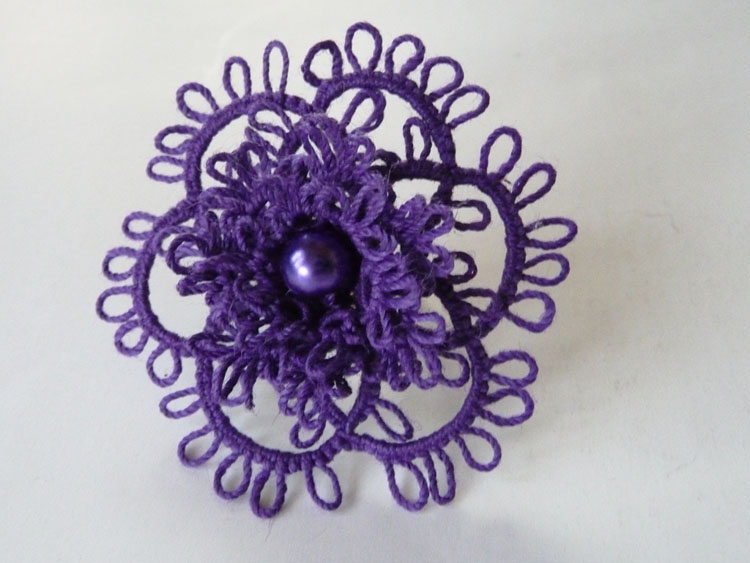
Lace table runner Quasi chess
Here are the links to these detailed video tutorials:
Detachable blue collar necklace for Dress Sia Glass
And finally, a link to today’s video lesson Perfect tatting – Part 13, how to attach a Split Ring to the previous element: https://youtu.be/bgaH-SduZ34
Don’t forget to comment, like and share my videos and articles on social media, please! Happy tatting! Thank you!
My articles are also accompanied by video tutorials. Along with the article, I add them to my YouTube channel.
Please write in the comments what subtleties you would like to learn. Then it will be easier for me to make a lesson plan.
You can also ask me questions in the comments, I am ready to help!
Oh, you must admit, it’s very annoying when a couple of three sloppy picots spoil the product and the mood of the master! I’m talking about curled picots.
Today I want to show several simple ways to avoid this mistake.
SHUTTLE TATTING
First, try to wind the threads onto the shuttle correctly. Do not wind the thread around the shuttle, but rotate the shuttle. By the way, there are various devices for winding threads onto the shuttle. I know that some craftsmen use sewing machines for this (for “bobbin shuttles”).
Secondly, try to place the shuttle horizontally. I have a special device for this. It is very convenient. Because the shuttle rotates around the axis and the thread does not twist. By the way, you can use this technique while weaving as well.
Thirdly, spin the shuttle more often! This is a very simple technique, but popular and used by absolutely all tatters! Or am I wrong?
Fourth, you can also untwist the ball. This is especially true when making chains. Use a ball-point needle to secure the thread. And “send the ball on the carousel”!
NEEDLE TATTING
Unwinding the ball can also be useful for needle tatting.
Also, use the horizontal ball placement method. If the ball is big enough, you can take a knitting needle and attach it together with the ball to a box, for example. I have an oval box made of cord for this purpose.
And of course, don’t forget to untwist the needle more often.
My articles are also accompanied by video tutorials. Along with the article, I add them to my YouTube channel.
Please write in the comments what subtleties you would like to learn. Then it will be easier for me to make a lesson plan.
You can also ask me questions in the comments, I am ready to help!
I often hear from beginner tatters: My chains are twisted! What am I doing wrong? Because, most often, this problem arises from the incorrect position of the shuttle and ball threads (for needle tatting, this is the needle and ball thread).
First, let’s remember the terminology! So, I’m turning to the ABC Tatting website again: https://abctattingpatterns.com/terms/ These are the names accepted in English:
Ball Thread (BT): Thread originating from the ball of thread.
Core Thread: a.k.a. foundation thread, shuttle thread, needle thread or running thread. Traditionally, the shuttle or needle thread is used as the core thread. It used like a clothesline upon which the double stitch hangs.
Although, in other languages, these may be other names. For example, a shuttle thread or a needle thread is called a leading thread. Because it kind of leads the double stitches. And a ball thread is called a working thread. Because it “works” by tying knots. What are these threads called in your language? Please write in the comments. It’s very interesting!
Shuttle tatting
So, first, let’s look at shuttle tatting.
Note that the main (shuttle) thread is always in the right hand. If you are right-handed! And we are not looking at pearl weaving, split ring, etc. techniques.
For left-handers, it’s the other way around.
Thus, the Core thread is always BELOW the Ball thread. By the way, you remember Ball thread can also be wound on the second shuttle?! But the name of the thread is still retained for convenience.
It is interesting that when performing the Ring, the same thread is the Core and the Ball threads. The role of the Ball thread is played by the thread that forms a loop on the hand.
If you are going to make a Chain after turning the work, you just need to move the Ball of Thread upwards (if it was not located there initially). This way, the threads will be in their places again after turning. Namely: the main thread in the right hand, and the Ball of Thread above it. By the way, pay attention! The threads do not cross!
If the pattern does not call for you to turn before the Chain, you need to swap the threads. It’s very simple! Make one simple knot, as if you were tying shoelaces. Similarly, change the threads after the chain, when moving to the Ring without turning the work.
NEEDLE TATTING
There is a small nuance for needle tatting. Firstly, most often we work with only one thread from the ball. How interesting, but the same thread “bifurcates” and becomes the Needle thread ( or Core thread ) and the Ball thread. Do you know what separates them and thus “gives individuality by giving names”? ( LOL ) Of course, it’s a joke! But we can smile while doing tatting. And even while reading such a serious lesson Perfect tatting – Part 11. Because a good mood is always appropriate!This is the very first stitch that you make on the needle.
Thus, the thread from the eye of the needle to the stitch will be the Core Thread. And the thread from the stitch to the ball will be the Ball Thread. It’s simple.
I’m sure you can guess which photo illustrates the work for right-handed people and which one for left-handed people!
When turning the work, we also make one simple knot to swap the threads. If there is no work rotation, then we will need to make two knots. This way we fix the element and do not swap the threads.
Thus, remembering the correct position of the threads, we will always get perfect, untwisted Chains!
Unfortunately, cro-tatting is not a very common type of tatting. Probably because for this type of needlework you need to have skills for two techniques at once: tatting with a needle and crochet. But now, with the advent of high-quality tools for cro-tatting, the popularity of this type is growing. However, there are very few patterns and instructions for cro-tatting. So I am often asked if any tatting pattern can be used for cro-tatting. Yes, of course! And in this article I will tell you how to independently adapt ANY tatting pattern for cro-tatting.
For example, I took a free pattern on the website Handy Hands “Sand Dollar Pendant”, adapted by Kendra Goodnow. You can download this manual by taking a screenshot or by following the link: https://hhtatting.com/free-patterns/free-tatting-patterns/
For clarity, I, as always, made a short video. Please comment, like, subscribe to my channel! https://youtu.be/Pltwb6JgGiM
Step 1
First we need to make a small sample of the chosen pattern.
To do this, take the threads of the thickness indicated in the instructions. Make the first two Rings and the chain according to the graphic diagram. You can do this with the tool you prefer, a shuttle or a needle.
Step 2
To do this, take the threads of the thickness indicated in the instructions. Make the first two Rings and the chain according to the graphic diagram.
You can do this with the tool you prefer, a shuttle or a needle.
Step 3
Now take a hook for cro-tatting of the appropriate thickness and make the first ring.
Compare this ring with the previous sample. Usually the difference in size between the rings is quite small. But if you are making a large project with many rows, it is better to check. If the crochet ring is much larger than the sample, you should reduce the number of double stitches.
Step4
Now crochet 15 chains (as shown in the diagram), using cro-tatting hook. Unravel the extra chains. I got 10 chains. In our pattern, all Chains are 15 double stitches. So we don’t need more measurements. In the new pattern, each Chain will consist of 10 chains.
So our graphic diagram looks like this.
The final
You can tie the outer row as you like.
I hope you enjoyed and found Cro-tatting Lesson 8 useful. You can support my channel with likes, reposts and comments! Thanks in advance to everyone who donates to my PayPal: fish20085@gmail.com Thank you!
Also my articles will be accompanied by video tutorials. Simultaneously with the article I will add them to my YouTube channel.
Please write in the comments what subtleties you would like to know. Then it will be easier for me to make a lessons plan.
Also you can ask me questions in the comments, I’m ready to help!
Sometimes when making two or more rings in a row, there is a small distance between the rings, especially for beginner tatters.
This kind of trouble happens both when working with shuttles and when working with a needle. I want to show you how you can avoid this kind of mistake with a little tricks.
For tatting shuttle
After you make the first part of the first double stitch, press this knot with your fingernail. Oh, you don’t have to have long beautiful nails and a perfect manicure for this! Of cource, you can use short ones like mine, for example, LOL
Then do the second part of the double stitch and check your perfect result!
In this way you can make two, three or more rings.
For tatting needlee
Make the first ring. You can use method with knot. I told you about it in the previous lesson. This way you won’t have to make fixing knots between the rings. And before making the second and also all subsequent rings, place the needle exactly in the middle of the ring and press the needle to the ring with your fingers.
You will be surprised how easy it is to make the next ring perfectly close to the previous one if you position the needle just like this.
Perfect Tatting – Part 10 is finished! Happy tatting! I hope my previous blog posts will also be useful and interesting: https://fairylace.kozinenko.com/blog/
Hello everyone! This is the ninth lesson in the series Perfect Tatting. You can read previous part here: https://fairylace.kozinenko.com/perfect-tatting-part-8/
Also my articles will be accompanied by video tutorials. Simultaneously with the article I will add them to my YouTube channel.
Please write in the comments what subtleties you would like to know. Then it will be easier for me to make a lessons plan.
Also you can ask me questions in the comments, I’m ready to help!
In this article I describe several ways to tighten the rings. Two ways for the shuttle and two ways for the needle.
The first method for the shuttle
I won’t even describe this method, because all tatters use it (well, almost all, but more on that later). We just tighten the Ring. But if you look closely at the photo, you’ll see a small knot between the shuttle and ball threads after the Ring is formed.
Madhur Dadlani Method
A few years ago I saw a video of how a talented tatting master from India, Madhur Dadlani, does tatting. Oh, the speed of her work is absolutely amazing! At the same time, the precision and accuracy of the knots are beyond praise! I was delighted with this mastery. It is not for nothing that in India she is called the “Queen of Tatting”!
But I also noticed how she tightens the Rings. Of course, I tried to repeat this technique. This technique has been known for a long time and is called “posting the shuttle”. But I first saw it with Madhur. So let me call this method by her name!
Before tightening the Ring, pull the shuttle through the loop where the double stitches of the Ring are located.
Pay attention to the placement of the threads. This is perfect, isn’t it?
The first method for the needle
I will not describe this method either, because absolutely all tatters who use a needle use this method (or not all? Write to me in the comments, please). The only “imperfection” of this method is the need to tie knots after each element to fix the Rings and Chains. In principle, these nodes are not very noticeable. But I know about them…
Needle Tatting. The Method with Knot
I admit, I watched a lot of videos for the needle. But I didn’t see another way anywhere. It’s quite possible that I wasn’t diligent enough in my search. So I came up with my own way. You need to twist the loop where the double stitches of the ring are located BEFORE you pull the needle through it.
Perfect Tatting – Part 9 is finished! Happy weekend! I hope my previous blog posts will also be useful and interesting: https://fairylace.kozinenko.com/blog/
Hello everyone! This is the eigth lesson in the series Perfect Tatting. You can read previous part here: https://fairylace.kozinenko.com/perfect-tatting-part-7/ Also my articles will be accompanied by video tutorials. Simultaneously with the article I will add them to my YouTube channel.
Please write in the comments what subtleties you would like to know. Then it will be easier for me to make a lessons plan.
Also you can ask me questions in the comments, I’m ready to help!
So, today I want to take a closer look at the importance of number placement in tatting graphic designs. I already told you that the number is placed above the “cap”, this is logical and simplifies the drawing (read here: https://fairylace.kozinenko.com/perfect-tatting-part-6/ ).
I suggest going back to the pattern from part 6. Graphic diagrams are also added to today’s video. To make the pattern easier to read, I write the abbreviation and instructions.
Option 1
Abbreviations: R – Ring; PVR – previous Ring; C – Chain; sp – small picot; jp – join picot; 1S – one shuttle; TS – two shuttles; tw – turn of work.
1S 1. R: 15, sp, 5, tw; TS 2. C: 10, tw; 1S 3. R. 5, jp to sp of PVR.
Option 2
This option for two shuttles.
Abbreviations: R – Ring; PVR – previous Ring; C – Chain; PVC – previous Chain; sp – small picot; jp – join picot; 1S – one shuttle; TS – two shuttles.
1S 1. R: 15, sp, 5; TS 2. C: 5, jp to sp of PVR, 5, sp, 5; 1S 3. R: 5, jp to sp of PVC, 15.
Option 3
This option for shuttle and ball.
Abbreviations: R – Ring; PVR – previous Ring; C – Chain; PVC – previous Chain; sp – small picot; jp – join picot; sk – simple knot to swap the threads; 1S – one shuttle; S + B – shuttle and ball.
1S 1. R: 15, sp, 5, sk; S + B 2. C: 5, jp to sp of PVR, 5, sp, 5, sk; 1S 3. R: 5, jp to sp of PVC, 15.
Option 4
Abbreviations: R – Ring; PVR – previous Ring; C – Chain; PVC – previous Chain; sp – small picot; jp – join picot; pk – one pearl knot to secure chain ( on the graphical diagram it is indicated by a star); 1S – one shuttle; TS – two shuttles; ts – turn of work.
юю
So, you see how important the placement of the numbers in the drawing is. Also, I think my detailed instructions will help you better understand how to read tatting patterns. After all, I add instructions to the drawings and photos. Actually, I do this for all my designs. I hope my long article didn’t bore you! Because the video is also quite long: https://www.youtube.com/watch?v=w3qcvpiizmw&list=UULF3dn4_9pp7tIKA2k564wLBQ
Perfect Tatting – Part 8 is finished! Happy weekend! I hope my previous blog posts will also be useful and interesting: https://fairylace.kozinenko.com/blog/
Also my articles will be accompanied by video tutorials. I will add them to my YouTube channel.
Please write in the comments what subtleties you would like to know. Then it will be easier for me to make a lessons plan.
Today I wrote a very short article and added a short video. But I hope it will be very useful and informative!
So, in the last lesson I promised to tell you how to easily and quickly give rings different shapes. We talked about round, oval and teardrop shapes.
I watched a lot of videos on YouTube and noticed how many tutters (not all, of course) form rings. They simply pull the shuttle or needle, tightening the ring. In the video, I tried to show this method. Although I never use it. Unfortunately, in this case, the ring is asymmetrical and has to be adjusted. Or is it just me “be all fingers and thumbs”? LOL
Speaking of hands. I apologize for the unkempt look of my hands in the last videos and the lack of a manicure. I developed a terrible allergy to shellac nail polish. So I treated my fingers for a month. Today the doctor said that I can try regular polish. But I have to be very careful! Oh, I hope my hands will return to their attractive appearance. Take care of your hands, they are “every tatter’s treasure”!
Hello everyone! This is sixth lesson in the series Perfect Tatting. You can read previous part here: https://fairylace.kozinenko.com/perfect-tatting-part-5/
Also my articles will be accompanied by video tutorials. I will add them to my YouTube channel.
Please write in the comments what subtleties you would like to know. Then it will be easier for me to make a lessons plan.
Today I show several graphic tatting designs and explain how to “read” them.
First, look at what shapes can be used to depict rings, chains, and picots. In fact, everything here depends on the creative imagination of the designer or the computer program used.
Rings can be drawn round, oval, teardrop-shaped. Next time I will tell you how to easily give ready-made rings different shapes. And chains can be depicted as an arc with different bending amplitudes. Well, Pico is usually depicted as a short straight segment. Sometimes designers draw a small oval. But it seems to me that such a depiction of Pico is not very logical. By the way, this is another of the following topics.
So, let’s see what kind of image options we can get.
In fact, these are variations of the graphic representation of the same pattern. This is what this pattern looks like in its finished form.
Where to put the numbers for the design perfect tatting
The standard tatting knot consists of two “legs” and one “cap” above them. The ABC website says the following: “Cap: A cap is the bump above the legs of a double stitch. It is an easy term to remember as most people wear a cap on their head which is above their legs”. https://abctattingpatterns.com/terms/
Therefore, it seems quite logical to me to place the numbers above the caps.
But what to do in this case? There is no space for numbers around the Rings!
It’s very simple. We’ll put the numbers inside the ring. Especially since it doesn’t change the location of the caps and legs in the ring. I’m not considering options where the caps are inside the ring right now.
You can also simplify the pattern by writing one number in the ring. This is possible if all parts of the ring contain the same number of double stitches. For example, I took 5 ds.
With chains it’s more complicated. I think it’s best to put the numbers ABOVE the caps. That way the tatter can see the direction of the work right away. And this is especially important to determine where to turn the work.
So, I will show you two variations of the Ring – Chain – Ring pattern.
Perfect Tatting – Part 6 is finished! Happy perfect tatting! I hope my previous blog posts will also be useful and interesting: https://fairylace.kozinenko.com/blog/
Also my articles will be accompanied by video tutorials. I will add them to my YouTube channel.
Please write in the comments what subtleties you would like to know. Then it will be easier for me to make a lesson plan.
I’d like to thank Patrizia for her comment on one of the previous videos where she suggested we talk about hiding the threads at the beginning of two-color tatting. This is a really interesting topic. Sometimes we can leave the threads at the beginning of the work and tie them to the ends of the work, if it is a closed motif or earrings, for example. But it happens that it is a pattern for a bookmark or a strip of lace. Of course, you can hide all the “tails” after finishing the work. But I really don’t like leaving all these tails “for later”! Therefore, I suggest you look at how you can reliably and easily hide the threads at the beginning of a two-color work.
Today I made a video for two shuttles. We do not make a knot at the beginning of the work. This is especially important if you take two colors of thread. In this case, a two-color knot can look sloppy. But we are striving for the ideal, aren’t we?! https://www.youtube.com/watch?v=Nze8b1Wy_KE&list=UULF3dn4_9pp7tIKA2k564wLBQ
Perfect Tatting – Part 5 is finished! Happy perfect tatting! I hope my previous blog posts will also be useful and interesting: https://fairylace.kozinenko.com/blog/