Gift for Cro-Tatters 🎀, or why I don’t sum up the past year.
Hello everyone! Another year of our turbulent lives has come to an end — a year full of pain, disappointments, and tears. Yet, I don’t want to dwell on all the hardships; instead, I try to look to the new year with optimism. It is only thanks to you, my friends and followers, that I keep going and even create something new and, I hope, inspiring.

Today, I invite you to create a small cro-tatting motif with me — and it even features double chains! Don’t be afraid: with the help of the instructions and the video tutorial, you’ll easily master this fascinating technique.
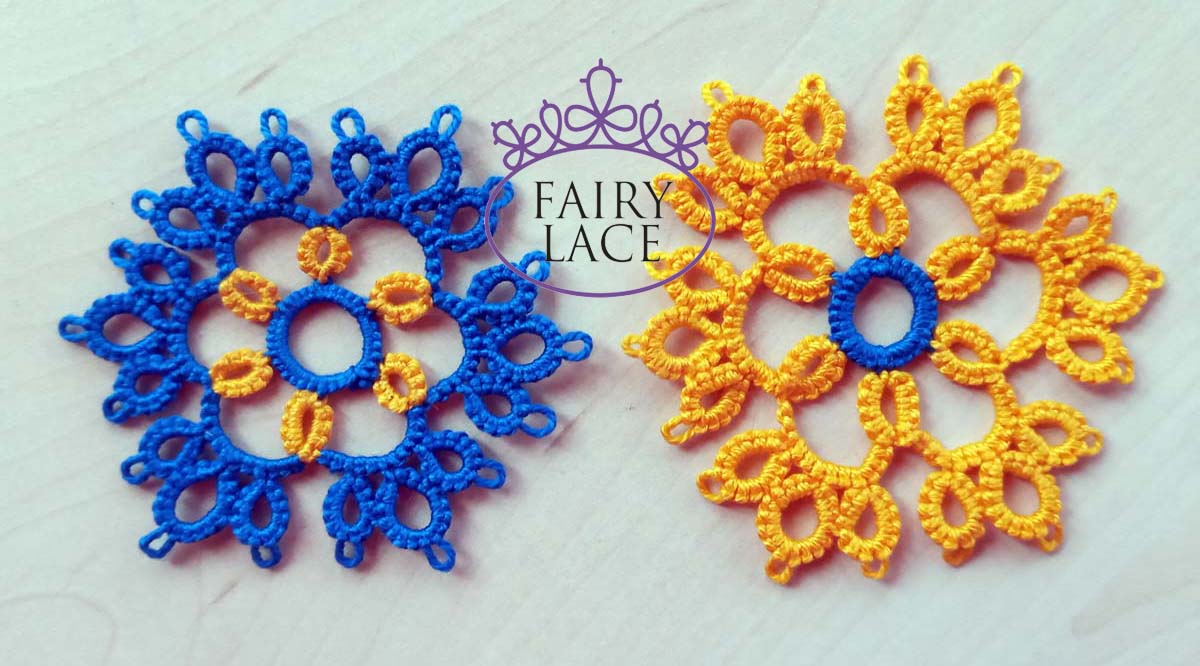
My small motif is called “Harmony in Two Colors”. It consists of six rings and six double chains, with alternating yellow and blue threads. This technique creates a cheerful, vibrant effect, and it’s fun and engaging to work on. You can find all the details, the diagram, and a step-by-step video in the PDF I’ve prepared for you.
Gift for Cro-Tatters: Free Pattern & Video

You can either take a screenshot of the screen or follow the link to download the PDF file: https://drive.google.com/file/d/1XyV2bjIGi7UttpjZUhHhx_XfOZl-Y1rf/view?usp=sharing
To make the process easier and clarify the tricky parts, I’ve added a step-by-step video on my YouTube channel: https://youtu.be/5KBcy_boUQw
Along with the PDF and video, you can find all the necessary hooks for this motif in my shop: https://fairylace.kozinenko.com/
I wish you a new year full of creative ideas, inspiration, and joy in your favorite craft. 🎉I hope my little Gift for cro-tatters will come in handy!
May every knot bring you satisfaction, and may your little colorful motifs brighten your life!
Finally, I want to thank everyone who supports me and helps me in my creative journey! ❤️
Without you, I wouldn’t be able to create, share patterns, and inspire others. You are my true motivation!
Happy tatting!❤️❤️❤️