How to stiffen tatting lace, everything I found on the internet and my personal experience. But I would sooooo much like to see your comments on my posts. Trust me, feedback is very important. After all, this is the only way I can understand how interesting my articles are. I am very interested to know if my experience was helpful to someone. So subscribe to my blog. Comment and ask questions. I will be happy to help with tips!
Hello everyone! Thank you, dear friends, for new subscriptions. Your support helps me improve my blog and store!
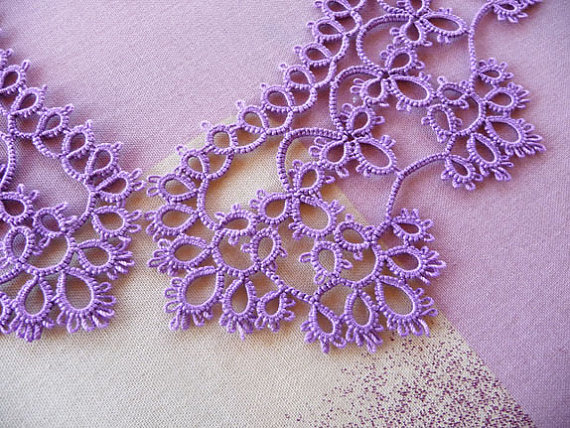
Please be patient. Because the article will be too long. But I added pictures for fun! So, let’s begin! As beautiful as the pattern is, the finished tatting product almost always needs to be fixed. I mean giving stiffness and stability to the lace. All tatters know if the lace is not fixed, it looks sloppy. But we should always strive for excellence. Do you agree?
Apart from my own experience, I have found many articles on the Internet on this topic. There are many solutions. Among which are absolutely unexpected, ha ha! It turns out that you can make the lace stiffer: sugar syrup, starch, hairspray, nail polish, PVA glue, varnish for resin, embroidery fixing agent, and even candle wax. I’ve seen a few more experiments. But they did not interest me. So let’s talk a little more about each method.

Sugar syrup for to stiffen tatting lace
I don’t like using sugar syrup. It’s hot and uncomfortable. In addition, sugar lures pests who will eat delicious lace with pleasure!
Starch for to stiffen tatting lace
You can use the powdered kind that is dissolved in water. You will have to get the object totally wet with the starch and then pressed with a hot iron.


Or you can use the pressurized starch sprays that are available in the laundry section. There is a drawback to this method though. It isn’t recommended to use starch for white objects as it will yellow over time.
Hairspray for to stiffen tatting lace
It is interesting to experiment with hairspray. I have tried spraying a strong hold polish on the earrings. But after a few days the varnish peeled off. Therefore, the earrings lost their rigidity and shine, alas. But this method works well with pieces for greeting cards or framed pieces. Moreover, you can use glitter polish. This is what you need for Christmas!


Nail polish for to stiffen tatting lace
I have not tried using clear nail polish. But maybe you tried it? Then share your experience with us in the comments, please.
PVA glue for to stiffen tatting lace
is great for doilies and center pieces. Mix the glue with water. The proportions may vary. If you use a lot of glue, the solution will be too thick. You may be disappointed with the thin film on the back of the product. So the glue is absolutely not suitable for colored threads, only for light ones (white, ivory, etc.). And I think you should not use glue for the products to wear. These are collars, chokers, jewelry, clothing. So I don’t really like this method. And don’t forget! Do not iron! It will darken if you stroke it.


Varnish for resin
I did an experiment with varnish for resin. But the result did not make me very happy. Because I got insufficient rigidity of the earrings. you can also notice traces of dried varnish on the leaf on the right. I think that in this case it is better to use the tatting in resin method. I wrote about this in detail in my previous posts.
Spray for securing embroidery
I don’t use this for tatting. In my opinion, these funds are too expensive. And sooooo expensive for big projects. And also scares me DANGER: Extremely flammable. Fumes are harmful. Content under pressure. Keep out of reach of children.


Embroidery stabilizer solution
This is my favorite way. Read more about this in my article here: https://fairylace.kozinenko.com/cute-tatting-ring-final/
This is how I dispose of the remains of the embroidery stabilizers. I also like that these materials are harmless and environmentally friendly.
Candle wax for to stiffen tatting lace
This is a completely unexpected way for me! I was very surprised. Read more about this on the JEDDAH MOM blog. But come back to me at once! My story is not over. We continue! https://www.jeddahmom.com/how-to-stiffen-a-doily-with-candle-wax-2/

How to soak the finished product for to stiffen tatting lace

I have seen many videos showing the complete immersion of a small piece of tatting into a container of solution. Perhaps this works for small items. Provided that there are no long picots in the lace. Ha! Have you tried this trick on a large item? I tried it once. Now you can cry with me. For I have hopelessly ruined my long work on the bag. The lace should NOT be deformed during the application of the solution.
Therefore, I do not put tatting into the solution. On the contrary, I put the tatting on a flat surface and saturate with the solution. Of course, it is convenient to use a brush for small items.


It is very convenient to work with a spray. But in this case, some of the solution will not get on the product. And be sure to blot the wet product with a towel to remove excess solution.
I use a simple and “reliable” product – a cotton ball. With this ball, I can spread the picot out during the soaking process. I often don’t even need to use needles.

Where to place tatting lace for stiffen

It all depends on the size of the finished product. For example, earrings, snowflakes, bells can be placed on a table or windowsill. In any case, find a place where they will not interfere with you while drying. There are two important points. Try to keep out the sun and dust! To do this, cover the damp item with a plastic container and a towel. I do this for tatting in resin too.
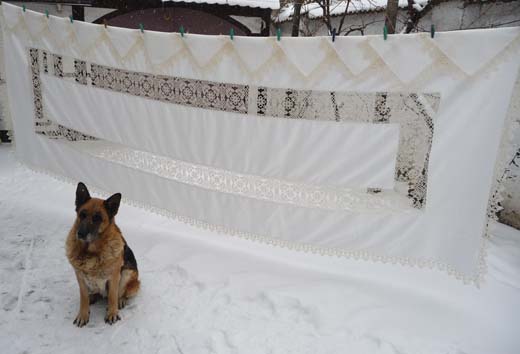
But I have to place very large projects on the floor. When I was finishing the borders for the table linen set, my family was uncomfortable for a while. By the way, do not forget to lay polyethylene or oilcloth under your product BEFORE applying the solution.


And one more important question. Do you use needles for fixation? I don’t have a definite answer here. Because it all depends on the pattern. Of course, you cannot do without needles if there are long picots in the pattern. Or in cases where you need to achieve the perfect shape. For example, for a box.