Tatting in resin, part 4.
Hello everyone! First, I want to thank everyone for the great reviews and comments about my blog. Your kind words are very important to me. I am inspired! But soon my topic of tatting in resin will end. What will I write? Again I ask you, dear readers. What do you want to know about? Are there topics that are interesting and important to you? Maybe browsing my store will tell you ideas for my new posts? https://fairylace.kozinenko.com/

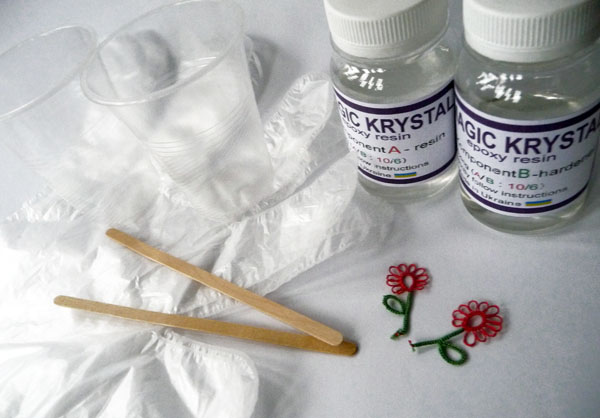
So, today is the article “Tatting in resin, part 4”. You read carefully my previous posts on this subject, I hope. 🙂 I talked about tools, molds, threads. Thus, gradually we came to the most important moment ( ta-daaaa!). I am sure my advice will help you make the perfect transparent tatting in resin! After all, now I will show how I work with resin.

I start work with mathematical calculations. (Ha ha! That sounds very clever, right?)
Do you remember my table for determining the volume of molds? I talked about this before. Thus, I calculate how much resin and hardener I need. Then I divide the result by 2. This is an important point! Because I do the fill in two steps. It took me a few experiments to come to this conclusion.
Then I pour the resin into a transparent plastic cup. I carefully monitor the volume (everything is exactly according to the calculations!).

Oh God, what terrible hands I have! No, these are just medical gloves! 🙂

Do you see what a cloudy resin from many-many-many bubbles?
Resin manufacturer’s instructions
I do not know which resin you are using. Therefore, I ask you to pay attention to the manufacturer’s instructions. The instructions for my epoxy indicate: put the container with the resin in hot water to completely dissolve the air bubbles. You may not see such an item in your instructions, but try it! This will be your personal experiment.
I take a cup and a kettle of hot water.


And voila, I got the perfect result in 10 minutes!
In the meantime, I prepared the molds for pouring. I already told you the best way to store forms. Therefore, I do not need to wash molds every time. If I notice a speck of dust or a small speck, I wipe the mold with a cotton swab. Because everything must be perfectly clean!


The next step, I pour the hardener into the resin (do not forget about the accuracy)! After that I have to mix the composition thoroughly.
Rules when mixing the resin.
I came up with these rules for myself, but you can use them, of course.

First, I mix the resin and the hardener is NOT FAST. Because with a high mixing speed, I get sooooo many bubbles (alas). Secondly, I DO NOT REMOVE the stick from the solution until mixing is complete. Because it leads to the formation of large air bubbles every time you raise and lower the stick.
Thirdly, I use TRANSPARENT cup to see the state of mixed. Fourth, I leave the solution alone after stirring for 3-5 minutes, so that the small bubbles disappear.


Fifth, I pour the settled mixture into a clean plastic cup MANDATORY!
Oh, how many words I wrote today! I will not abuse your patience, so I will end my story about the filling process in the next post.
Please, make comments, ask questions, drop by my store, join my YouTube channel and, of course, subscribe to my blog to be in the know! https://www.youtube.com/watch?v=K_fWxN3THBc&list=UU3dn4_9pp7tIKA2k564wLBQ


Thank you for the lesson.
You welcome always!
Thank you for the precise tips!
My pleasure always, Bebe!
Thank you for this information!!!!
I feel I will be more successful when I start using resin now
You welcome, Michele! Wait! There are a few tricks ahead!
Thank you for such detailed instructions. You are a great artist!
Thank You, my dear friend Polina! I really appreciate Your support!