Pattern Brooch Tonja

Pattern Brooch Tonja – dimensional tatting brooch with beads, original lace design in purple tones, PDF tutorial.

Pattern Brooch Tonja

Tonja, the Unspoken Lighthouse

This brooch was created in gratitude to a friend who lit blue-and-yellow lights in her window — so I could see them across the ocean, even through the dark days of war. So it’s a tribute to friendship stronger than distance, and love brighter than fear.

The name Tonja is often associated with strong, deep, yet warm-hearted souls.
It belongs to those who know how to truly listen — and offer comfort without saying a word.
Just like my dear friend across the ocean.

But if you are someone with a great heart — even with a different name — this brooch is for you, too.

This pattern contains a full set of written instructions in English, clear diagrams, a step-by-step photo process,
and a detailed video tutorial, split into 4 parts for easier viewing.
You will need Adobe Acrobat or any PDF-reading software to open the file.
📎 The PDF file is 7 pages long and approximately 2.64 MB.

🌟 Who Is This Pattern Brooch Tonja For?

This is a challenging design, created for experienced tatters who love a creative challenge and are ready to explore new techniques and lace possibilities.
If you’re eager to grow, this pattern will reward you with beauty, depth, and satisfaction.

💎 Why You’ll Love It

  • A fascinating dimensional lace circle at the center (a unique structural surprise!)

  • A stunning blend of purple shades in threads and beads

  • A one-of-a-kind original design created with heart and symbolism

  • Incorporates tatting with beads (Beanile) and ANKARS-style elements

    🧵 Materials & Tools for Pattern Brooch Tonja

    • Polyester thread №50 in three shades of purple

    • Two tatting shuttles, scissors

    • Czech seed beads (~1 mm) in two colors

    • 6 long bugle beads, 6 round quartz beads, 12 lilac rondelles

    • One large central bead

    • Plus additional supplies: crochet hooks, needles, cardboard, etc.
      A full material list is included in the PDF file.
      📏 Finished size: approx. 3 x 3 in (7.5 x 7.5 cm)

      🎥 See the Finished Brooch in Action

      Watch this short demo video to admire how it looks when complete:
      👉 https://www.youtube.com/shorts/hJjdP4ar1OM

      🛍️ Explore More Brooch Patterns

      Looking for more original tatting brooches in my store?
      Please visit:
      👉 https://fairylace.kozinenko.com/?s=Brooch&post_type=product

📧 Attention!

You do not need to download the file yourself!
After confirming the payment, please check the email you provided in the order.
📩 I will send the Pattern Brooch Tonja within 10–12 hours.

📌 Note: My message may end up in the Spam folder if I’m not in your contacts — please check all folders just in case!

⚠️ Please note:
This is not a finished item.
You are purchasing a digital PDF pattern with instructions — not a physical product!

🖋️ Respect the designer
If you share your finished lace made from this pattern, please give credit to the designer 💜It means a lot and helps support independent artists 💕 Use the tag: #FairyLacefromElena

📲 Let’s stay connected!
Follow me for more inspiration, patterns, and tutorials.
Click below to follow me into the world of lace dreams!

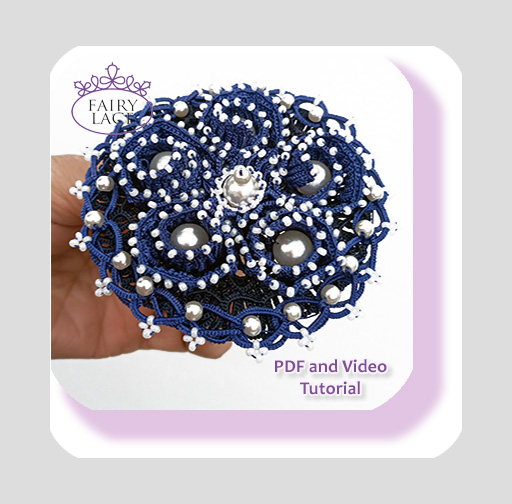
Tatting Pattern Broosh Marina

Elegant lace brooch in tatting technique, inspired by marine style. Perfect for handmade lovers and vintage accessory collectors.

Tatting Pattern Brooch Marina 🌸
This is a digital tatting pattern for creating an elegant lace brooch. You will need Adobe Acrobat Reader or any other PDF-reading software to access the file. This Tatting Pattern Broosh Marina contains 13 pages and has a file size of approximately 3.34 MB.

Inside the PDF, you will also find:
an active link to an additional video tutorial 🎥
a graphic chart with the number of double stitches 🧵

💎 This pattern is perfect for experienced tatters who love a challenge.
Level: Advanced. To complete this project, you need to be skilled in: Split Rings, Block Tatting, Floating Rings.

This is a wonderful design for those who enjoy pushing their skills and exploring detailed lacework.

🌊 What makes this pattern special?

I created this brooch in honor of my dear internet friend Marina 💙
This design is part of my heartfelt “Thank You” jewelry collection.

Marina is an elegant and inspiring woman. She wears her handmade tatting with such grace that it takes your breath away!

Did you know that Marina means “marine”? That is why I chose deep blue tones, white highlights, and pearls to echo the spirit of the sea 🌊

The curves of the brooch resemble the crests of ocean waves. It’s like wearing a little piece of the sea 💫

This pattern is designed for tatting with shuttles. But if you prefer, you can also work it with a tatting needle.

It’s a real challenge for a skilled tatter, with many techniques combined.

You will enjoy the creative process using a wide range of tatting skills.
Inside the file, you’ll also find many links to free video lessons for almost every technique.

And of course, there are detailed videos showing the trickiest parts of the brooch 💡

✨ Watch a short demo video here: https://www.youtube.com/shorts/AWd1mF1k2A4

🧵 Materials and size

I used polyester threads №50 in dark blue, blue, and white.

To decorate the brooch, I added: 6 round pearl beads (1 cm diameter), 21 pearl beads (0.5 cm diameter), a pack of Czech Preciosa seed beads (5 g, 0.1 cm diameter).

The finished brooch is about 3.5 inches (8.5 cm) wide.

📧 Attention!

You do not need to download the file yourself!
After confirming the payment, please check the email you provided in the order.
📩 I will send the Tatting Pattern Broosh Marina within 10–12 hours.

📌 Note: My message may end up in the Spam folder if I’m not in your contacts — please check all folders just in case!

⚠️ Please note:
This is not a finished item.
You are purchasing a digital PDF pattern with instructions — not a physical product.!

🖋️ Respect the designer
If you share your finished lace made from this pattern, please give credit to the designer 💜It means a lot and helps support independent artists 💕 Use the tag: #FairyLacefromElena

📲 Let’s stay connected!
Follow me for more inspiration, patterns, and tutorials.
Click below to follow me into the world of lace dreams!

Posted on 8 Comments

Vintage buttons

How to Use Vintage Buttons in Lace

Vintage buttons. Tips for beginner tatters. Part 4 , or how to add a beautiful button to a tatting pattern. Part 3 of my articles for beginning tatters can be read here: https://fairylace.kozinenko.com/tips-for-needle-tatters/

Hello everyone! I’ve recently been organizing my craft supplies. Ah, I have to do this from time to time! To you too? And among the three kilograms of buttons, I found several pieces that interested me.

vintage button

Often I have seen round buttons added to tatting patterns. I made such a heart (this was 12 years ago).

But these are rectangular buttons. Can they be used? Why not?

As usual, I didn’t stop at shuttles only. After all, for those who tat with a needle, it is also interesting to make a small brooches with a vintage buttons. Do you agree?
The pattern is very simple. Because the main thing in this pattern is the rectangular button!

Use a crochet hook when making connections. Choose a hook that will fit easily into the button hole.

I decided it wasn’t worth doing graphic design. Therefore, I simply put numbers indicating the number of double stitches directly on the photo. You can take a screenshot or download a PDF file from the link: https://drive.google.com/file/d/13Oct1mUyQuwGVzr2P08M3uobKR098UNH/view?usp=sharing

Tatting with button
Tatting with button

Educational video on my YouTube channel. Please take a look and come back! https://www.youtube.com/watch?v=ldSiIp_3CeA&list=UULF3dn4_9pp7tIKA2k564wLBQ

Some useful tips for tat with vintage buttons

Of course, if the buttons are dirty, they need to be washed and dried.

As you work, try to tighten the loops inside the button tightly. Otherwise, the button will not be firmly secured in the middle of the pattern. But we don’t want the buttons to “dangle or float” in space!

Another important point. Try to ensure that the threads on the button lie parallel and do not twist with each other. This will make your work look neater.

When watching a video please note that I respect the front and back sides when weaving. It seems to me that in this case the picots look more beautiful.

The two motifs are made with the same threads and the same pattern. But with the shuttle and needle ready, the motif turns out to be of different sizes.

Please don’t forget to subscribe to my blog, comment and share on social media. Your help and support is very important to me.
I will also be grateful for any charitable contribution to my Paypal: fish20085@gmail.com

Broosh Karen

Broosh Karen

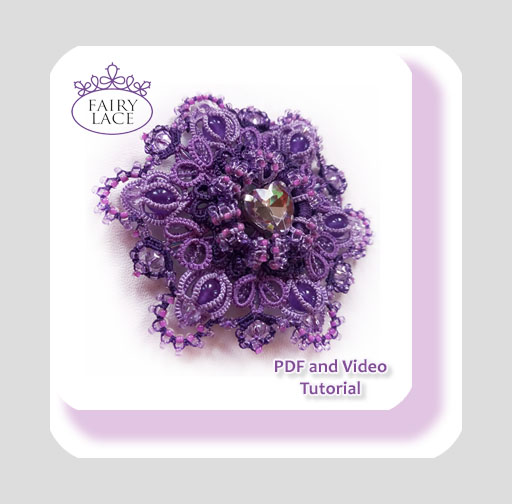
Broosh Karen. Unique 100% handmade 3D broosh in new tatting technique.

Made to Order! Your Order will be ready for shipment within 8 business days from payment.

This brooch is a unique personalized gift for the romantic and stylish lady named Karen. Although you can give this brooch to a lady with any name, of course! This is also a wonderful gift for your 13th wedding anniversary. Because this anniversary is called a lace wedding. Did you know this?

In the photo you see a brooch in three shades of purple. But you can choose any other color combination or monochrome product. You can also choose the option with or without beads. Just contact me BEFORE placing your order. To do this, write to me in the comments to the listing, by email fish20085@gmail.com or in the FB: https://www.facebook.com/kozinenkoelena 

Attention! To fix the brooch I use hairspray. Therefore, if you have allergies, please notify me in advance so that I can change the fixation method.

You can buy pattern for this broosh  in my store, welcome: https://fairylace.kozinenko.com/product/tatting-pattern-broosh-karen/

You can also watch a demo video of this broosh on my YouTube channel:   https://www.youtube.com/shorts/BGsBlxSL3pc

Size

Size of the broosh is about 10 cm in diameter.

Materials and tools

To create this item, I used polyester thread “Atlas” No. 50 three shades of purple. Also purple beads(diameter is about 1mm ) and crystal glass beads ( 3mm diameter )

Shipping

FREE SHIPPING. I sending all items as STANDARD SHIPPING AVIA with tracking number. So you can follow the journey of your ordered items and keep track of the delivery.
I will pack your Broosh Karen in handmade eco-friendly cardboard box with my lace logo .

Usually delivery times vary from 4 to 8 weeks, depending on the country of destination. But please note, during pre-holiday periods, delivery times may increase. Of course, you can buy express shipping here: https://fairylace.kozinenko.com/product/express-shipping/
Express shipping 8 ~ 10 business days from the date the parcel was sent.

Also, feel free to message me if you have any questions. Thanks!


Tatting pattern brooсh Karen

Hand holding a purple tatted lace brooch with layered petals and beads, made using shuttle tatting technique. Includes PDF pattern and video tutorial.

🌸 Tatting pattern brooсh Karen

This is a digital tatting pattern for creating the exquisite “Karen” brooch using tatting shuttle techniques and advanced lacework. ✨
The pattern includes a full set of written instructions in English, easy-to-follow diagrams, a detailed step-by-step photo process, and even a video tutorial 🎥.
Moreover, you will receive a separate graphic design page indicating the exact number of double stitches — a true gift for meticulous tatters!

📄 The file is in PDF format, so you’ll need Adobe Acrobat or any other PDF reader to access it.
The pattern consists of 12 pages, and the file size is approximately 4.74 MB.

💜 Who is this tatting pattern brooсh Karen for, and why should you try it?

This pattern is designed for advanced tatters who want to explore new methods and challenge their creativity.
However, don’t worry — I have prepared a detailed video tutorial that will definitely support you at each step.
You’ll learn how to create a volumetric center and master an unusual method of connecting rows — a technique you’ll be proud to use again!

Imagine giving this brooch as a gift to someone you love (or yourself!) 💝
You’ll surely receive countless compliments and curious questions about this exclusive, rare lace jewel.
✨ Just look how gorgeous it is:  https://www.youtube.com/shorts/BGsBlxSL3pc

🌺 What makes this Tatting pattern brooсh Karen special?

First of all, this brooch continues my heartfelt “Gratitude” collection.
I named it in honor of all the amazing women named Karen — especially one beautiful soul from Cazenovia with a heart full of kindness 💗.

Secondly, you can create two versions of the brooch: one with beads, and one without. Of course, you’re free to mix both styles or add your own flair. This flexibility allows you to personalize the piece completely.

Thirdly, the design includes a unique new tatting element: a captivating mix of spiral arcs, cleverly intertwined layers, and an unconventional row-joining technique that will add elegance and depth to your lacework 🧵.

🧶 Materials, tools, and finished brooch size

I used polyester thread “Atlas” No. 50 in three charming shades of purple 💜.
In addition, the brooch features tiny purple beads (1 mm) and sparkling crystal glass beads (3 mm) for a luxurious touch.

The finished brooch measures approximately 10 cm (about 4 inches) in diameter.

Moreover,  to create this beauty, you’ll need:

  • A very thin crochet hook that fits the bead holes (or thin wire as an alternative),

  • A washable fabric marker,

  • A needle threader for comfort,

  • And a lighter to gently seal thread ends. 🔥

🛍️ Want to buy the finished brooch instead?

No problem at all! I’ll be happy to create the Karen brooch just for you, in any color combination you wish 💖
Visit this page to order the finished lace accessory:
👉 Order the finished brooch here : https://fairylace.kozinenko.com/product/broosh-karen/

📧 Attention!

You do not need to download the file yourself!
After confirming the payment, please check the email you provided in the order.
📩 I will send the Tatting pattern brooсh Karen within 10–12 hours.

📌 Note: My message may end up in the Spam folder if I’m not in your contacts — please check all folders just in case!

⚠️ Please note:
This is not a finished item.
You are purchasing a digital PDF pattern with instructions — not a physical product!

🖋️ Respect the designer
If you share your finished lace made from this pattern, please give credit to the designer 💜It means a lot and helps support independent artists 💕 Use the tag: #FairyLacefromElena

📲 Let’s stay connected!
Follow me for more inspiration, patterns, and tutorials.
Click below to follow me into the world of lace dreams!

Posted on Leave a comment

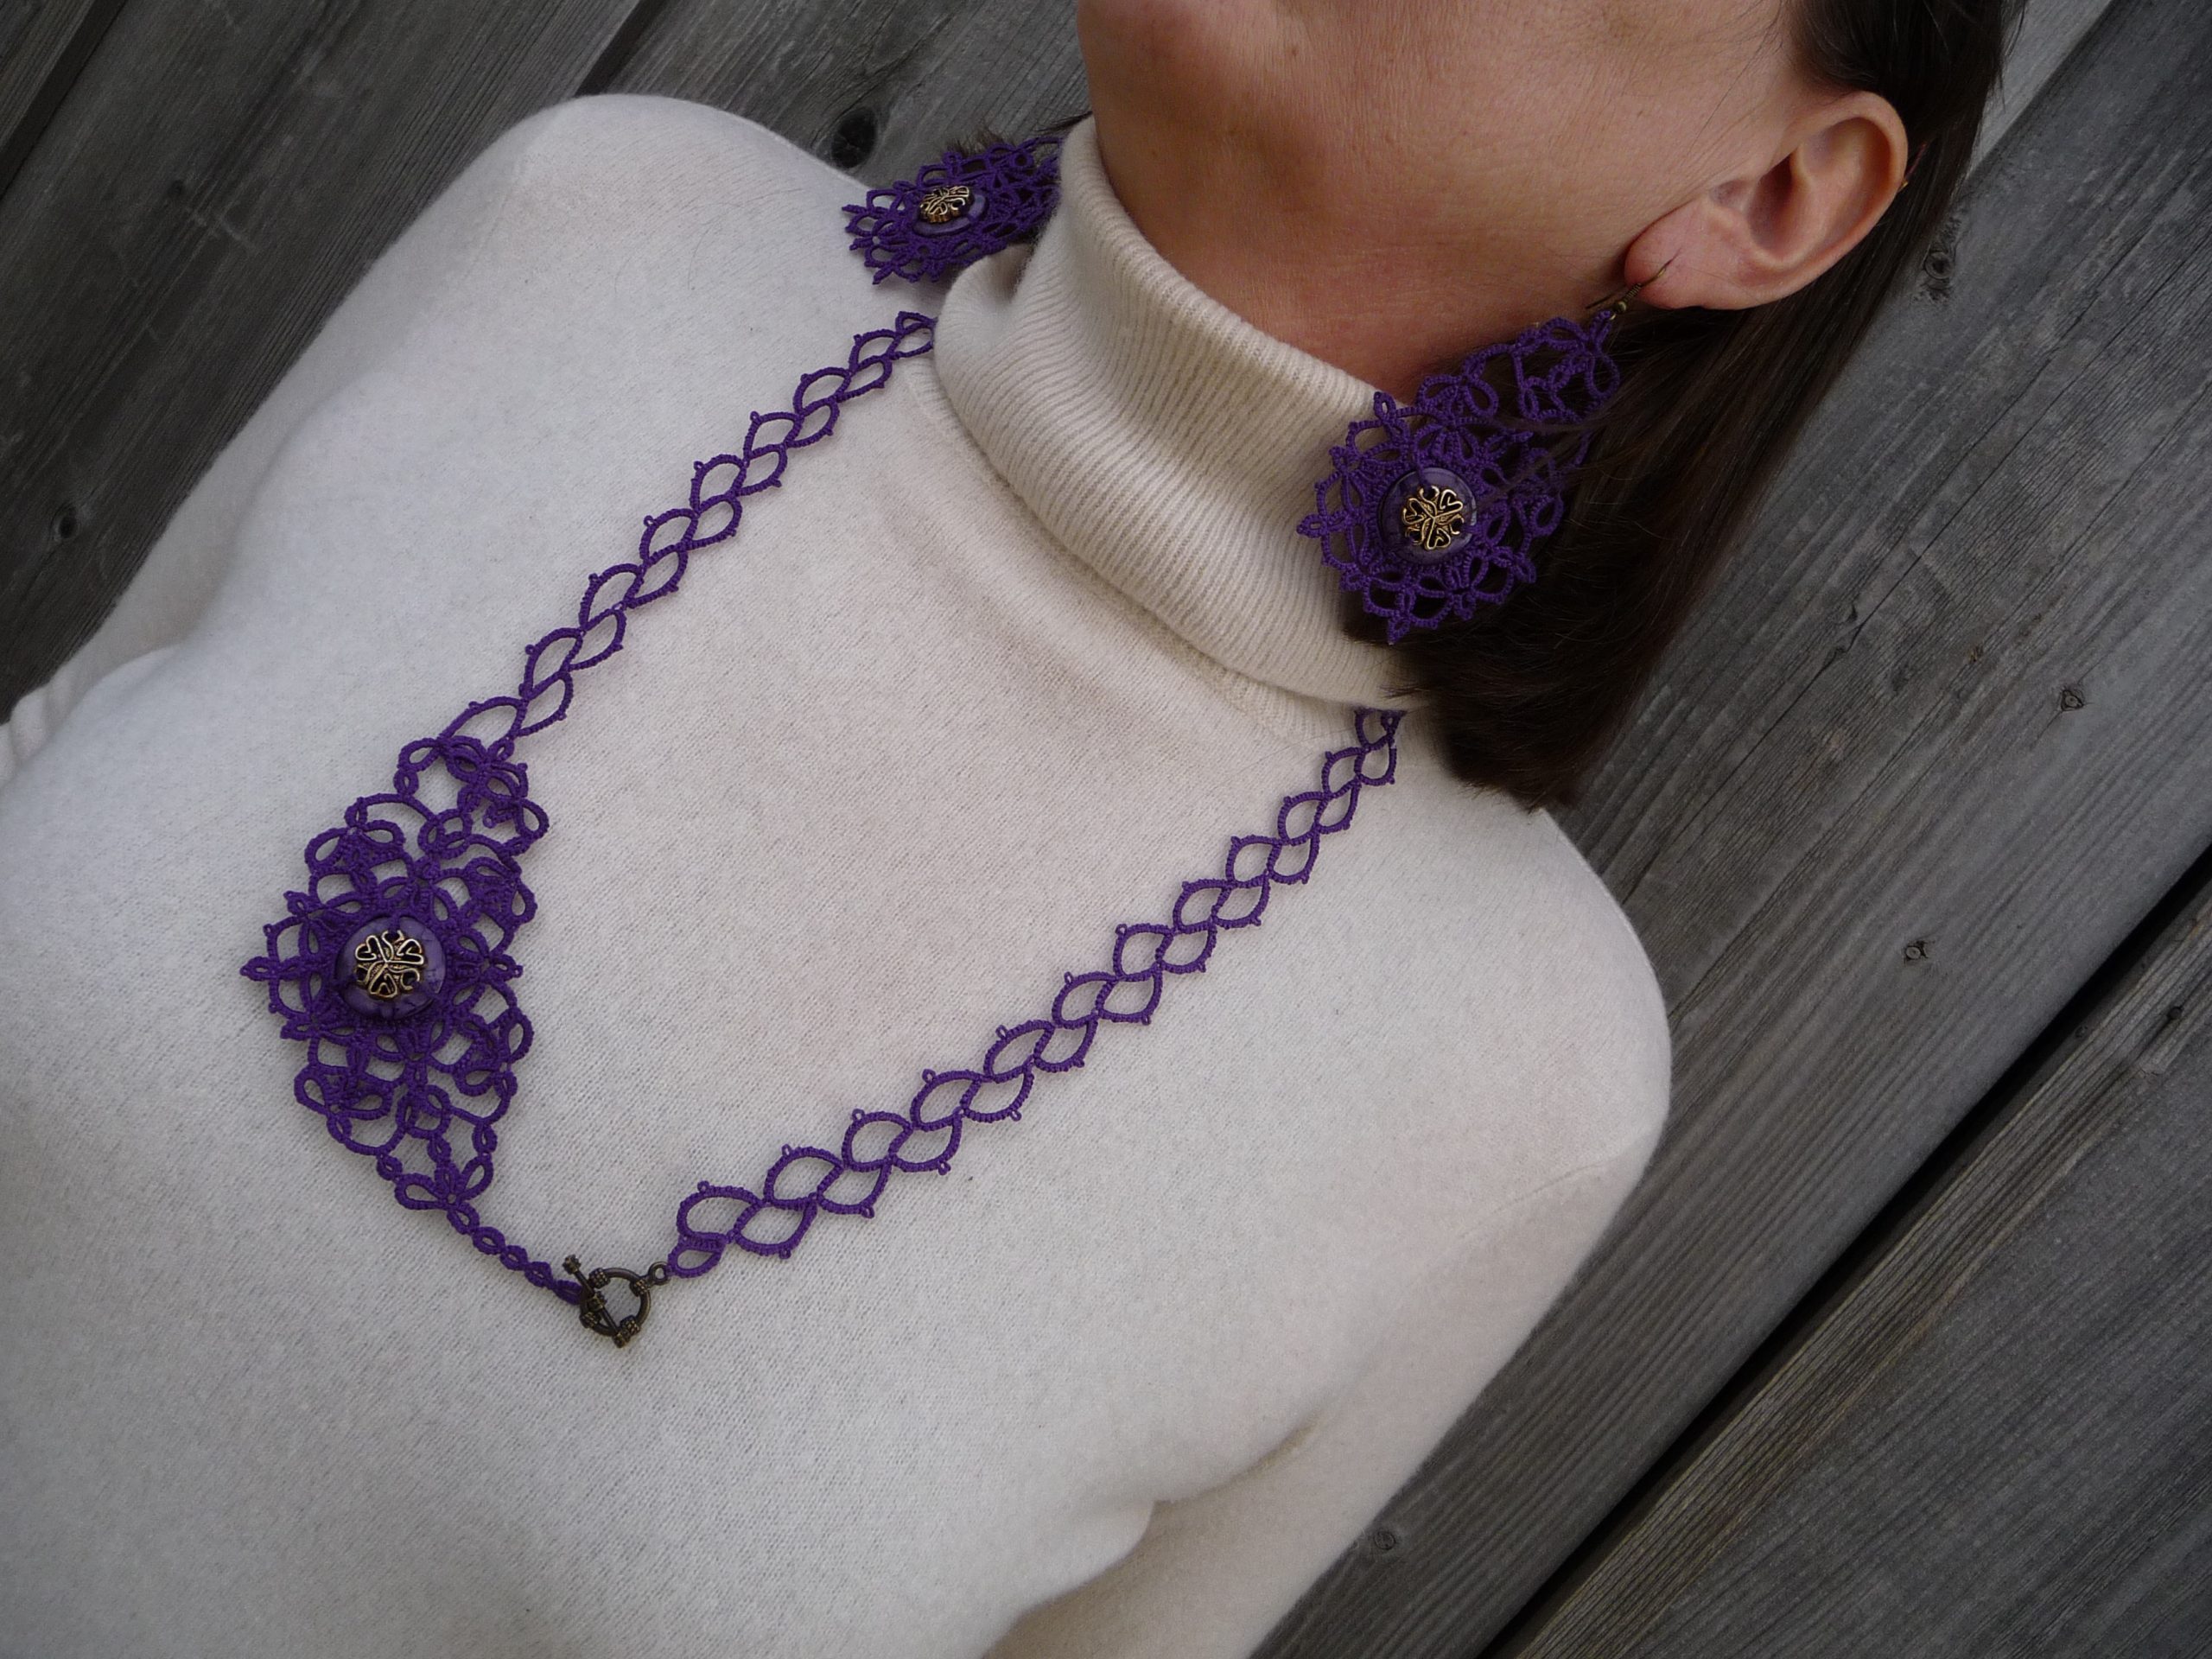
Tatting lace collars

White tatting lace collar with beads.

Tatting lace collars, or 2023 fashion trends.

Tatting lace collars

Hello everyone! Today I found an interesting article about collars on Wikipedia. And I want to share with you for sure! So:

In clothing, a collar is the part of a shirt, dress, coat or blouse that fastens around or frames the neck.
A collar may be permanently attaced to the main body of the garment (e.g. by stitching) or detachable. Oh, I love detachable collars! Because by changing the collars, you can get several different outfits from one dress!

Collars shapes

I also found a table on Wikipedia with the names and descriptions of 66 types of collars, wow! For example, a Peter Pan collar. But I’m sure you all know that collars name. Or, zero collar. This is neckline of shirt without band and collar. Or, zero collar. This is neckline of shirt without band and collar. By the way, it is on such a zero neckline that detachable collars look best.

By the way, you can use a brooch to fasten the collar around the neck. This will add even more chic and elegance to your image.

There is also a type of collar worn as part of clerical clothing called Clerical collar. I may be wrong, but it seems to me that the shape of chokers is very similar to this type of collar.

Also I find collar Pussy Bow very interesting and unusually feminine. This collar tied in a large bow under the wearer’s chin. Particularly associated with Margaret Thatcher in the 1980s. I was very surprised to learn this fact today. Because about 10 years ago I created a little collar with a little bow and named it Pussycat! Haha!

Collars material

I’m afraid you won’t have the patience to read a list of all the materials from which the collars were made.

These are the golden collars-necklaces of the pharaohs of Ancient Egypt.

Or the finest handmade lace in the collars of French kings. It’s a Medici collar.

Also a combination of silk fabric and the finest lace is used.
Nowadays, cotton, denim, guipure, leather various threads are used for collars. Add embroidery, embossing, beads. Of course, the list is far from complete!

In 2023, lace is back in fashion. Probably, not all ladies will want to wear a lace dress. But everyone wants to be at the peak of fashion, I’m sure! So be sure to add some lace collars to your wardrobe. Including tatting collars. It is for the manufacture of tatting or bobbin lace that threads are used. Because they are light and extremely chic.

Tatting lace collars for the dress

You can buy ready-made collars for every taste or make your own according to my master classes. Welcome to my store: https://fairylace.kozinenko.com/?s=collar&post_type=product

Please write your wishes, feedback and comments in the comments. To do this, go to the BEGINNING of the article and click the “Leave a comment” button.

I hope you enjoy my video on YouTube. Like and subscribe! https://www.youtube.com/watch?v=kbPXyJwRHFw&list=UULF3dn4_9pp7tIKA2k564wLBQ&index=45

And in conclusion, a small gift – a tatting collar pattern from Project Gutenberg’s Beeton’s Book of Needlework, by Isabella Beeton.

Christmas Holly tatting pattern

Christmas Holly tatting pattern

Christmas Holly tatting pattern.

This lacy Holly tatting can be used as a brooch or earrings (clip or dangle). You can also decorate a greeting card with cute green leaves and red berries.

By purchasing this tutorial, you will learn a new tatting technique – Pearl Tatting with Floating Rings. But thanks to the video, you can easily make the main element – a leaf. I talk about it in detail on my blog:  https://fairylace.kozinenko.com/blog/
To make the leaves, I took three shuttles (or two needles). Believe me, it’s not very difficult, but on the contrary, it’s exciting!

Level: difficult.

Leaf size is about 6,5 Х 3 cm ( 2,5 Х 1 in )

This item consist written instructions in English, graphic diagram , photo and video fo shuttles and needles. The pattern consists of 7 pages and has a size of about 2,71 MB.

This list is only a PDF file, not a finished product.

Attention!

You do not need to download the file yourself. After confirming the payment, check your email specified in the Order. Because I will send Christmas Holly tatting pattern  to you within 10-12 hours.
This tatting pattern are for personal use only. Do not share, sell or copy these patterns.

You can sell finished item made from these patterns ( for this You must buy a pattern) – please give credit to the designer Elena Kozinenko from FairyLace.
But this does not apply to mass production.
Also, if you want to publish the finished jewelry please link back to or mention this shop where you originally bought the pattern. https://fairylace.kozinenko.com/product-category/patterns-tutorials/

My video tutorials will help for you, welcome!  https://youtu.be/Of-fmKKNp4A

Also, feel free to message me if you have any questions. You can ask your questions by contacting me on the FB as well:  https://www.facebook.com/kozinenkoelena

Of course, You can join me on Pinterest too: https://www.pinterest.com/elenakozinenko/

Thanks!


Posted on 2 Comments

Ring on chain

Two handmade tatting bookmarks, red and blue, using triple FR tatting, placed on a dark red thick book, by FairyLacefromElena

Ring on chain, or don’t be afraid to experiment!

Hello, everyone! My regular readers know how much I love experiments. I love using new tools or materials. I also really like finding new tatting weaving techniques. When I create my patterns, I always try to make them original, understandable and usable. But I love it when my customers make their own changes and additions to my work. Ah, I keep repeating: creativity is welcome!

Ring on chain

My model of earrings is called Snow. These are the white earrings in the photo. And the second photo was kindly provided by Christy. I am delighted with her version! The beads and the color of the threads are reminiscent of the glittering drops of melting snow on the first spring flowers, isn’t it?

Ring on chain

And in these photos my 3D Bow pattern and a completely unexpected version of Christy . She combined two bows into an original brooch, bravo!

Ring on chain

When I was creating the Mandala doily pattern, I could not even imagine that it could be a wonderful dream catcher! Look at the beauty of Dawn!

Ring on chain

Finally, my favorite collar is Sea Glass. Elena made her own version, complementing the collar with large beads and small details along the edge of the collar. It is amazing!

These and other patterns are in my store, welcome: https://fairylace.kozinenko.com/product-category/patterns-tutorials/

Of course, I can talk about my customers endlessly! These are extraordinarily lovely ladies and very talented tatting masters. But I hasten to tell you about my new video. The topic of the video tutorial is how to make a ring on a chain. And, naturally, I tried to show my creativity and shot 5 ways.

Method 1.

This is the traditional way for two shuttles. In my opinion, in this case, the ring on the chain look perfect.

Method 2.

You can try this motif with one shuttle and one ball. Of course it will look like a chain-ring-chain. But why not?

Method 3.

And this method is for tatting with a needle. I think you will like it. So, if you do not knot after half of the chain and after the ring, it almost looks like a classic ring on a chain. Do you agree?

Method 4.

In this method I used knots and it is very similar to method 2 for the shuttle. But you do not have to cut the thread and change the needle. Of course, this method has its pros and cons!

Method 5.

And this method looks perfect, in my opinion. You can use two needles. By the way, do not forget that both needles must be the same thickness. But you can do this with just one needle. Of course, in this case, after the first half of the chain, pull the thread out of the needle, then weave a ring on this needle. Then pull the thread out of the needle again and weave the other half of the chain. Sounds complicated? It’s actually very simple, you should try it! I say: don’t be afraid to experiment!

Please, after watching the video, do not forget to subscribe to my YouTube channel. And I am always glad for your comments and questions on my blog. It helps me to make my blog interesting and useful for you! https://www.youtube.com/watch?v=xL5lhlGs6ek&list=UU3dn4_9pp7tIKA2k564wLBQ

Posted on 4 Comments

How much does handmade cost

US dollars representing the cost and value of handmade tatting and artisan creations, by FairyLacefromElena

How much does handmade cost, or how to calculate the cost of a finished product.

Hello everyone! I know a lot of my readers are in the business of making amazing handcrafted items for sale. Of course, you know how to evaluate your work. And I’m absolutely sure each of you has heard these terrible words: why is it so expensive? I understand that we must be patient and tolerant with customers. And so I don’t want to answer: if this is dear to you, then do it yourself. (Ha ha!) But let’s calculate together how much any handmade product actually costs.

How much does handmade

How much materials and tools cost

For example, you are knitting a sweater. Do you remember how much money you paid for threads of such a beautiful color and for the set of knitting needles that are most comfortable for you? I remember, but not always! LOL Therefore, you can take the average cost at the moment. Do you agree? And also don’t forget to add the shipping cost. Or the cost of gasoline, if you yourself went to the posh Hobby Lobby store (this is not an advertisement, but a metaphor!). Likewise, you can calculate how much money you spent on thread and embroidery fabric. Or how much does clay and glaze for ceramics cost. Etc. Sewing, crocheting, knitting, embroidery, painting, tatting and much more … Well, you get the point, I hope.

How to pay for work time handmade correctly

I remember how 10 years ago, on a large internet site for selling handmade products, managers instructed us: you must value your work and “pay yourself” at least $ 40 for every hour. But this is absolutely the wrong approach. After all, you want your products to be sold, and not lying at home, creating a warehouse. Did I guess? Of course, you can pay yourself $ 600 an hour. But will such a price be competitive? In this case, I suggest taking into account the average wage in your country. Or the salary that you want to receive.

How to evaluate the creativity of a handmade product

This is the most difficult thing, it seems to me. How can I appreciate the “pangs of creativity”? Or how much is originality worth? How interesting is the technique I used to bring my idea to life? And here we must also take into account the latest fashion trends. Oh, fashion is such a windy lady! But I hasten to assure you that handmade are always in fashion. In evaluating this criterion, you will have to “follow the competition”. It’s a shame if you see that a similar brooch (ring, dress, painting …) has already been made by another master. And then you have two choices: either abandon your idea, or make your brooch even cooler! That is, think of how your product can stand out from the crowd. Ah, you and I have come to the concept of a brand, a master’s handwriting, a recognizable style. Right?

How recognizable and distinctive is your master’s handwriting? Unfortunately, I do not have an exact formula for calculating this component. But if you constantly improve your skills, and master new methods, you will definitely gain your admirers and regular customers! Consequently, your brand rating will increase as well!

How much does handmade

This is not knitting, this is tatting!

Finally, I want to explain why tatting is so much more expensive than knitting. There is such a definition. The fewer people can do a certain job, the more valuable that job is. Therefore, for example, the work of Leonardo da Vinci is estimated at hundreds of millions of dollars, in contrast to the primitive oil stains of a beginning artist. And do you know how many people in the world know the tatting technique? Have you heard about The Radcliffe Red List of Endangered Crafts? You can read an article on this topic on Wikipedia: https://en.wikipedia.org/wiki/HCA_Red_List_of_Endangered_Crafts

Hooray, tatting has ceased to be considered an endangered type of needlework. But the danger has not passed, unfortunately. Take a look at this page.

I don’t want to offend knitters in any way, but sooooo many people knit, even tough bikers!

How much does handmade

And on the contrary, very few people know about the art of tatting, alas. Following the theory I just wrote about, tatting should be valued far more than other currently viable crafts. I think this is fair. Thanks to all experienced and budding tatters for promoting and reviving this amazing art! I really hope that my modest contribution to this cause will not go unnoticed.

Subscribe to my blog, comment, ask questions. I’m always happy to help.
Welcome to my store: https://fairylace.kozinenko.com/

Best name for tatting doily

Earrings Iris tatting pattern

Earrings Iris tatting pattern

Earrings Iris tatting pattern.

I really like iris flowers. They are amazing and luxurious. Do you agree? I was delighted with the delicate pink-lilac iris.
So I tried to convey the radiance of dew drops on the delicate flowers of iris.

You can make not only earrings, but also a brooch or a medallion. If you use threads of other colors, then you will get a completely different flower.

Earrings size about 2 inches.

This instruction is written for the tatting shuttle. But you can use this for needles. You need Adobe Acrobat or other PDF reader software to access the file.

This earrings “Iris” tatting pattern consist written instructions in English, diagram and photo process. Level – middle. You using Ring, Chain and picot . The pattern consists of 6 pages and has a size of about 3, 16 MB.

This list is only a PDF file, not a finished product.

Attention!
You do not need to download the file yourself. After confirming the payment, check your email specified in the Order. The PDF file will be sent to you within 10-12 hours.
This tatting pattern earrings are for personal use only. Do not share, sell or copy these patterns.

You can sell finished item made from these patterns ( for this You must buy a template) – please give credit to the designer Elena Kozinenko from FairyLace.
But this does not apply to mass production.
If you want to publish the finished jewelry please link back to or mention this shop where you originally bought the pattern.

https://fairylace.kozinenko.com/product-category/patterns-tutorials/

My video tutorials will help for You, welcome!

Also, feel free to message me if you have any questions. You can ask your questions by contacting me on the FB as well: https://www.facebook.com/kozinenkoelena

Thanks!