Posted on 27 Comments

Gift for tatters

Bicolored tatting doily in progress with orange and dark green threads, two blue shuttles and printed pattern by FairyLacefromElena

Right now, a gift for tatters, who active subscribers to my blog! Want to get a gift from FairyLace? You welcome!

Only blog subscribers can participate in the prize draw.
Rules:

  1. Subscribe to my blog;https://fairylace.kozinenko.com/blog/
  2. Give a name to my new lace doily and write this wonderful name in the comments to this post;
  3. Post a link to this post on social networks (the more links, the more chances you have for a prize!).
  4. Follow me on social networks: FB – https://www.facebook.com/kozinenkoelena

The author of the best name and the most active follower will receive as gift for tatters “Three snowflakes tatting patter” free, https://fairylace.kozinenko.com/product/three-snowflakes-tatting-patterns/
two second prizes – Tatting Pattern 3D Bow. https://fairylace.kozinenko.com/product/tatting-pattern-3d-bow/

So, this is a doily that awaits a beautiful name!

Gift for tatters, pattern doily

Comments and reposts are counted until October 7, inclusive. The results will be announced on October 8th. Good luck to all!

Posted on 16 Comments

How to reduce the pattern tatting.

White tatting lace doily on a black background next to a transparent box with a red artificial rose and green ribbons — used to show three ways to reduce a tatting pattern by FairyLacefromElena

How to reduce the pattern tatting. Very often on the Internet you are see tatting pattern that very much likes you! Whether a doily or earrings, a bracelet or a tablecloth … But for some reason the size of a lace decoration, indicated in the instruction, does not fit for You. How to reduce the size of the finished product? I have three ways. Each ways has its own advantages and disadvantages. Hopefully, my tips will be useful to you!

Way 1 how to reduce the pattern tatting.

Take a little thinner threads, as indicated in the instruction. And weave according to the pattern, not changing anything! Look at the difference between the earrings I made from Threads # 10 and # 20.

The advantage of this way is its ease.
But there are disadvantages: you can not know for sure what size of the finished product you will get 🙂 . And when changing the thread size the pattern works perfectly not always.

Way 1 how to reduce the pattern tatting.


Remove the last Row from the Pattern. For example:
In this Doily there were 4 rows and a size 10,6 inches in diameter.

Remove off the last, fourth row. And in the third row add the picot for a more logical pattern completion.

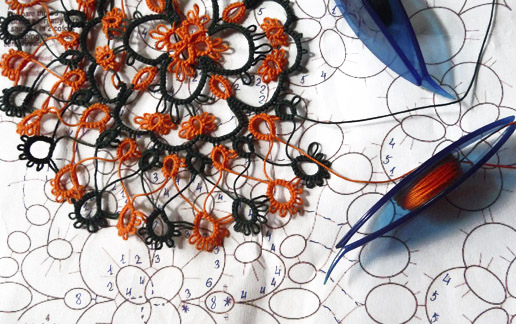
Way 3 how to reduce the pattern tatting.


Remove some middle rows from the pattern. For example:
This pattern has 8 rows, the finished doily size is about 9 inches. I want to exclude 5 and 6 rows.

Tat 1 – 4 rows.

Divide the finished piece into 4 parts mentally. (If the finished piece is very large, it can be divided into 8 or 12 parts for easy drawing).

Draw the border of the fourth row (one quarter. In order not to use the large size of the paper page).

Draw the fifth row similar to the seventh (graphic diagram). There will be fewer repetitions of elements in this row, of course (we are reducing the pattern. Do you remember ? ☺ ) Now we can weave a “new” fifth row. The size of the tatted elements should match the drawn elements. Record the appropriate number of double stitches in rings and chains. ( R: 5, p, 5, p, 5; C: 8, jp, 8 )

We continue to the end of the row. That’s what will get.

Draw the sixth row (this will be the last row in the pattern). You can copy a pattern from a graphic diagram or be creative and add something new. I changed the design slightly. And again: the size of the tatted elements should match the drawn elements. Record the appropriate number of double stitches in rings and chains.

The finished doily is approximately 6 inches in diameter. This size corresponds to the drawn pattern.

If you liked the third way, you can use this to create your own designs!

Thanks for reading!

Subscribe to my blog. https://fairylace.kozinenko.com/blog/

You can buy tatting patterns in my store: https://fairylace.kozinenko.com/product-category/patterns-tutorials/

Comment and ask questions. I will be happy to help with tips!

Join me on FB: https://www.facebook.com/kozinenkoelena

Posted on 4 Comments

Cute tatting ring, final.

Easy pattern for cute tatting ring from FairyLacefromElena

I shared a master class how to make a cute tatting ring in a previous post https://fairylace.kozinenko.com/2019/09/27/free-tatting-pattern-how-to-make-cute-tatting-ring/
and thank you, dear friends, for comments, subscriptions and suggestions. Your support helps me improve my blog and store!
So subscribe to my blog. Comment and ask questions. I will be happy to help with tips!

At your request, today I will tell you in detail how to stabilize the lace ring. This is my personal experience, and you can use other methods.

So our ring is woven.

Then prepare a fixing solution. It can be a mixture of PVA glue and water, a sugar solution or gelatin. I do not recommend using sugar. Products impregnated with sugar solution look attractive, of course! But these products cannot be washed – sugar is absorbed into fibers and threads can crumble from water. Believe me, I saw it with my eyes!
I do machine embroidery, so I have a lot scraps of soluble stabilizer. I take several pieces of the stabilizer, dip them in a glass bowl and pour warm water on it. The solution is ready!

After that measure the thickness of your finger ( my finger in thickness 5,5 cm). Find a template of the appropriate size. You can use the ring sizer. But I found a plastic pipe with a diameter of 5,5cm (in garage of my husband! ) . This is what I need!

Next put the ring on the pipe. Use a sponge or a piece of cotton wool to apply the solution to the threads, giving the ring a pipe shape. Soak the threads well, pat the excess solution with a dry cloth.

Leave to dry. If you need fast, use a hairdryer!

After complete drying, the ring can be removed from the pipe. Be careful, not pull the ring so as not to deform the shape. Holding the ring with your right hand, rotate the pipe. Your lace ring is ready!

And finally one more trick! You can wash the ring by putting it on this pipe. First, soak the ring with soap and water using a sponge, and then rinse the soap with warm water. You do not have to straighten out each picot, sponge and pipe will do it!

Welcome in section Patterns of my store: https://fairylace.kozinenko.com/product-category/patterns-tutorials/

And, of course, I will be glad to meet on my YouTube channel: https://www.youtube.com/@ElenaKozinenko