Posted on 2 Comments

Tatting with netting needle

Round Mandala tatting lace doily, handmade with netting needle by FairyLacefromElena, showcasing original pattern and delicate craftsmanship

Tatting with netting needle, or how I use unusual tools.

Hello everyone! Thanks everyone for supporting my blog! Also, I thank you for the many answers to my question about the tatting tools you use. Today I want to tell you in detail about the wonderful netting needle tool.

So, first, a little story.
When I started tatting, I gradually mastered new tools and new techniques. Oh, this is very interesting! Besides, new knowledge does not allow our brain to “stop”, ha ha!
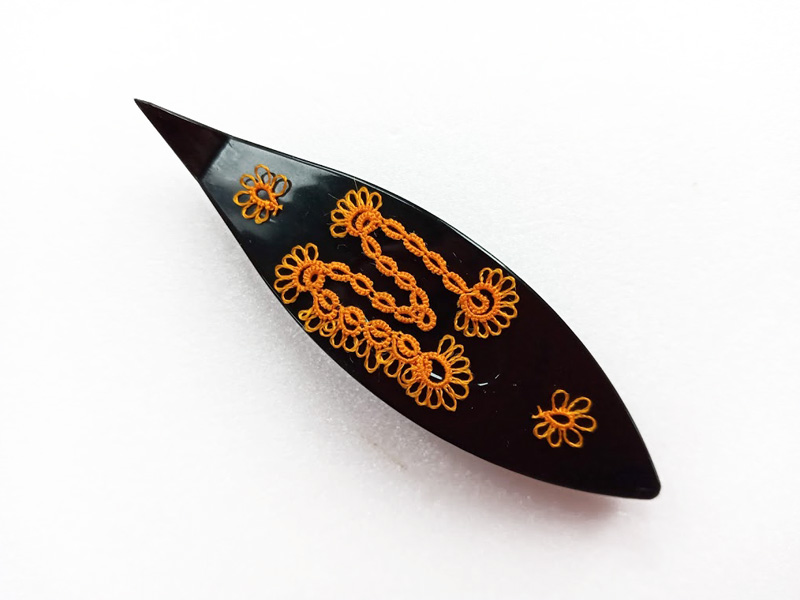
Once I saw amazing photos of Celtic patterns and decided I needed to do it. But how to do it? You will understand that the shuttle cannot be threaded through very small closed pieces. Therefore, another tool I needed. I used a weaving needle as a shuttle. I also tried long plastic celtic weave shuttles. It all works, of course. You will probably agree with me that the Internet is a super invention. How else would I see the mesh weaving kit? Unfortunately, then in our country there was not such a variety of accessories for needlework. And we have not even heard of online shopping!

So, I saw what I needed. I even found out the name of this instrument and told my sister about it. You cannot even imagine my delight and my gratitude to my little sister when I received a package from her with gifts. Oh, it was a real treasure! I unpacked and took out threads, stabilizers, scissors, tatting needles, templates for kumihimo and so on (the list is very long). And at the bottom of the box, I saw two netting needle kits!

Tatting with netting needle

I liked the set on the left better. because the ends of the tool are neater here and it is easy to wind the thread around them.

Tatting with netting needle

The needle has a small hole for tying the beginning of the thread.

Tatting with netting needle

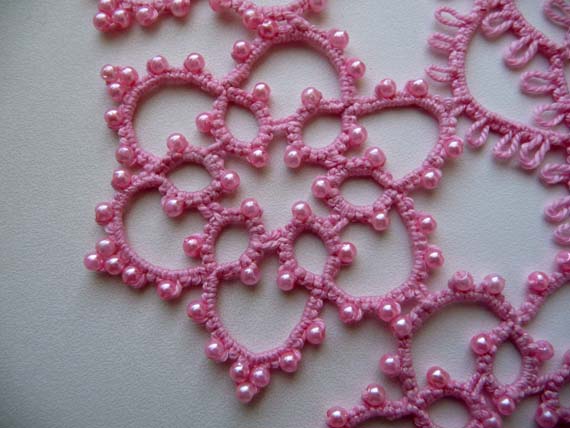
But it turned out I can use this needle for tatting with beads too. This is very convenient because a huge amount of booster threads can be placed on this needle.

Tatting with netting needle

You can watch a small video of how I tat using this tool. https://youtu.be/3Fn-Urybu_A

Please note that when working with this tool, I use the second method for the shuttle. You can also see several tat methods on my channel. https://www.youtube.com/watch?v=ISTEQI1ud1k&list=UU3dn4_9pp7tIKA2k564wLBQ&index=6

Finally, I used igloo mesh to create my Summer Mood collection. By the way, all patterns are available in my store, welcome: https://fairylace.kozinenko.com/?s=summer+mood+pattern&post_type=product

In addition, you can get the perfect connection with long picots using a netting needle. https://www.youtube.com/watch?v=qWPPlAbps5I&list=UU3dn4_9pp7tIKA2k564wLBQ&index=21

Please subscribe to my blog, comment, ask questions. Trust me, your support is very important to me!

Posted on 2 Comments

How to make a personalized tatting shuttle

Black tatting shuttle with lace letter M in orange thread by FairyLacefromElena

How to make a personalized tatting shuttle?

Hello everyone! My granddaughter graduated from second grade (all the marks are on top, of course!). After such a busy year, the child should rest, right? And now my Maria is relaxing about sea with her parents. Therefore, I can devote more time to my tatting.

I told in one of the previous posts how to choose tatting tools.https://fairylace.kozinenko.com/2019/10/18/how-to-choose-tools-for-tatting/

I admit, I like to use shuttles the most. Because I thought that there are many beginner tattoos and masters of this art who also love to use shuttles. And yes, I consider tatting art, do you agree? Therefore, I decided to create unusual shuttles. Let it be “lace for lace.”

Collection of shuttles

So I thought, creating my first collection of shuttles.

These were shuttles with flowers using the tatting technique. There are 154 knots in each flower! To weave these mini pieces, I used the thin embroidery threads. This is part of my stock! I’m not a threadsholik ( ha-ha-ha! ), I just love different colors!

But how to make a personalized tatting shuttle? For this, initials are needed. Many attempts, a few torn threads, and as a result, a collection of personalized shuttles is ready, cheers!

How to make a personalized tatting shuttle

Perhaps you will appreciate the filigree of my work by watching the video. I tried to show with what thin threads letters are made. Do not worry, my hands are not so scary really! This is a very close-up shot. https://youtu.be/qZP7IEWKJjQ

What color shuttles do you like more? Perhaps you have suggestions for choosing thread colors. Write in the comments which combination of shuttle and letter is your favorite. These may be unexpected and fresh decisions, I am sure!

You can see and buy ready-made shuttles in my store: https://fairylace.kozinenko.com/product-category/patterns-tutorials/tatting-tools/

Take care of yourself!

Posted on 8 Comments

Additional tools for tatting

Pink tatted lace doily fragment with beads instead of picots, handmade lace, inspired by Yusai Shokoin, by FairyLacefromElena

In a previous post, I told you about how to choose tools for tatting. I hope you made a choice, and my experience has helped you! https://fairylace.kozinenko.com/2019/10/18/how-to-choose-tools-for-tatting/ Today we will continue this topic. So I promised to talk about additional tools that I use for tatting.

Scissors

First, you will need scissors, be sure! Oh, how hard it is to control yourself! There are an infinite number of different scissors, and almost all of them are really beautiful. But believe me, it’s enough for you to buy one or two scissors, this is quite enough (you can three … ha ha!). And it is better to choose small scissors with short blades.

Knitting markers

Secondly, knitting markers. You can use paper clips. I often take paper clips, they are thin and do not make large “holes” at lace.

Sewing needle

Thirdly, a sewing needle is useful. It is better to choose a thin needle with a wide eye. Nobody likes to hide the ends of threads after weaving, but … we have to, right? I’m sure, if you have a “strong character” and you tightly tighten the double stitch , so you will need pliers ( very small !)! Check out my video on how to use pliers, welcome. https://www.youtube.com/watch?v=HKBg6xUGZL8&t=939s

Hooks

Fourth, do not forget about the hooks! You may have chosen shuttle with hooks, or tatting needles. It is wonderful! But three or four crochet hooks are very useful. Take different sizes of hooks for different thicknesses of threads. Hooks will help when connecting weaving elements. Very good hook for working with beads. I bought the most thin that I found.

Needle threaders

Fifth, stock up on needle threaders. You can take the simplest. With my poor eyesight, the needle threader is an indispensable helper.

Picot gauge

Sixth, for beginner tatters (and for experienced ones too), a templates for picots is very necessary. You can take a “tatting needle and picot gauge”. But I do not like bulky tools. I use homemade cardboard templates. You can make them as many as you like, any width and length!

Thin wire

Seventh, I have another “magic” instrument – an ordinary very thin wire. With its help, the variant of leaves (cluny) is woven. And the wire can be used as a hairpin when stringing beads and beads on a thread.

I am sure that each craftswoman has her favorite additional tools for tatting. Tell us about it in the comments, please. Subscribe to my blog. Comment and ask questions. I will be happy to help with tips! And of course, do not forget to visit my store, welcome! https://fairylace.kozinenko.com/