Posted on Leave a comment

Just tie and cut

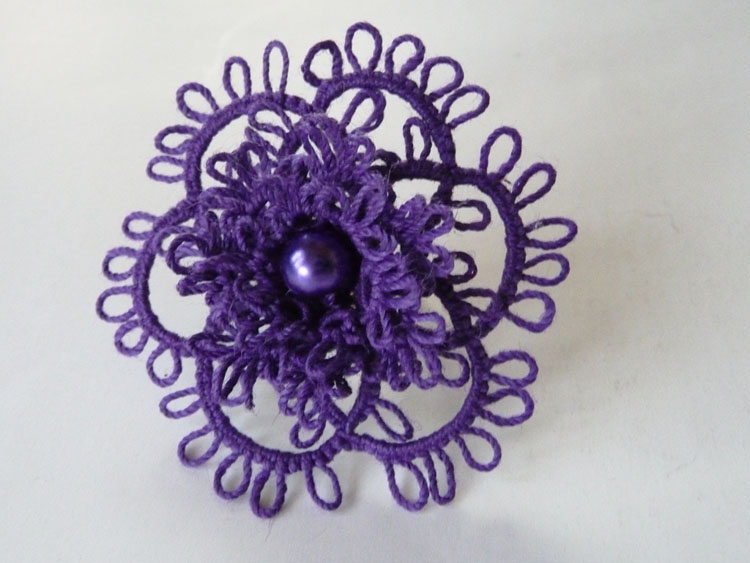
Just tie and cut — or is it really that simple? ✂️🧵

Hello, everyone! 👋

Have you ever come across the phrase “ tie and cut” in a tatting pattern? Of course you have — it’s in almost every single one! But wait… is it really that simple? 🤔

🎥 The video is already edited and available on my YouTube channel, so you can watch every detail step-by-step!

A mysterious instruction?
Well, maybe not mysterious, but certainly more interesting than it first appears! These few innocent words — “just tie and cut” — often hide a lot of nuance. And trust me, ignoring them can lead to some very disappointing results.

One day, I read a comment from a beginner in a tatting group. She wrote:

“I tied the knots very tightly, but after washing, my doily tore apart wherever I had finished the threads!”

💔 I could feel her frustration! Sadly, this kind of thing happens more often than you might think. Especially when you’re learning on your own, it’s easy to miss the fact that simply tying knots and trimming the threads is not enough. There’s a hidden art to it — and that’s exactly what we’re going to uncover today.

Just tie and cut. Close-up of hands holding a small pink tatted lace motif with rings and picots, made using shuttle tatting.

Never do this! ❌


It may look neat now, but disaster awaits! If you leave your ends like this, your tatting will unravel during washing or even gentle use. The knots will slip, and your beautiful piece will fall apart — with no way to save it. 😢

To achieve a flawless result, you need to add one simple step between “tie” and “cut.” First, make sure to tie a firm knot — a square knot works best. ✅

Then, carefully hide the loose thread ends inside the double stitches. Only after this should you trim the excess. ✂️

🔍 Pro tip: Always tuck the ends on the back side of your tatting. This way, the finish will remain invisible — and perfectly neat! 🌸

There are a few special tricks for each tatting method — shuttle, needle, or cro-tatting. We’ll get to that soon!

Shuttle tatting, tie and cut

To hide the thread tails, you’ll need a thin embroidery needle — preferably a blunt one. 🪡 If you use a regular sharp needle, you might accidentally pierce through the double stitches, which can damage the texture of the thread — something we definitely want to avoid. A thick needle is also not a good choice. First, it will be difficult to pass it through the stitches. And second, it can stretch the lace element where you’re trying to hide the threads. That doesn’t look neat or professional.

Just tie and cut. Close-up of hands holding a fine needle, preparing to hide the thread tail inside white tatting lace.

🧵Needle tatting

This method is a bit easier compared to shuttle tatting. In fact, you can use the very same needle you used to make your lace — how convenient is that? 😌

However, there’s one important thing to remember: when you finish a needle tatting project, both thread tails remain in the last element. To secure your work properly, you need to pass one of the threads through the starting point — in other words, join the first and last elements together. Only then should you tie a secure knot, hide the thread ends neatly, and trim the excess.

🪡 Cro-Tatting, tie and cut

Cro-tatting might not be the most popular tatting technique, but I truly enjoy it! 💖 Hiding thread ends is just as simple as with needle tatting — no stress at all.

Even better, you have options: you can use a fine embroidery needle or a special tatting needle if you have one on hand. Either tool will work beautifully to keep your lace looking clean and polished. ✨

👉 Curious to learn more?
If you’d like to dive deeper into the differences between the three main types of tatting — shuttle, needle, and cro-tatting — feel free to check out my detailed blog post:
🔗 https://fairylace.kozinenko.com/three-types-of-tatting/

It’s packed with helpful tips and clear comparisons to help you choose your favorite technique! ✨

🎥 Watch the Full Video on YouTube!

Now it’s time to see everything in action!
🎬 Click below to watch my step-by-step video:
🔗 https://youtu.be/Hi6nQ27Wtio

If you enjoy it, don’t forget to subscribe to my channel, give it a thumbs up, leave a friendly comment, and share the video or my blog with your crafty friends on social media! 💬💖
Your support means the world to me! 🌍✨

Happy tatting!

Posted on Leave a comment

Beginning of work in graphical diagram

Hexagonal tatting doily made of white and red threads

How to find the beginning of work in graphical diagram, or continue learning how to read a tatting pattern.

Hello everyone! This is the fourteenth lesson in the series “Perfect Tatting”. You can read the previous part here: https://fairylace.kozinenko.com/perfect-tatting-part-13/

My articles are also accompanied by video tutorials. Along with the article, I add them to my YouTube channel.

Please write in the comments what subtleties you would like to learn. Then it will be easier for me to make a lessons plan.

You can also read the article (and download the pattern for free) on the topic How to read tatting patterns, where I talk about different options for instructions for tatting patterns. https://fairylace.kozinenko.com/how-to-read-tatting-patterns/

But today I would like to show you a graphic diagram and tell you about a little trick. I am sure it will be especially useful and interesting for beginners.

Often beginners ask the question: where to find the beginning of the work on the graphic diagram?

You will be surprised, but you can start anywhere! Although usually designers indicate where the beginning of the work is. For example, I put a small red circle on the drawing to indicate the start.

Option 1 beginning of work in graphical diagram

 Beginning of work in graphical diagram-1

Most often we start working with the Ring. Look at this pattern. We start working with the first of three rings in the trefoil. In the video, you can see that I used one shuttle and a ball. Therefore, I had to make one simple knot in places where it was necessary to swap the shuttle and ball threads. The link to the video is at the end of the article.

 Beginning of work in graphical diagram-2

And so we make 6 identical elements: trefoil, chain, ring, chain. We attach each first ring to the third ring of the previous trefoil. And we attach the seventh trefoil to the previous and first trefoil. What do we get? We already have a closed motif. But we need to complete the seventh time Chain – Ring – Chain. And since my motto is “nothing is impossible”, I showed on video how it works. This is the motif I got.

Option 2 beginning of work in graphical diagram

But let’s change the picture just a little bit. Look, I moved the beginning of the work, and now our pattern starts with the combination Chain – Ring – Chain. You will see in the video, I used a paper clip to start. But you can take a short thick thread, for example.

Oh, how I love this way of finishing the work! I attached the last chain to the first one, removing the paper clip. And I just have to make the last trefoil. Believe me, this option is much more convenient. Voila, it’s done!

By the way, this pattern can be made with a needle too. And use this option to start the work. I’m sure you’ll like it!

You can watch the video here: https://www.youtube.com/watch?v=sukHCw-IyCI&list=PLmUVrN61lH3yT7k0vrL0PosljWkYTjM3a&index=14

Don’t forget to comment, like and share my videos and articles on social media, please! Also I thank all my friends, subscribers and followers for their support!

Merry Christmas and Happy New Year!

Posted on Leave a comment

Perfect tatting – Part 11

Tatting doily white-yellow

Perfect tatting – Part 11, or how not to twist chains.

Hello everyone! This is the eleventh lesson in the series “Perfect Tatting”. You can read the previous part here: https://fairylace.kozinenko.com/perfect-tatting-part-10/

My articles are also accompanied by video tutorials. Along with the article, I add them to my YouTube channel.

Please write in the comments what subtleties you would like to learn. Then it will be easier for me to make a lesson plan.

You can also ask me questions in the comments, I am ready to help!

I often hear from beginner tatters: My chains are twisted! What am I doing wrong? Because, most often, this problem arises from the incorrect position of the shuttle and ball threads (for needle tatting, this is the needle and ball thread).

First, let’s remember the terminology! So, I’m turning to the ABC Tatting website again: https://abctattingpatterns.com/terms/ These are the names accepted in English:

Ball Thread (BT): Thread originating from the ball of thread.

Core Thread: a.k.a. foundation thread, shuttle thread, needle thread or running thread. Traditionally, the shuttle or needle thread is used as the core thread. It used like a clothesline upon which the double stitch hangs.

Although, in other languages, these may be other names. For example, a shuttle thread or a needle thread is called a leading thread. Because it kind of leads the double stitches. And a ball thread is called a working thread. Because it “works” by tying knots. What are these threads called in your language? Please write in the comments. It’s very interesting!

Shuttle tatting

So, first, let’s look at shuttle tatting.

Perfect tatting - Part 11 -1

Note that the main (shuttle) thread is always in the right hand. If you are right-handed! And we are not looking at pearl weaving, split ring, etc. techniques.

For left-handers, it’s the other way around.

Perfect tatting - Part 11 - 2

Thus, the Core thread is always BELOW the Ball thread. By the way, you remember Ball thread can also be wound on the second shuttle?! But the name of the thread is still retained for convenience.

Perfect tatting - Part 11- 3

It is interesting that when performing the Ring, the same thread is the Core and the Ball threads. The role of the Ball thread is played by the thread that forms a loop on the hand.

If you are going to make a Chain after turning the work, you just need to move the Ball of Thread upwards (if it was not located there initially). This way, the threads will be in their places again after turning. Namely: the main thread in the right hand, and the Ball of Thread above it. By the way, pay attention! The threads do not cross!

Amazing tatting part11-4
Shuttle tatting

If the pattern does not call for you to turn before the Chain, you need to swap the threads. It’s very simple! Make one simple knot, as if you were tying shoelaces. Similarly, change the threads after the chain, when moving to the Ring without turning the work.

NEEDLE TATTING

There is a small nuance for needle tatting. Firstly, most often we work with only one thread from the ball. How interesting, but the same thread “bifurcates” and becomes the Needle thread ( or Core thread ) and the Ball thread. Do you know what separates them and thus “gives individuality by giving names”? ( LOL ) Of course, it’s a joke! But we can smile while doing tatting. And even while reading such a serious lesson Perfect tatting – Part 11. Because a good mood is always appropriate!This is the very first stitch that you make on the needle.

Thus, the thread from the eye of the needle to the stitch will be the Core Thread. And the thread from the stitch to the ball will be the Ball Thread. It’s simple.

Needle tatting

I’m sure you can guess which photo illustrates the work for right-handed people and which one for left-handed people!

When turning the work, we also make one simple knot to swap the threads.
If there is no work rotation, then we will need to make two knots. This way we fix the element and do not swap the threads.

Thus, remembering the correct position of the threads, we will always get perfect, untwisted Chains!

Oh, my long article Perfect tatting – Part 11 is over! I hope you have enough strength to follow the link and watch the video: https://www.youtube.com/watch?v=9sZ3HmRs4cY&list=PLmUVrN61lH3yT7k0vrL0PosljWkYTjM3a&index=11
Don’t forget to comment, like and share my videos and articles on social media, please! Thank you!

Posted on 4 Comments

Perfect tatting – part 10

Purple tatting ring with bead

Perfect tatting – part 10.

Hello everyone! This is the tenth lesson in the series Perfect Tatting. You can read previous part here: https://fairylace.kozinenko.com/perfect-tatting-part-9/

Also my articles will be accompanied by video tutorials. Simultaneously with the article I will add them to my YouTube channel.

Please write in the comments what subtleties you would like to know. Then it will be easier for me to make a lessons plan.

Also you can ask me questions in the comments, I’m ready to help!

Perfect tatting – part 10-1

Sometimes when making two or more rings in a row, there is a small distance between the rings, especially for beginner tatters.

This kind of trouble happens both when working with shuttles and when working with a needle. I want to show you how you can avoid this kind of mistake with a little tricks.

For tatting shuttle

Perfect tatting – part 10-2

After you make the first part of the first double stitch, press this knot with your fingernail. Oh, you don’t have to have long beautiful nails and a perfect manicure for this! Of cource, you can use short ones like mine, for example, LOL

Perfect tatting – part 10-3

Then do the second part of the double stitch and check your perfect result!

Perfect tatting – part 10-4

In this way you can make two, three or more rings.

For tatting needlee

Perfect tatting – part 10-5

Make the first ring. You can use method with knot. I told you about it in the previous lesson. This way you won’t have to make fixing knots between the rings. And before making the second and also all subsequent rings, place the needle exactly in the middle of the ring and press the needle to the ring with your fingers.

You will be surprised how easy it is to make the next ring perfectly close to the previous one if you position the needle just like this.

As I promised, a short video demonstrating these little tricks is already on my YouTube channel. Subscribe, comment, like and share my videos on social networks! https://www.youtube.com/watch?v=1qE1POw-dIE&list=PLmUVrN61lH3yT7k0vrL0PosljWkYTjM3a&index=10

Perfect Tatting – Part 10 is finished! Happy tatting!
I hope my previous blog posts will also be useful and interesting: https://fairylace.kozinenko.com/blog/

Posted on 18 Comments

Perfect tatting – part 9

Oval tatting lace doily in white-yellow colors

Perfect tatting – part 9.

Hello everyone! This is the ninth lesson in the series Perfect Tatting. You can read previous part here: https://fairylace.kozinenko.com/perfect-tatting-part-8/

Also my articles will be accompanied by video tutorials. Simultaneously with the article I will add them to my YouTube channel.

Please write in the comments what subtleties you would like to know. Then it will be easier for me to make a lessons plan.

Also you can ask me questions in the comments, I’m ready to help!

In this article I describe several ways to tighten the rings. Two ways for the shuttle and two ways for the needle.

The first method for the shuttle

Perfect tatting – part 9.2

I won’t even describe this method, because all tatters use it (well, almost all, but more on that later). We just tighten the Ring. But if you look closely at the photo, you’ll see a small knot between the shuttle and ball threads after the Ring is formed.

Madhur Dadlani Method

A few years ago I saw a video of how a talented tatting master from India, Madhur Dadlani, does tatting. Oh, the speed of her work is absolutely amazing! At the same time, the precision and accuracy of the knots are beyond praise! I was delighted with this mastery. It is not for nothing that in India she is called the “Queen of Tatting”!

But I also noticed how she tightens the Rings. Of course, I tried to repeat this technique. This technique has been known for a long time and is called “posting the shuttle”. But I first saw it with Madhur. So let me call this method by her name!

Perfect tatting. Part 9. 3

Before tightening the Ring, pull the shuttle through the loop where the double stitches of the Ring are located.

Perfect tatting. Part 9. 4

Pay attention to the placement of the threads. This is perfect, isn’t it?

The first method for the needle

I will not describe this method either, because absolutely all tatters who use a needle use this method (or not all? Write to me in the comments, please). The only “imperfection” of this method is the need to tie knots after each element to fix the Rings and Chains. In principle, these nodes are not very noticeable. But I know about them…

Needle Tatting. The Method with Knot

I admit, I watched a lot of videos for the needle. But I didn’t see another way anywhere. It’s quite possible that I wasn’t diligent enough in my search. So I came up with my own way. You need to twist the loop where the double stitches of the ring are located BEFORE you pull the needle through it.

This method is especially convenient when you need to make two or more rings in a row. Of course, it is better to watch all these techniques on video. For ease of viewing, use the time code, which is indicated in the description under the video. https://www.youtube.com/watch?v=Fwr8fbbhMn0&list=PLmUVrN61lH3yT7k0vrL0PosljWkYTjM3a&index=9

Perfect Tatting – Part 9 is finished! Happy weekend!
I hope my previous blog posts will also be useful and interesting: https://fairylace.kozinenko.com/blog/

Posted on 4 Comments

Perfect tatting – part 7

How to make tatting ring

Perfect tatting – part 7.

Hello everyone! This is seventh lesson in the series Perfect Tatting. You can read previous part here: https://fairylace.kozinenko.com/perfect-tatting-part-6/

Also my articles will be accompanied by video tutorials. I will add them to my YouTube channel.

Please write in the comments what subtleties you would like to know. Then it will be easier for me to make a lessons plan.

Today I wrote a very short article and added a short video. But I hope it will be very useful and informative!

So, in the last lesson I promised to tell you how to easily and quickly give rings different shapes. We talked about round, oval and teardrop shapes.

I watched a lot of videos on YouTube and noticed how many tutters (not all, of course) form rings. They simply pull the shuttle or needle, tightening the ring. In the video, I tried to show this method. Although I never use it. Unfortunately, in this case, the ring is asymmetrical and has to be adjusted. Or is it just me “be all fingers and thumbs”? LOL

Speaking of hands. I apologize for the unkempt look of my hands in the last videos and the lack of a manicure. I developed a terrible allergy to shellac nail polish. So I treated my fingers for a month. Today the doctor said that I can try regular polish. But I have to be very careful! Oh, I hope my hands will return to their attractive appearance. Take care of your hands, they are “every tatter’s treasure”!

But let’s get back to our rings! Try to form the desired ring shape and, holding it between your thumb and index finger, tighten the ring. I showed in detail in the video how this can be done: https://www.youtube.com/watch?v=0D7wigmj_oM&list=UULF3dn4_9pp7tIKA2k564wLBQ

Perfect Tatting – Part 7

Perfect Tatting – Part 7 is finished! Happy perfect tatting!
I hope my previous blog posts will also be useful and interesting: 

https://fairylace.kozinenko.com/blog/

Posted on 2 Comments

Perfect tatting – part 6

Perfect tatting - part 6. free tatting tutorial

Perfect tatting – part 6.

Hello everyone! This is sixth lesson in the series Perfect Tatting. You can read previous part here: https://fairylace.kozinenko.com/perfect-tatting-part-5/

Also my articles will be accompanied by video tutorials. I will add them to my YouTube channel.

Please write in the comments what subtleties you would like to know. Then it will be easier for me to make a lessons plan.

Today I show several graphic tatting designs and explain how to “read” them.

First, look at what shapes can be used to depict rings, chains, and picots. In fact, everything here depends on the creative imagination of the designer or the computer program used.

Perfect tatting

Rings can be drawn round, oval, teardrop-shaped. Next time I will tell you how to easily give ready-made rings different shapes.
And chains can be depicted as an arc with different bending amplitudes.
Well, Pico is usually depicted as a short straight segment. Sometimes designers draw a small oval. But it seems to me that such a depiction of Pico is not very logical. By the way, this is another of the following topics.

Ideal tatting

So, let’s see what kind of image options we can get.

In fact, these are variations of the graphic representation of the same pattern. This is what this pattern looks like in its finished form.

Where to put the numbers for the design perfect tatting

The standard tatting knot consists of two “legs” and one “cap” above them. The ABC website says the following:
“Cap: A cap is the bump above the legs of a double stitch. It is an easy term to remember as most people wear a cap on their head which is above their legs”. https://abctattingpatterns.com/terms/

Therefore, it seems quite logical to me to place the numbers above the caps.

Perfect tatting – part 6

But what to do in this case? There is no space for numbers around the Rings!

Perfect tatting – part 6

It’s very simple. We’ll put the numbers inside the ring. Especially since it doesn’t change the location of the caps and legs in the ring. I’m not considering options where the caps are inside the ring right now.

Perfect tatting – part 6

You can also simplify the pattern by writing one number in the ring. This is possible if all parts of the ring contain the same number of double stitches. For example, I took 5 ds.

With chains it’s more complicated. I think it’s best to put the numbers ABOVE the caps. That way the tatter can see the direction of the work right away. And this is especially important to determine where to turn the work.

So, I will show you two variations of the Ring – Chain – Ring pattern.

  1. R: 15, sp, 5, tw;
  2. C: 10, tw;
  3. R: 5, jp to sp of PVR, 15.
  1. R: 15, sp, 5;
  2. C: 5, jp to sp of PVR, 5, sp, 5;
  3. R: 5, jp to sp of PVC, 15.

Oh, thank you for your patience! You had to read for a long time. But I made a very short video: https://www.youtube.com/watch?v=QtM9uDZ2dq0&list=UULF3dn4_9pp7tIKA2k564wLBQ

Perfect Tatting – Part 6 is finished! Happy perfect tatting!
I hope my previous blog posts will also be useful and interesting: https://fairylace.kozinenko.com/blog/

Posted on Leave a comment

Perfect tatting – part 5

Vanilla and chocolate, tatting doily

Perfect tatting – part 5.

Hello everyone! This is fifth lesson in the series Perfect Tatting. You can read previous part here:  https://fairylace.kozinenko.com/perfect-tatting-part-4/

Also my articles will be accompanied by video tutorials. I will add them to my YouTube channel.

Please write in the comments what subtleties you would like to know. Then it will be easier for me to make a lesson plan.

I’d like to thank Patrizia for her comment on one of the previous videos where she suggested we talk about hiding the threads at the beginning of two-color tatting. This is a really interesting topic. Sometimes we can leave the threads at the beginning of the work and tie them to the ends of the work, if it is a closed motif or earrings, for example. But it happens that it is a pattern for a bookmark or a strip of lace. Of course, you can hide all the “tails” after finishing the work. But I really don’t like leaving all these tails “for later”! Therefore, I suggest you look at how you can reliably and easily hide the threads at the beginning of a two-color work.

Today I made a video for two shuttles. We do not make a knot at the beginning of the work. This is especially important if you take two colors of thread. In this case, a two-color knot can look sloppy. But we are striving for the ideal, aren’t we?! https://www.youtube.com/watch?v=Nze8b1Wy_KE&list=UULF3dn4_9pp7tIKA2k564wLBQ

How to make the same perfect start for needle tatting, watch one of my previous videos: https://www.youtube.com/watch?v=bVdn3qXlWFg&list=UULF3dn4_9pp7tIKA2k564wLBQ&index=11

Perfect Tatting – Part 5 is finished! Happy perfect tatting!
I hope my previous blog posts will also be useful and interesting: https://fairylace.kozinenko.com/blog/

Posted on Leave a comment

Perfect tatting – part 4

Perfect tatting – part 4

Perfect tatting – part 4.

Hello everyone! This is fourth lesson in the series Perfect Tatting. You can read previous part here: https://fairylace.kozinenko.com/perfect-tatting-part-3/

Also my articles will be accompanied by video tutorials. I will add them to my YouTube channel.

Please write in the comments what subtleties you would like to know. Then it will be easier for me to make a lesson plan.

So, today we will talk about how to choose the shuttle size and needle thickness depending on the chosen thread.

TATTING SHUTTLES

Perfect tatting – part 4

I took a photo of four different shuttles and four different balls. Although in fact the size of the shuttle does not matter at all when choosing the thickness of the thread. Because, it all depends on your personal preferences and your convenience. The more threads you need to wind, the larger the shuttle you will take. Of course, this is logical. The same applies to beading. You will just need more space to fit more beads on the shuttle.

But you can tat with any threads, using only one shuttle.

PERFECT TATTING NEEDLES

With needles, everything is completely different. Because here the thickness of the needle is extremely important. The accuracy and beauty of your work depends on it.

I found this table on Pinterest.

Ideal tatting

So, this table was compiled and published in the FB group “Sparkling Light Creation Studio – Fibre Art by Gloria Nelson”.

I also found a classification of tatting needles on the website Handy Hands: https://hhtatting.com/product-category/tatting-needles/

Tatting Needles

The Handy Hands metal tatting needles are specially made to our specifications. Unlike sewing needles, these tatting needles are blunt, have a smaller eye, and are not tapered. They are made of steel and are nickel plated.
1.Yarn Needle 0-0 (chunky weight yarns)
2.Yarn Needle 1-0 (worsted weight yarns)
3.Yarn Needle 2-0 (Speed Cro Sheen and most 100% cottons)
4.Tatting Needle 3-0 (crochet cotton size 10, Pearl Cotton 5 and 3, Knit Cro Sheen and smaller yarns)
5.Tatting Needle 5-0 (crochet cotton thread sizes: 10, 20, and Pearl Cotton 8 and 5)
6.Tatting Needle 7-Fine (crochet cotton thread sizes: 50, 40, 30, 20, and Pearl Cotton 12)
7.Tatting Needle 8-Extra Fine (crochet cotton thread sizes: 100, 80, 70, 60, 50)

But there is one obstacle – the thickness of threads is marked differently by different manufacturers. And then it is difficult for us to use these tables. In this case, I suggest you choose the needle for your thread yourself.

I prepared 4 different needles and mercerized threads Madame Tricot No. 10 for the video. Unfortunately, I could not form a ring using the thinnest needle. So I had to choose from the remaining three options. In my opinion, the middle ring looks perfect!

The video is already uploaded on my channel, welcome: https://www.youtube.com/watch?v=JIXGclqrCgI&list=UULF3dn4_9pp7tIKA2k564wLBQ

Perfect Tatting – Part 4 is finished! Happy perfect tatting!
I hope my previous blog posts will also be useful and interesting: https://fairylace.kozinenko.com/blog/

Posted on 2 Comments

Perfect tatting – part 1.

Square tatting doily

Perfect tatting – part 1.

Hello everyone!  This article begins a series of lessons “Perfect Tatting”. Tricks, subtleties, error correction, new skills – I share my experience.

My articles will be accompanied by video tutorials. I will add them to my YouTube channel.

Please write in the comments what subtleties you would like to know. Then it will be easier for me to make a lesson plan.

Firstly, I want to emphasize that all the techniques that I will talk about are NOT MANDATORY to implement! Everyone has their own opinion and their own “handwriting”! But I will be glad if my experience is useful and interesting to you.

So, ideal tatting, part 1.

Recently I was asked an interesting question: is it necessary to tie the thread to the shuttle?
Look closely: there is almost always a small hole on the shuttle. What is it for?

I am amazed at the talent of the designer who invented such a shape of tatting shuttles. Everything is very logical, ergonomic and practical!

Perfect tatting.Part1.

If you do not secure the thread to the shuttle, you will have to press the thread with your finger. No big deal – you will say! I agree. But I weave a lot and often use nylon and polyester threads in my work. They look so beautiful in jewelry…

If the thread rubs the skin on your finger all the time, you will get a cut and a scar. Believe me, I know. It is very painful. Take care of your hands!

No injuries, no trouble! I guess I should have called this article “Safe Tatting”! LOL
I often see on video when tatters hold the shuttle thread with their little finger. Try “freeing” your finger. The shuttle is designed to be moved freely, like a space shuttle! And hold the shuttle with only two fingers. It looks very elegant, by the way!

And for a good mood I added a knot on a thread for a tatting needle to the video. Of course you will smile! A spontaneous knot is too much! https://www.youtube.com/watch?v=zS6yj9MYFUk

Perfect Tatting – Part 1 is finished! Thank you for your patience!
I hope my previous blog posts will also be useful and interesting: https://fairylace.kozinenko.com/blog/