Posted on Leave a comment

Cro-tatting Lesson 6

Cro-tatting Lesson 6 , or the return to the beginning.

Hello everyone! This article is a continuation of Lesson 5. Therefore, follow the link if you have not read or watched the video of the previous lesson: https://fairylace.kozinenko.com/cro-tatting-lesson-5/

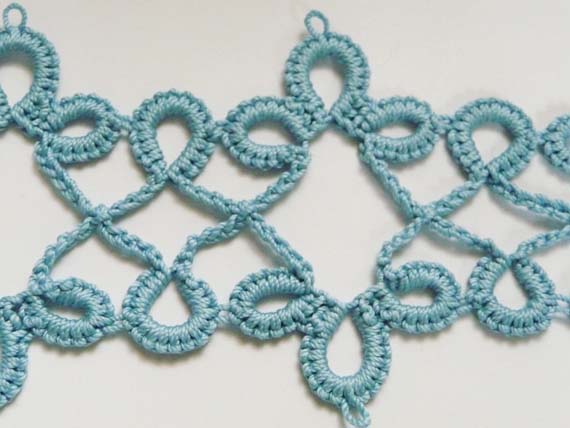
In the last lesson, we disposed of the remnants of the thread. Did you succeed? And I promised to tell you in detail how to connect elements of different colors correctly. Do not throw slippers at me, because I will again talk about the front and back of tatting! Of course, I do not in any way insist on my opinion. Because every artist is entitled to their own point of view. After all, every tatter is an artist! Do you agree? And who can tell the artist exactly how CORRECT? It is possible that you will like the product, which has specially made thin “stitches” of a different color on the front side of the work.

Cro-tatting Lesson 6 Front side

Front or back side?

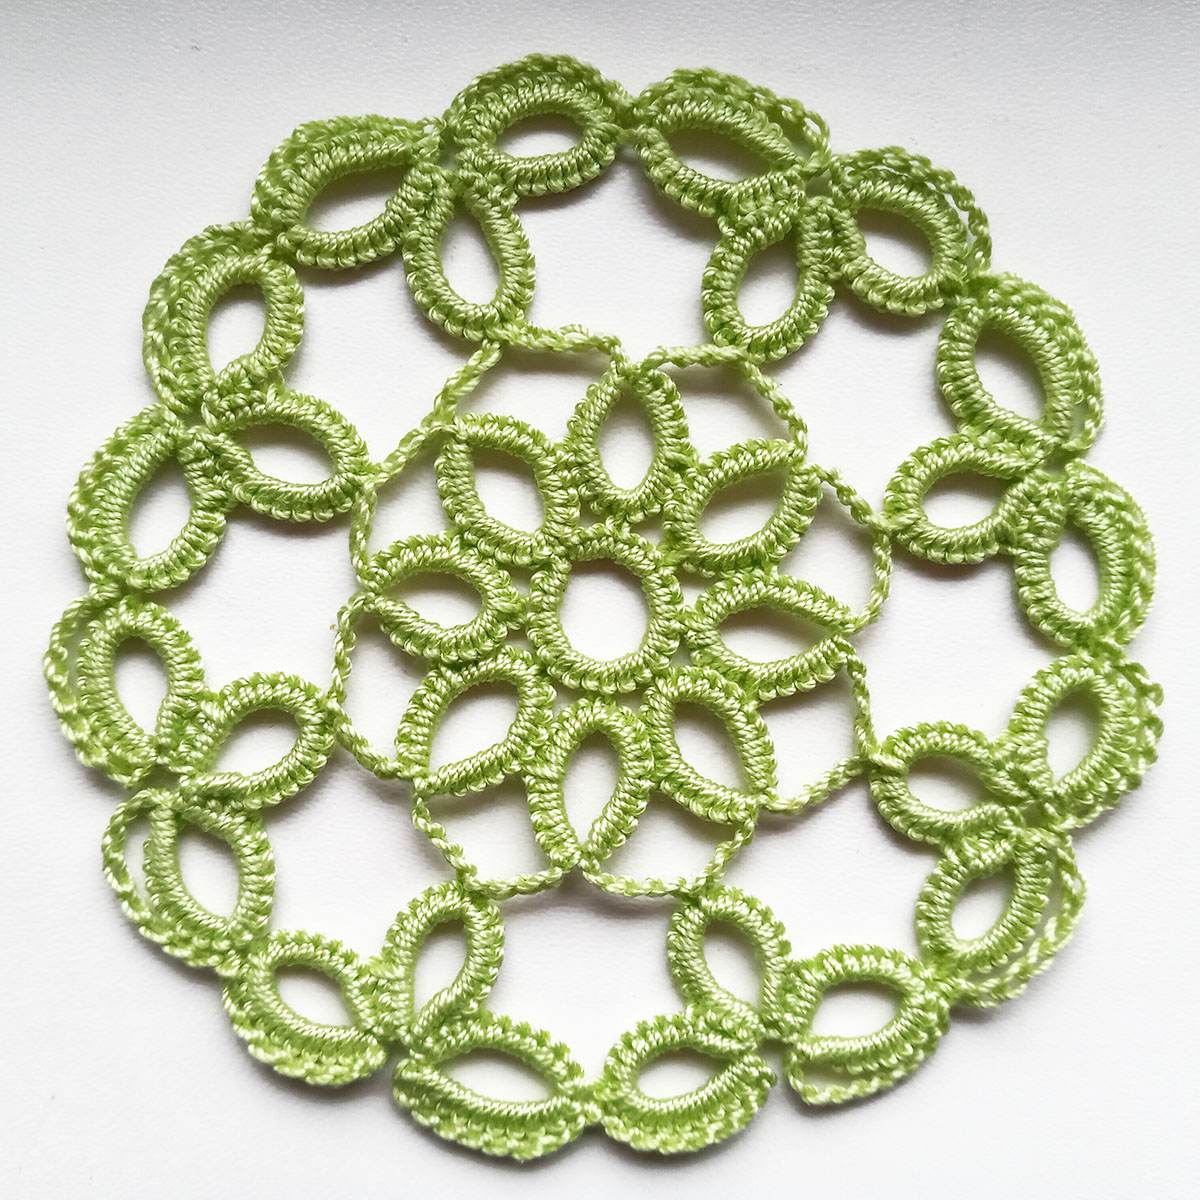
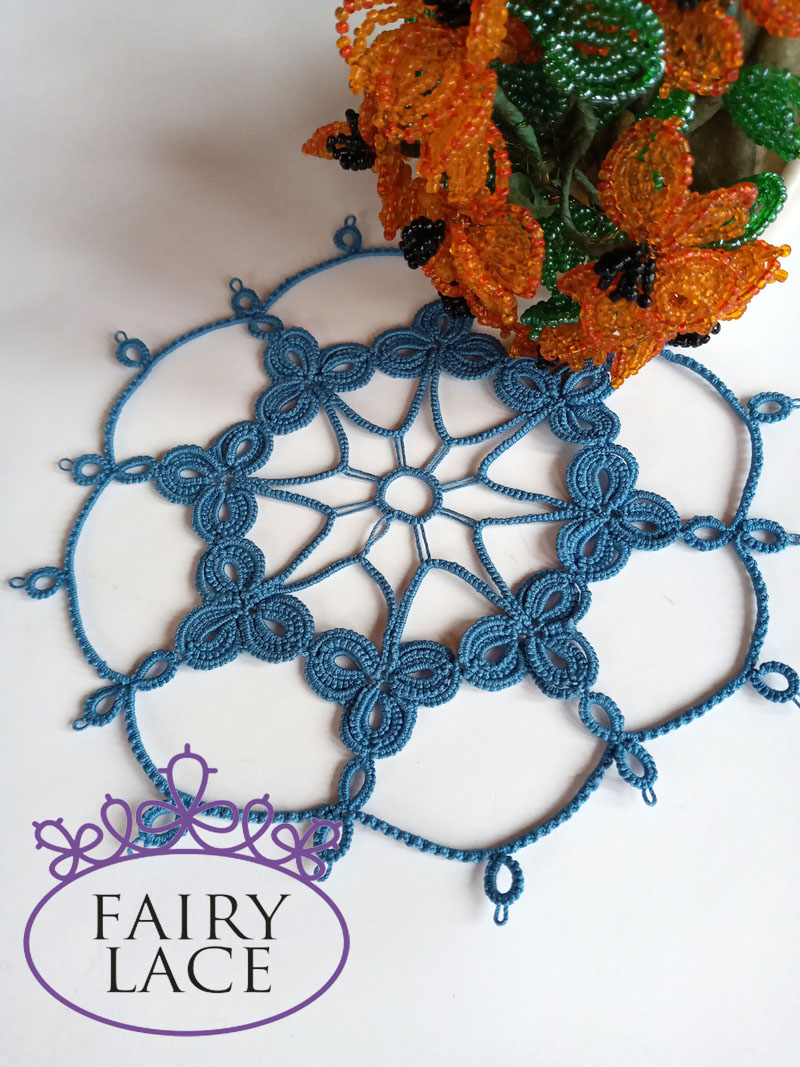
In my classes for schoolchildren, I show the difference between the wrong side and the wrong side at the very beginning of lessons. Believe me, students perceive this very easily. By the way, it is in cro-tatting that the difference between both sides of the work is very clearly visible. Especially if you use double crochet in the pattern. How unexpectedly, I had an idea for the topic of a new lesson! If you are interested in getting a pattern using double crochet in the pattern , write me in the comments please.

Cro-tatting Lesson 6 Back side

But, it’s time to move from words to deeds, that is, to video! So video Cro-tatting Lesson 6 : https://www.youtube.com/watch?v=mGW4f-nMu1g&list=UULF3dn4_9pp7tIKA2k564wLBQ

By the way, I have a video on this subject for shuttle tatting. Maybe this will come in handy too: https://www.youtube.com/watch?v=98FYbzTfzZE&list=UULF3dn4_9pp7tIKA2k564wLBQ&index=26

I will be grateful for the support of my blog and YouTube channel. Subscribe, comment, share on social networks, please! This will help make my information more interesting and useful.

Posted on Leave a comment

Cro-tatting Lesson 4

Cro-tatting Lesson 4 , or how to make a split chain in cro-tatting technique.

Hello everyone! This article is a continuation of Lesson 3 . Therefore, follow the link if you have not read or watched the video of the previous lesson: https://fairylace.kozinenko.com/cro-tatting-lesson-3/

Cro-tatting Lesson 4

Ah, I tried my best in the previous lesson! I sought to convince all my readers of the need to master the reception of the split ring. By the way, this is necessary not only for cro-tatting, but also for the tatting shuttle and for the tatting needle. I hope many tatters will “follow me” in this matter, haha! And today I want to suggest that you use a split chain too as often as possible as well. But alas, I have no new arguments. I’m just sure that we must develop, improve and look for new ways and methods. Do you agree with me? Then you will benefit from my new video, I hope.

I use two methods to perform a split chain.

First method

So, fhe first method is good when you move from row to row through chains. You hide the tail of the thread at the beginning of work and, as the second part of the split chain, perform a double crochet. The number of yarn overs should be 1 less than the number of loops in the first half of the split chain. In my video, this is 5sc and Triple Treble Crochet ( or Double Treble Crochet ). Here again I ask for your help. How is this element correctly indicated in English. Write to me in the comments, please.

Second method

But the second method is ideal if you are going to the next row through a split chain + split ring combination. So, in the video, you will see two threads after the split chain is completed. First thread – ball, and the second – long tail of the thread, which I left at the beginning of work. Therefore we can use these two threads to make a split ring.

Wow! I can imagine how tired you are of reading this! Of course, it’s better to watch the video. Don’t forget to leave a comment and subscribe to my YouTube channel! https://www.youtube.com/watch?v=OvR8NaB1-c4&list=UULF3dn4_9pp7tIKA2k564wLBQ

Posted on 6 Comments

Cro-tatting Lesson 1

Cro-tatting Lesson 1. A bit of history and also basic knots.

Cro-tatting Lesson 1

Hello everyone!  My regular readers, you certainly know how much I love tatting. This is a hobby for me, a passion, an antidepressant and an opportunity to support my Ukraine in this difficult time. In addition, I try to popularize this amazing needlework technique. And today I’m starting a series of cro-tatting lessons.

What is cro-tatting

Crochet combines tatting needle with crochet. The cro-tatting tool is a needle with a hook on the end. I’m sure you can read the full article on tatting on wikipedia. Many people find cro-tatting more difficult than crocheting or tatting.

Some tatting instructors recommend using a tatting needle and a crochet hook. But I haven’t tried it. Perhaps because I have the perfect tool (in my opinion) – Toshiko Takashima hook.

Unfortunately, this type of tatting is quite rare. And completely undeserved, in my opinion. In addition, cro-tatting are easy to unravel if you make a mistake. You just need to pull the end of the thread, haha! I know, supporters of tatting by shuttle would certainly appreciate it!

Base knots

Cro-tatting lesson 1

This photo shows that all the rings are made using the classic tatting technique. That is, the rings are made up of double stitches (ds). And the chains are crocheted and consist of air loops (al). Perhaps because of the intricacies of the translation, I again confuse the terminology. So write me in the comments, please, if I’m wrong (to do this, click on the Leave a comment button at the BEGINNING of the article).

For cro-tatting lesson 1, I made a video demonstrating the base knots. Of course, if you know how to tat with a needle, it will be very easy for you to make a double stitches. The main difficulty lies in the formation of the ring. But with just a little practice, you’ll get the hang of it. I decided to show you two ways to form a ring. Personally, I prefer the first way. Because this way the ring turns out to be more symmetrical (it seems to me).

In the recording, cro-tatting Ring looks the same as a shuttle or needle tatting. For example, R: 16.
English term for the chain is “single crochet” and in abbreviation “C: 7 sc”. Although in Ukrainian this term is called “air loop” and is denoted, for example, as C: 7al.

https://www.youtube.com/watch?v=rdd7EHAM9lI&list=UULF3dn4_9pp7tIKA2k564wLBQ

Check my store please: https://fairylace.kozinenko.com/shop/

And also subscribe to my YouTube channel and blog. I will try to make new video tutorials and detailed articles on the topic of cro-tatting in the near future. Thanks in advance for your comments, questions and suggestions!

Posted on 8 Comments

Tatting Split Ring

Tatting split ring , or why I love using this technique.

Hello, everyone! I want to thank everyone who read my blog posts, commented and followed me on YouTube. Trust me, I am making these video tutorials for you. Because I endlessly love tatting and try to promote this art to the best of my ability.

Today I want to talk about the split ring.
How is a split ring indicated in patterns? It is usually written like this: SR: [ 8 ], [ 8 ].
This means you have to sew 8 double stitches in the normal way (this is the first section in square brackets), and then make 8 double stitches with “pearl weave” (this is the second section in square brackets). By the way, in my new video tutorial I am making this very ring. But the number of double stitches in brackets may vary depending on the pattern. Also, picots can be contained in brackets. For example : SR: [ 3, p, 3, p, 3 ], [ 3, p, 3, p, 3 ]. And in graphical diagrams, such a ring can be drawn with a dotted line in the middle, or the halves of the ring can be highlighted in different colors.

When are split rings used? Oh, the application is unusually wide. It all depends on your imagination, of course!

It could be a simple bookmark.

Or a summer bag.

You can use the split ring to create earrings or bracelets. The chain for a medallion of split rings also looks very delicate

It is very common to use a split ring when making doilies. Pay attention to the beige squares. This pattern is made up of a combination of split rings.

Using Tatting Split Ring as an auxiliary element

This is my favorite way to use a split ring. Yes, it is the split rings along with the split chains that help me weave a multi-row doily WITHOUT cutting the threads between the rows.

This way I avoid endlessly hiding the thread tails. Are you still hiding the threads at the end of each row? Then try my method! You’ll like it!

I made a video tutorial in which I collected five methods for making a split ring: two methods for two shuttles, one method for one shuttle, one method for a needle and one method for a hook. Perhaps you know another way. Write about it in the comments, please. I hope you enjoy my video and choose one of the methods that is convenient for you. Welcome : https://www.youtube.com/watch?v=PuweruFd6Kw&list=UU3dn4_9pp7tIKA2k564wLBQ

And my new pattern from the collection “Romantic Geometry” is based on the use of split rings. Each square is woven without cutting the thread from beginning to end. It is very interesting and exciting!

I will be very glad for your comments, questions and new subscribers! Thank you !

Posted on 10 Comments

New week new project

New week new project.

Hello everyone! On June 17, my competition for the best name for tatting doily ended. Ah, how many beautiful names, how many kind words I received! It’s amazing! I am extraordinarily inspired. And after a wonderful weekend (I hope your weekend was also good!) I start my new week with a new project.

I decided to use an interesting technique for the center of this doily. It looks like bobbin lace, doesn’t it?

New week new project

I want to call this doily “Wheel of Time”. Because the alternation of dense and airy rows reminds me of the running of time in our lives. I think each of you has come across “long” days when time goes on endlessly. And I know there are so “swift” days that fly by like an instant. This is the wheel of time that moves without stopping, then slowing down, then accelerating. Zoe Carbajales came up with this name. I hope she will not mind using this name for my new project.

Previous option

So, I did this project 7 years ago. And the previous version of this template looked like this.

Grey mandala doily

Now I decided to slightly change the general appearance, changed the color and thickness of the threads. I’m very interested in your opinion on the title. Therefore write in the comments, please. Is the “Wheel of Time” suitable for this doily?

By the way, pay attention to the personalized shuttle that I use. Do you want one for yourself? Check out my store, please: https://fairylace.kozinenko.com/product-category/patterns-tutorials/tatting-tools/

You can also watch a video on my YouTube channel, welcome: https://www.youtube.com/watch?v=P0zrZP-a6dQ&list=UU3dn4_9pp7tIKA2k564wLBQ

So, I will try to finish the pattern at the end of the week. Anyway, I will try! But after tat, I will need to draw a graphical diagram in a computer program, write instructions and mount a video tutorial. Yes, I plan to add a video to this manual. Do you think the video helps a lot? Or is it a waste of time? Oh, I’m talking about time again! Write your opinions in the comments.

Posted on 8 Comments

Announcement of winners

Announcement of winners contest for the best name of my new doily. Competition for masters and tatting fans. What is the name of my new doily?

Best name for tatting doily

Thanks so much to all the participants! You came up with a lot of great name options for my new doily.
Lot determined the winner! You can see the video report on my YouTube channel: https://youtu.be/vJwnjKz3RT4

So, the winner is Joan Thomas! My doily got the name “Honeycomb”! Joan receives a FREE doily “Honeycomb” tutorial. And also Coupon Code 30% discount on all patterns in my store. https://fairylace.kozinenko.com/product-category/patterns-tutorials/patterns-and-tutorials/
The first 10 participants receive a Coupon Code 30% discount on all patterns in my store. https://fairylace.kozinenko.com/product-category/patterns-tutorials/patterns-and-tutorials/

  1. Michele ;
  2. Wally;
  3. Isabella;
  4. Dawn;
  5. Connie Lewis;
  6. Andrea Fruggiero;
  7. Michelle;
  8. Mary G Chandler;
  9. Sarah;
  10. Helga.

I really liked ALL the names! Of course, I could not ignore all the participants. Therefore, I give the Coupon Code 20% discount on all patterns in my store for other participants.
Your prizes will be sent to everyone by e-mail registered when participating in the competition. Check ALL folders, please. My message may go to the spam folder if you have not added me to your contact list.

So, the Announcement of winners has taken place. I thank all the participants and congratulate the winners!

Subscribe to my blog. Because you will find many interesting things.
Join me on social networks.

Posted on Leave a comment

Tatting curl

Tatting curl. How to make curl in beginning work.

Hello everyone! I recently made a new pattern for tatting earrings ” Valentine “. By the way, now you can buy any pattern at a discount 10%. Use coupon code: OFF10HAPPYPATTERN

https://fairylace.kozinenko.com/product-category/patterns-tutorials/patterns-and-tutorials/

Tatting curl

I used curl in these earrings. After posting to the FB, you asked me how to do this.

So I decided to tell you more about how I make curls. There are several subtleties. Take my advice. And then your curls will look perfect!

First trick

You must try to ensure that all nodes are strong enough. Do you know that you can determine the nature of a person by nodes? Yes, psychologists know many tricks to analyze us! If your nodes are very strong, you have a solid and even somewhat tough character. If you make free knots, then most likely your character is soft and calm. Please write in the comments if your nodes match your character! It is very interesting. Because my nodes even depend on my mood, yes! Oh, I’m a little distracted! So, tatting curl. What you need for a perfect curl. Firstly, try to make your nature very solid at this moment 🙂 The stronger the knots you tie, the better it a curl will hold the form.

Second trick

We start tat with a chain sometimes. Of course, it depends on the pattern. In this case, it is convenient to use a paper clip. But for curl, this does not work absolutely. Because you get a weak knot at the beginning of the curl after disconnecting the paper clip. What to do? I take a small piece of thread. How it works, check out my video. This my video shows three methods of tatting, as usual: tatting with a shuttle, tatting with a needle and cro-tatting. You can easily and simply make a curl at the beginning of weaving. https://www.youtube.com/watch?v=P0zrZP-a6dQ


Subscribe to my blog. Comment and ask questions. I will be happy to help with tips! Welcome!  https://fairylace.kozinenko.com/blog/