Posted on 2 Comments

Molds and epoxy resin

Two 100ml clear bottles of epoxy resin and hardener, each decorated with a small tatting lace flower — materials ready for making resin items, handmade by FairyLacefromElena.

Molds and epoxy resin. Where to buy and how to choose supplies for your creativity.

Hello everyone! Happy Holidays are over. I hope you had fun like me! But it’s time to get back to work. You asked me a lot of questions after a series of my posts about tatting in resin. The most common question: where to buy molds and resin? Therefore, I am returning to this topic today.  

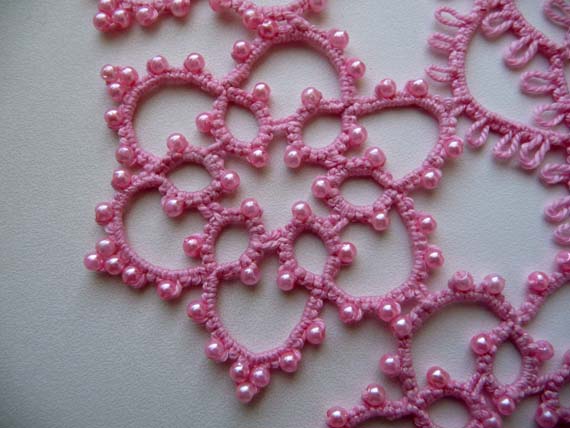
So, I wrote which molds I use (check out my post on December 2, 2019). https://fairylace.kozinenko.com/2019/12/02/tatting-in-resin-part-2/

Molds

However, it is difficult for me to indicate the store where I bought these supplies. Because it is impossible, alas! Of course, I buy all these materials in online stores. After all, it is convenient and fast. But you have to choose yourself where to make a purchase. I hope my reasoning helps you.

Molds and epoxy resin

So, I do as follows. First, I select the appropriate molds for my project in internet, then I look for a store on Ali Express (this is not an advertisement !!!). I try to buy everything I need from one seller. In this case, good discounts are obtained. I also choose free shipping. Many sellers have this option. But there is one drawback. The package shipping on for a long time, almost a whole month. However, I am very patient! Haha It is more difficult to choose suitable molds in Ukrainian online stores (I live in Ukraine, do you know?). Because the assortment here is not so diverse. And the prices are undeniably higher. But the plus is that for a minuscule fee I get the package in 2-3 days! This method I choose when I do not have time and patience to wait 🙂

Resin

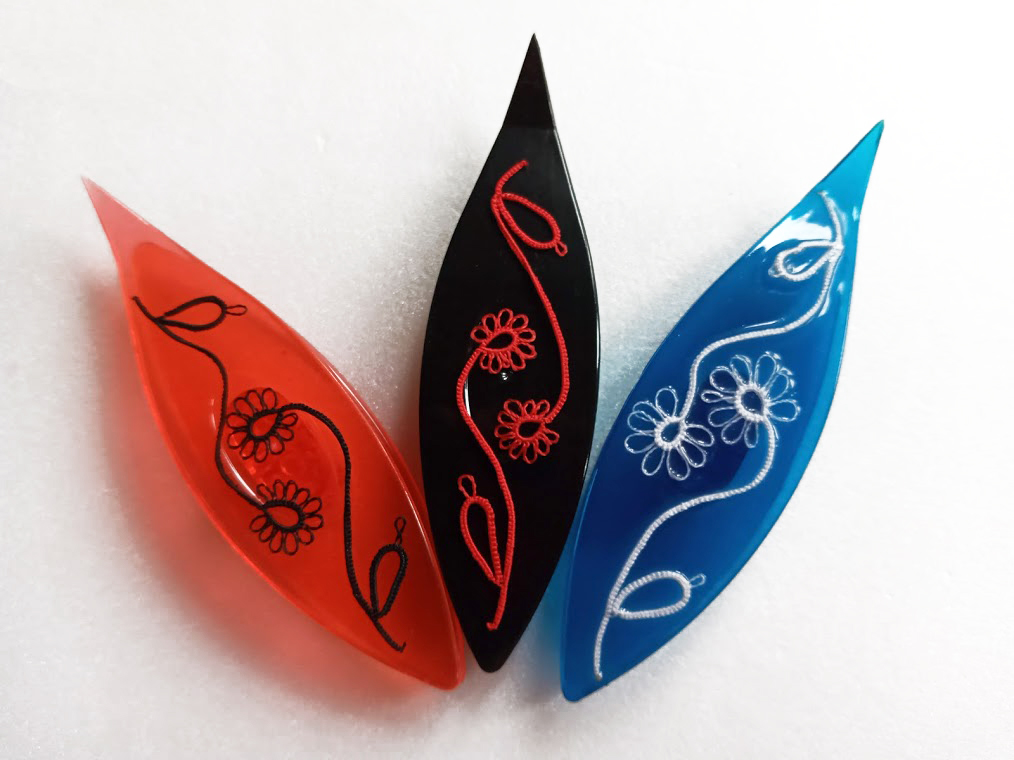
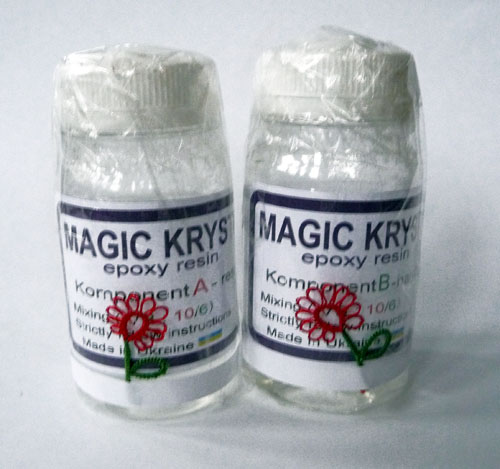
I can talk for a long time and in detail about the resin that I use! Imagine, I tried several types of resin from different manufacturers. Also, I ruined a whole liter of resin before I got a good result. In the end, I found the best combination of quality, price and delivery speed. For me at least. 🙂 This is Magic Crystal resin. This modified resin is made in Ukraine. Employees of the “Institute of Binders and Adhesives” are talented and experienced specialists. I am proud of my compatriots! This is a link to the official website of the company. I am sure you will like it. https://silicone.prom.ua/

In conclusion, I want to report on the next post. Attention! I am planning a prize draw for Valentine’s Day. You have a chance to get this sweet heart from FairyLace. To do this, be sure to subscribe to my blog and stay tuned. Soon, soon, soon!

Posted on 8 Comments

Additional tools for tatting

Pink tatted lace doily fragment with beads instead of picots, handmade lace, inspired by Yusai Shokoin, by FairyLacefromElena

In a previous post, I told you about how to choose tools for tatting. I hope you made a choice, and my experience has helped you! https://fairylace.kozinenko.com/2019/10/18/how-to-choose-tools-for-tatting/ Today we will continue this topic. So I promised to talk about additional tools that I use for tatting.

Scissors

First, you will need scissors, be sure! Oh, how hard it is to control yourself! There are an infinite number of different scissors, and almost all of them are really beautiful. But believe me, it’s enough for you to buy one or two scissors, this is quite enough (you can three … ha ha!). And it is better to choose small scissors with short blades.

Knitting markers

Secondly, knitting markers. You can use paper clips. I often take paper clips, they are thin and do not make large “holes” at lace.

Sewing needle

Thirdly, a sewing needle is useful. It is better to choose a thin needle with a wide eye. Nobody likes to hide the ends of threads after weaving, but … we have to, right? I’m sure, if you have a “strong character” and you tightly tighten the double stitch , so you will need pliers ( very small !)! Check out my video on how to use pliers, welcome. https://www.youtube.com/watch?v=HKBg6xUGZL8&t=939s

Hooks

Fourth, do not forget about the hooks! You may have chosen shuttle with hooks, or tatting needles. It is wonderful! But three or four crochet hooks are very useful. Take different sizes of hooks for different thicknesses of threads. Hooks will help when connecting weaving elements. Very good hook for working with beads. I bought the most thin that I found.

Needle threaders

Fifth, stock up on needle threaders. You can take the simplest. With my poor eyesight, the needle threader is an indispensable helper.

Picot gauge

Sixth, for beginner tatters (and for experienced ones too), a templates for picots is very necessary. You can take a “tatting needle and picot gauge”. But I do not like bulky tools. I use homemade cardboard templates. You can make them as many as you like, any width and length!

Thin wire

Seventh, I have another “magic” instrument – an ordinary very thin wire. With its help, the variant of leaves (cluny) is woven. And the wire can be used as a hairpin when stringing beads and beads on a thread.

I am sure that each craftswoman has her favorite additional tools for tatting. Tell us about it in the comments, please. Subscribe to my blog. Comment and ask questions. I will be happy to help with tips! And of course, do not forget to visit my store, welcome! https://fairylace.kozinenko.com/

Posted on 4 Comments

How to choose tools for tatting

Red, black and blue tatting shuttles decorated with miniature lace flowers under resin, handmade by FairyLacefromElena

How to choose tools for tatting? An important question, isn’t it? But first ask yourself what type of tatting you want to do. Choose shuttle tatting , needle tatting or cro-tatting. I wrote here details about the three types of tatting : https://fairylace.kozinenko.com/2019/09/20/three-types-of-tatting/ Now let’s talk in detail about each instrument.

If you chose to shuttle, buy 2 pieces to get you started. At first this will be enough for you. Which shuttle is better to choose? I do not know! Each tatters decides for herself what she likes best. But I will share my experience of weaving with different shuttles.

1.Tatting Shuttle

Tatting Shuttle with hook and bobbin is very attractive. They combine a hook and a shuttle. It’s comfortable. Because it takes less time to connect the elements. And you can easily thread wound on the bobbin. But the plastic bobbin break very soon and stop being fixed in the shuttle. The thread unwound and you need to fix the thread with your fingers when tying knots. And hook can break off, alas.

The most popular are plastic shuttles “with spout”. These are my favorite shuttles. They come in different sizes, different colors, different quality of plastic … The choice is diverse! But you must use a crochet hook if you want to achieve a very close connection between the elements. Because the “spout” can stretch a small picot.

Also it is good to use classic shuttles, but with the crochet hook too.

Wooden tatting shuttles. I have cherry wood and golden oak. Very beautiful, light, comfortable. You can buy shuttles from any tree, even exotic ones. Wooden shuttles are more expensive than plastic shuttles, of course. But they are worth it, believe me!

I do not recommend using metal shuttles. They are heavy, the hook is uncomfortable. Very quickly, the latch on the case broke. Not subject to repair. I had to throw it away. Maybe I’m just out of luck?

2. Tatting needle.

If you have chosen the type of tatting with a needle, pay attention to two attributes. First, the needle should not thicken at the end. This will help to make the weave more dense, not stretch the knots. Secondly, the needle should not be sharp so as not to puncture or scratch your fingers.

And in some cases you will have to use a crochet hook to make the perfect connection of the elements. I have never tried wooden needles. But I’ll think about buying them, maybe. And then I will share with you my experience.

3. Cro-tatting.

Tatting hooks are special. Do not try to use ordinary hooks for crocheting. Take a closer look, see the difference?

In my opinion, the most convenient hooks for tatting are Takashimabari hooks.

I hope this post will make it easier for you to choose tools for tatting! Next time I will talk about additional tools that I use when weaving.
Subscribe to my blog to stay updated. https://fairylace.kozinenko.com/blog/
Share your experience in choosing tatting tools in the comments, please. It will be interesting. See what you can do with the right tatting tools: https://fairylace.kozinenko.com/

Join me on FB:https://www.facebook.com/kozinenkoelena

Posted on 4 Comments

Cute tatting ring, final.

Easy pattern for cute tatting ring from FairyLacefromElena

I shared a master class how to make a cute tatting ring in a previous post https://fairylace.kozinenko.com/2019/09/27/free-tatting-pattern-how-to-make-cute-tatting-ring/
and thank you, dear friends, for comments, subscriptions and suggestions. Your support helps me improve my blog and store!
So subscribe to my blog. Comment and ask questions. I will be happy to help with tips!

At your request, today I will tell you in detail how to stabilize the lace ring. This is my personal experience, and you can use other methods.

So our ring is woven.

Then prepare a fixing solution. It can be a mixture of PVA glue and water, a sugar solution or gelatin. I do not recommend using sugar. Products impregnated with sugar solution look attractive, of course! But these products cannot be washed – sugar is absorbed into fibers and threads can crumble from water. Believe me, I saw it with my eyes!
I do machine embroidery, so I have a lot scraps of soluble stabilizer. I take several pieces of the stabilizer, dip them in a glass bowl and pour warm water on it. The solution is ready!

After that measure the thickness of your finger ( my finger in thickness 5,5 cm). Find a template of the appropriate size. You can use the ring sizer. But I found a plastic pipe with a diameter of 5,5cm (in garage of my husband! ) . This is what I need!

Next put the ring on the pipe. Use a sponge or a piece of cotton wool to apply the solution to the threads, giving the ring a pipe shape. Soak the threads well, pat the excess solution with a dry cloth.

Leave to dry. If you need fast, use a hairdryer!

After complete drying, the ring can be removed from the pipe. Be careful, not pull the ring so as not to deform the shape. Holding the ring with your right hand, rotate the pipe. Your lace ring is ready!

And finally one more trick! You can wash the ring by putting it on this pipe. First, soak the ring with soap and water using a sponge, and then rinse the soap with warm water. You do not have to straighten out each picot, sponge and pipe will do it!

Welcome in section Patterns of my store: https://fairylace.kozinenko.com/product-category/patterns-tutorials/

And, of course, I will be glad to meet on my YouTube channel: https://www.youtube.com/@ElenaKozinenko

Posted on 6 Comments

Tatting with beads and little trick

The photo shows white and blue earrings with beads next to red gladioli. Lace tatting earrings #FairyLacefromElena

Tatting with beads – a great way to decorate lace. Tatters are very creative masters. Do you agree? To create lace products, not only threads are used. For the realization of new ideas, tat-artists often use unexpected materials. For example, looks great tatting patterns with zigzag ribbon.

Else beads, rhinestones, and cabochons are relevant additions too. The desire to realize new ideas inspired talented artists to create new techniques in tatting. Angelina Rozanova, her daughter Ekaterina (Rina) Stepnaya and Anjella Safonova is talented masters and autors ANKARS tehnique. At present the works of ANKARS masters look further removed from tatting than at the beginning (some twenty years ago), and the difference lies in technique: innovative methods, new elements, and a new approach.
Nina G. Libin connected in new art form two elements widely used since ancient times – Beads and Knots . This is tehnique BEANILE .

I love tatting with beads too. Some projects cannot be imagined without beads. For example, this collar for dress. I called it “Sea glass.” Whimsical Pattern reminds me Whirlwind of Sea Waves. White Beads shine in the Sun.

Detachable blue collar necklace for Dress Sia Glass

I sometimes use beads with thin holes in my projects. It is difficult to put such beads on a needle with thread. Doubly folded thread does not pass through such a little hole. Maybe my little trick comes in handy. 🙂

You will need: PVA glue, scissors and 5 minutes of your time!

First step :

soak the end of the thread with glue.

Second step:

gently spread the glue over the thread, as if forming a needle.

Third step:

Hang the end of the thread vertically and allow the glue to dry (5-10 minutes).

Fourth step:

Cut the thread obliquely, imitating the tip of the needle.

Fifth step:

Carefully string the beads onto a thread, using the end of the thread as a needle.

So, voila! We are ready to create lace masterpieces!

Subscribe to my blog. Comment and ask questions. I will be happy to help with tips!

So, you want to buy a collar pattern “Sea glass”? Welcome: http:// https://fairylace.kozinenko.com/product/sea-glass-collar-necklace-tatting-pattern/

And finally, I invite you to my YouTube channel. I hope you will enjoy!https://www.youtube.com/watch?v=3U-z6wuzX08&list=UU3dn4_9pp7tIKA2k564wLBQ

Posted on 12 Comments

Three types of tatting

The photo shows three types of tatting tools: shuttles, needles, and hooks. The photo illustrates a blog post by FairyLacefromElena.

I have been tatting for over ten years and mastered well enough (I think 🙂 three types of tatting! A long time, right? I am happy to share my experience with beginning tatters.

Tatting is a technique for handcrafting a particularly durable lace from a series of knots and loops. There are three types of tatting : shuttle tatting, needle tatting and cro-tatting.

The first type:

Tatting with a shuttle is the earliest method of creating tatted lace. Historically, it was a metal or ivory pointed-oval shape less than 3 inches (76 mm) long, but shuttles come in a variety of shapes and materials. Shuttles often have a point or hook on one end to aid in the joining required in the construction of the lace. This method has a lot of possibilities and tricks. For example, shuttle tatting is good for making jewelry.

The second type:

The second type of the three tatting methods is the needle tatting . Use of the tatting needle became widespread in the 20th century. This method is good for creating large products. In my opinion it is easier to learn and faster. The result is similar to shuttle tatting but is slightly thicker and looser.

The third type:

Cro-tatting combines needle tatting with crochet. The cro-tatting tool is a tatting needle with a crochet hook at the end. In modern patterns, beginning in the early 20th century, the rings are tatted and the arches or chains are crocheted. Many people consider cro-tatting more difficult than crochet or needle tatting.
Cro-tatting is popular in Japan.

To show some tricks of these three methods, I made some videos. Welcome! https://www.youtube.com/channel/UC3dn4_9pp7tIKA2k564wLBQ/videos?view_as=subscriber


Subscribe to my blog. Comment and ask questions. I will be happy to help with tips! Welcome! https://fairylace.kozinenko.com/blog/