Posted on 2 Comments

Embroidered Quilt

Embroidered quilt size 2.20 x 2.20 m.

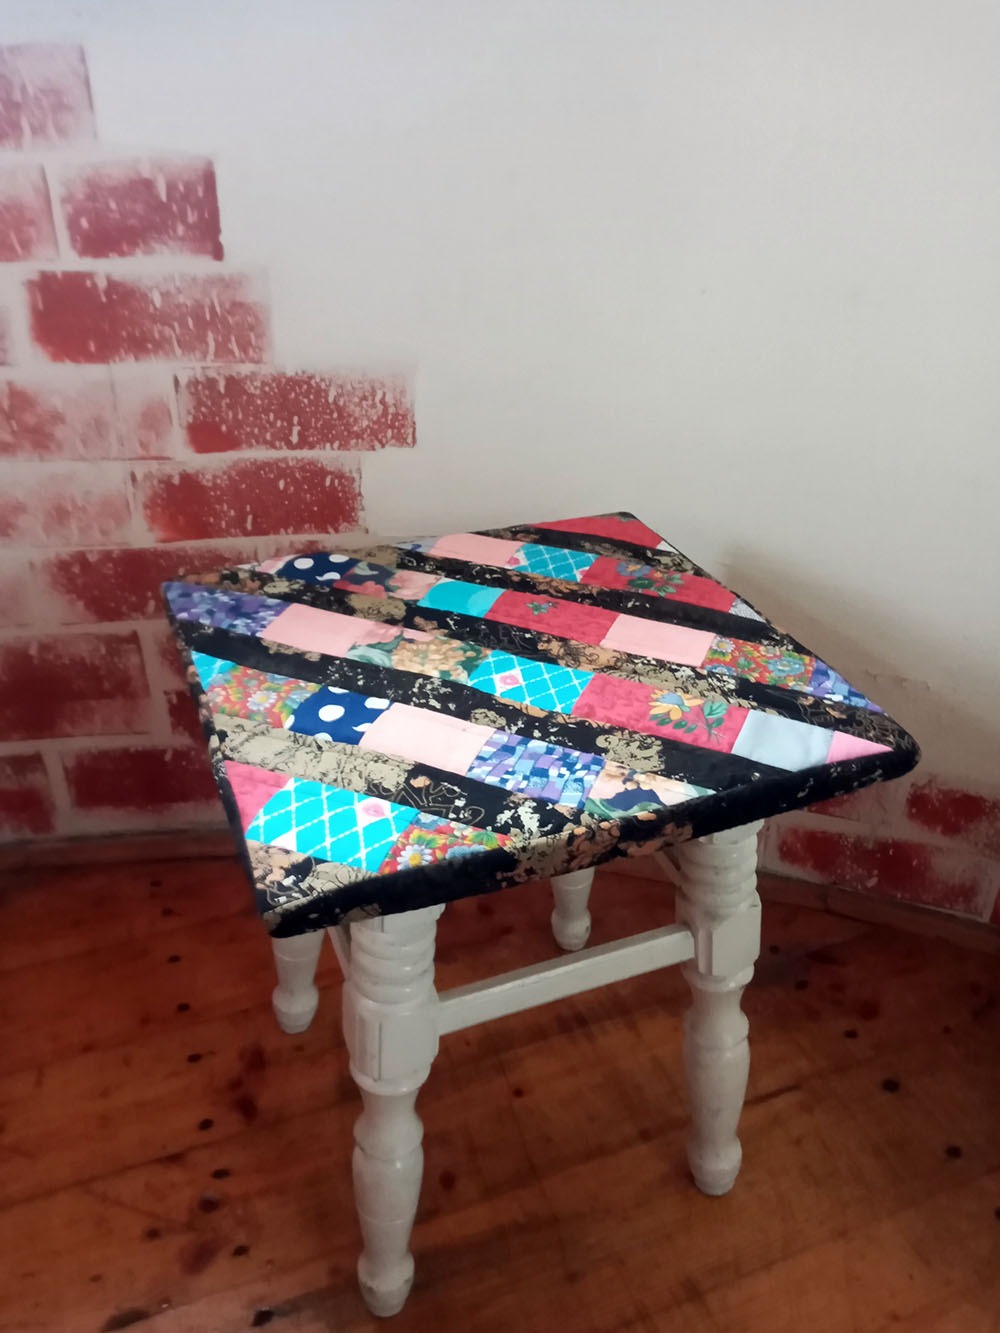
Embroidered Quilt, or recycling old clothes into beauty.

Hello everyone! I have posted several videos on my YouTube channel showing how I make an embroidered quilt. It is a lot of work, but I hope the results are worth it! So, first I cut up 2 old coats, 3 jackets and 2 pants. I cut out squares and embroidered each one. Of course, I couldn’t have done it without my amazing Bernina sewing and embroidery machine!

You can watch this series of videos and follow the sequence of my work. https://www.youtube.com/watch?v=88-aBxhKIs4&list=PLmUVrN61lH3yBsE8IWUzG70p9-jiLNQp7

7 bloks for embroidered quilt

Finally all 121 blocks are embroidered. It was very difficult for me to choose the patterns for embroidery, because I have about 100 designs for embroidery blocks. In addition, on my machine you can combine different patterns together. So the options can be endless!

Now I can start connecting the blocks into strips. This method of joining is often used by quilters.

Embroidered quilt 1

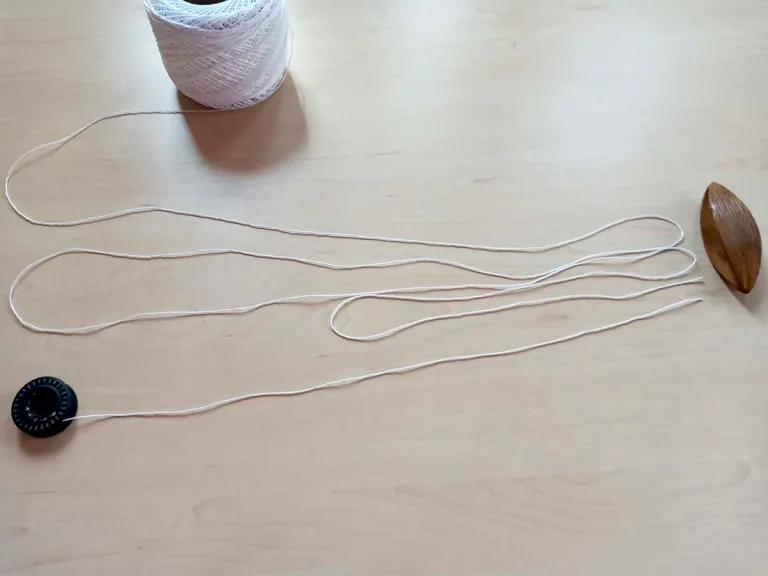
The first step is to place together the embroidered block, the lining, the folded strip for the back side and the strip for the front side.

Embroidered quilt 2

Sew together. I use a seam guide when sewing to ensure that all seam allowances are the same and perfectly even.

Step two is to press the seam. I use a special mini iron. It saves time ( Of course, because I don’t have to get up and go to the ironing board every time ) and helps to achieve a perfect result!

Step three is to stitch the second block with the lining. And be sure to iron this seam.

Step four – sew close to the on the front side, catching the strip on the back side. To avoid having to baste each strip by hand before sewing, I also iron this strip. To avoid having to baste each strip by hand before sewing, I also iron this strip with my small iron.

Step five is a decorating stitch. I chose “Home Sweet Home”. I think it will add coziness and “cuteness” to my quilt. It will also strengthen the joints of the blocks.

Every block I sew brings me closer to finishing the work! Wish me patience and good luck!
And also comment and subscribe to my blog! https://fairylace.kozinenko.com/blog/

Posted on 4 Comments

Organization of space in the craft room

Organized craft room storage with shelves, boxes, and creative workspace

Organization of space in the craft room, or how to store thread supplies.

Hello everyone! Today I organized my polyester thread supplies. I do this periodically. For some reason my thread supply is not decreasing. I think it’s due to frequent visits to the craft store. Ah, my willpower does not work at all when I see beautiful threads, fabrics, beads, accessories… (the list goes on and on!). I’m not a shopaholic, I’m a collector!

Of course, like any master, while working in the studio I have “artistic chaos”! But after finishing the project, I return the tools and the remaining supplies to their places.

Organization of scissors in the craft room

These are not surgical instruments, these are my scissors! (the photo is old, so now there are a little more scissors).

I hung the most frequently used ones on the “scissor tree”! My handsome husband made this organizer for me. The rest of the scissors are in the box. On the shelves in boxes are accessories for jewelry, needle shuttles and hooks for tatting, and various small items.

Organization of threads in the craft room

Sewing threads are always in place. Two organizers for small and large spools were made for me… You already know who!

I store large balls of cotton thread in two wicker baskets. It’s better to put each ball in a plastic bag, so they don’t collect dust.

I always have a problem with polyester balls. These are the threads I use most often in my work. For example, I made this set of bookmarks from polyester threads in all the colors of the rainbow. https://fairylace.kozinenko.com/product/bookmarks-chakras-tatting-patterns/
At first I put the balls in a basket, then I decided to use a plastic container with a lid. But such storage is very inconvenient. And besides, the threads get tangled and intertwined unless I secure the tail of the thread with a piece of tape (and I sometimes forget to do this). It takes a lot of time and patience to unravel this mess!

While making my next thread purchase, I received two transparent thin plastic boxes from the store. They are not very convenient for storage because they are fragile and soft. But I have a large roll of cardboard and skillful hands! (Is it okay that I’m bragging, LOL!?)
I made four cardboard boxes. Each box holds 10 balls. And two plastic boxes magically became four lids. Now each ball lies in its own “nest”. I don’t have to search for a long time for a ball of the right color, because I can see everything through the transparent lid. But I still have some balls left in a white plastic box. I think I need to buy more thread with a clear box…

Do you also praise yourself when you organize your supplies? Or are your threads always in perfect storage? I will be very interested if you share in the comments how you organization of space in the craft room.

Join me on social networks and also subscribe to my YouTube channel, welcome: https://www.youtube.com/c/ElenaKozinenko

Posted on 7 Comments

Mission impossible

Hearts from used men's ties in patchwork technique recycled

Mission impossible, or the suffering of a perfectionist.

Hello everyone!  Today I want to tell you how I created a small heart with great love. Because for painstaking work, you really need to love your craft, the people for whom you create your products and nature, if we want to save our Earth.

So, I once again decided to “recycle” at least part of my supplies. Because I realized that my craft supplies are filling up faster than I’m using them. I’m sure many craftswomen will understand me! Now it’s the turn of old men’s ties. Oh, I have a collection of about 50 pieces! And I decided to sew small hearts. I counted four reasons to do this. Firstly, it will free up space in my workshop. Secondly, I will give a second life to things (recycling helps us conserve natural resources). Thirdly, no one will wear these ties because they are out of fashion. And fourthly, it’s just beautiful! Oh yes, there is a fifth reason. I don’t like doing the same thing over and over again. So I decided to turn on my imagination 200%! After all, I can change color combinations, finishing stitches, and patchwork patterns as I please.

And then I realized how difficult it is to work with thin small pieces of silk. The edges of the patches literally form a fringe. The fabric “flows” between the fingers. The texture of each tie differs in the interweaving of fibers and density. In other words, “mission impossible”? It looks terrible. Calm down, don’t panic! By the way, I watched all 5 films with Tom Cruise and came to the right conclusions, LOL

Through trial and error, I found an algorithm of actions that led to an almost ideal result.

FIRST STEP

impossible task

Open and iron ties.

SECOND STEP

This is the most pleasant and at the same time the most crucial moment. You need to select the necessary components. Three ties and a piece of matching felt, polyester thread for embroidery, cotton thread for sewing and thread No. 10 for knitting. If all this does not combine well, the result will not please us.

THIRD STEP


Embroider words on felt. I liked “From Ukraine with Love”. It sounds beautiful and conveys my feelings.

FOURTH STEP

Cut the ties into strips and assemble the patterns.

FIFTH STEP

Sew all seams. I used a special clear sewing foot to ensure that the seams ran parallel to the pattern on the pieces of fabric. By the way, in order not to “sew on my fingers,” I use a wonderful tool – a thimble (I don’t know what it’s called correctly). Very convenient and safe!

SIXTH STEP

For the hearts, I made a transparent template from plastic. I cut out the hearts and felt according to the shape of the template with an allowance of about 1 cm on all sides. I glued an embroidery stabilizer to the reverse side of the silk piece with an iron. Alas, it later turned out that this was not enough! So I first applied double sided fabric tape around the edges and then added embroidery stabilizer.

SEVENTH STEP

the mission is possible with the right tools

Now you need to make finishing seams at all joints. It’s so good that my wonderful Bernina performs 1131 decorative stitches! But at the same time it makes it difficult to choose, haha! By the way, I used a special foot to help me stitch exactly into the seam.

EIGHTH STEP

Now you can finally connect the silk piece with the felt lining.

NINTH STEP

mission assistance

This stage consists of several operations. First you need to trim off the excess fabric and felt very close to the stitching. Then sew a medium-density overcast stitch along the edges. If the result is not very good (and I am almost always unhappy!), use a lighter to burn the edge. Here you need to act very carefully so as not to spoil the main fabric and threads. I also had to make sure that my assistant didn’t burn his paws with a hot lighter!

TENTH STEP

Sew an overlock stitch along the edge one more time. But this time the seam must be very tight to get a perfect edge.

ELEVENTH STEP

All that remains is to crochet the cord, tie a bow and sew it to the heart. Of course, you could just take a satin ribbon. But I think a handmade knitted bow gives the composition a special “cuties”!

I liked the first result so much that I decided to make several options. I’m sure no one will say that this “mission impossible”! I hope you like my idea. Ready-made hearts are available in my store: https://fairylace.kozinenko.com/product/from-ukraine-with-love/

Mission impossible
Mission impossible
Posted on 2 Comments

What is cro-tatting

Yellow jewelry set of earrings and bracelet in the Cro-tatting technique

What is cro-tatting, or do tatting masters deserve poems?

Hello everyone! I want to say Wow! No not like this. Wow Wow wow! This is my cry of joy and pride. And we especially need these positive emotions in this terrible time.

I want to thank the editor of Simply Crochet magazine Alison Maney ( link to the magazine website: https://www.gathered.how/magazines-simply-crochet/ ) and blogger Rebecca Parker ( https://beccaparker.journoportfolio.com/ )for their support and help in popularizing cro-tatting. Of course, it was very difficult for me to talk about such a rare, but very interesting type of tatting in a short interview. Because I am equally passionate about three types of tatting and am ready to talk about them for a Thousand and One Days (almost like Scheherazade!). Besides, I always forget that brevity is the sister of talent, LOL!

By the way, the article is called Crochet’s Quirky Cousins. You can read about Tunisian, Bosnian crochet and cro-tatting in this article. And also look at photos of the works of talented masters of their craft. You’ll understand why I’m proud. After all, it is a very honor to be in the company of such talents! Also I hope my subscribers recognize photos of my work!

Magazine pages with my cro-tatting works

What is cro-tatting
What is cro-tatting

I am also glad for this publication because cro-tatting is undeservedly deprived of attention from tatting and crochet masters. So, how can I briefly say what cro-tatting is? This is a symbiosis of crocheting and needle tatting. And it would be fair to put this type of lace making on a par with the rest of its sisters! Do you agree?

And not just publications in magazines. But also poems should be written about tatting! Agree, the lines from Guido Gezelle’s ode to a lacemaker sound very beautiful. “I love to watch you making lace…” I was very interested to learn about the work of this unusual author, a monk who wrote poetry in the Flemish language. And then I thought, maybe there is a poet who will glorify the masters of the shuttle, needle and hook? Alas, I do not have such talent. But for now I can shoot a video where you will see the beauty and grace of this wonderful type of needlework! https://www.youtube.com/c/ElenaKozinenko

I always welcome your comments. Follow me on social networks. And don’t forget to check my store, welcome! https://fairylace.kozinenko.com/

Posted on 8 Comments

Results of the competition

Results of the competition for the best doily name, or how the wrath of injustice is for us to live.

Hello everyone! The competition for the best name for my new doily is over.
I am eternally grateful to all participants for their extraordinary creativity and activity!
Alas, my holiday mood was very spoiled today. One of the members of the FB group accused me of quackery. She wrote in several groups that I was a liar and was not giving away any prizes. How can you be so unfair? After all, this lady didn’t even try to take part in the competition. I was upset and very offended.
I hope you can share some positivity with me and I will feel better. Please forgive me for being too emotional. Alas, I could not come to terms with such injustice.

Of course, I couldn’t choose one option from the many most unexpected, most imaginative and most beautiful names! You are extraordinary! Thank you very much for your creativity, imagination and support of my blog! I really liked absolutely ALL the options! So I resorted to drawing lots. And I made a short video report. You can watch on my YouTube channel how I chose the winner: https://www.youtube.com/watch?v=03JPh1vhfjM&list=UULF3dn4_9pp7tIKA2k564wLBQ

So, Results of the competition!

The winner of Connie’s competition with the name for doily Galaxy Flower. Congratulations!
I send her the pattern by email.
To celebrate all participants of the competition, I am providing a 30% discount coupon for the purchase of this pattern to ALL participants. Please check your emails.

Now the doily pattern with a wonderful name is available in my store, please check it out! https://fairylace.kozinenko.com/product/galaxy-flower-tatting-pattern/?removed_item=1
Thank you again for your active participation and support!

Follow my blog because I am planning some more contests with exciting prizes!

Posted on 2 Comments

Once I caught a fish alive

Once I caught a fish alive

Once I caught a fish alive, or how to quickly and easily wind the threads in several layers.

All plans go to hell when the air raid signal goes off…
It scares me terribly. Because the consequences of the bombing are always unpredictable and terrible. And every time I seem to crumble into small pieces. This is a very unpleasant feeling, believe me. Each time it becomes more and more difficult “to collect yourself as a whole”. But your kind words, your prayers and thoughts about me and my country help me.
Today, the third time, an air alert has been declared throughout Ukraine. Everyone get to cover now! I managed to shoot material for the video in my studio. And I can mount the video and write an article anywhere (even sitting in the basement, which I don’t have, unfortunately…).
Sorry for such a sad start. I thought for a long time if I could write about the war in my needlework blog. Tatting, sewing, embroidery, knitting, macrame, all my creativity is my life. But this terrible reality is now also my life, alas.

I caught a fish alive

So, I wanted to remind you of a nursery rhyme. Probably, in every language, children count one-two-three-four-five, read a poem or sing a song.

Once I caught a fish alive

One, two, three, four, five,
Once I caught a fish alive.
Six, seven, eight, nine, ten,
Then I let it go again.

Why did you let it go?
Because he bit my finger so.
Which finger did it bite?
This little finger on my right.

Surely you will be surprised and ask me: why a nursery rhyme? We’ve come to wind the threads! The fact is that winding threads in 2, 3, 4, 5 and even 6 layers is as easy as singing a song.

So, all you need is a ball of thread that you need to rewind, and an empty spool from the sewing machine. I was lucky, on my Bernina the bobbin reel is enlarged. Therefore, more thread is wound on this bobbin. I’ll be honest with you, I don’t like working with multiple layers of thread. But sometimes I just don’t have threads of the right color with the right thickness. For example, for jewelry set Danuta, I wound metal embroidery threads in three layers. The pattern for this set is available in my store: https://fairylace.kozinenko.com/product/tatting-pattern-set-danuta/

So, step one:

Wind the threads from the ball onto the spool. I do this on a sewing machine.

Two layers

It’s elementary, Watson! Two threads in one.

Three layers

I caught a fish alive

You only need a ball. Make a loop, forming three strands. Tie the end of the thread and loop to the shuttle. Gradually winding three threads on the hook, thread the ball of thread into the loop. Ah, I’m not sure I can explain clearly. Therefore, it is better to watch the video, please (link at the end of the article).

Four layers

In this case, you need to go back to winding in three layers and simply add thread from the spool. Thus, in one step you get 4 layers at once, hooray!

Five layers

 caught a fish alive

You only need a ball threads. We do the same as winding in three layers. But now we need two loops of different lengths. Oh, I won’t even try to write how to do it. And again, I suggest watching the video.

Accordingly, for six layers, you need a winding option for five layers plus one thread from the spool. And this “song” can go on forever!

I am very grateful to you for your patience! Now finally a link to the video. Don’t forget to subscribe to my YouTube channel. And also I will be very grateful for following my blog and comments. https://youtu.be/q53Ejc9gI60

Thanks!

Posted on 2 Comments

DIY fabric

Christmas Table Decor - Placemat

DIY fabric, or creating a unique pattern from pieces of fabric.

Hello everyone! I am very pleased to read your comments and feedback on my new work. Thank you so much to everyone who supports me during this difficult time!
You know that my first and main hobby is tatting. But there are still many types of needlework that I can do well (as it seems to me!).

DIY fabric

One of my favorites is patchwork. I’m sure you’ve heard of the pizza technique. Oh, it’s not about the food! Although I heard Italian housewives say: “I put everything I have left after dinner on pizza for breakfast in the morning!” Very economical and creative, in my opinion. So why not use practical advice in needlework ?! So, we use everything that remains from previous projects. And I used not only pieces of fabric, but also pieces of lace.

So, step by step we go to the ideal result. And I hope our pizza turns out “delicious” enough!

Step one

First determine the size of the placemat you need. I made 24×36 cm. Cut out a rectangle from the main fabric (I have it red-orange), adding 4 cm to the size of the placemat on each side. We also need rectangles of synthetic winterizer and adhesive double-sided interlining 24X36 cm. But you can make a non-woven rectangle 4 cm smaller. Also prepare a piece of 20X 32 cm from nylon, or mesh, or organza. It can be any fairly transparent fabric.

Ah, I almost forgot the most important thing! Prepare ANY pieces of fabric.

Step two

This step is the most exciting, I think. Here you can show all your imagination. Place fabric pieces on the non-woven rectangle as you like. No restrictions, no canons! You create a new fabric yourself. Remember you, I’m a fan of tatting? In the center I added a sample of one of my little lace projects. 🙂

Step three

Now gently “glue” the pieces of fabric to the interlining and synthetic winterizer with an iron.

Step four

Cover the resulting sample with a transparent cloth rectangle and secure with pins.

Step five

Put together all the layers of the prepared rectangles and quilt with a pattern that you like. It can be squares, circles, leaves, flowers. I chose a pattern that some craftsmen call “brains”. With the BSR foot, stitching becomes an absolute pleasure!

Step six

Forming the corners and borders. I plan to make a video on how to do it quickly, neatly and easily. So don’t forget to subscribe to my YouTube channel for updates. https://www.youtube.com/c/ElenaKozinenko

Step seven

Iron the finished placemats. And delight your family with a new dinner decor from the new DIY fabric! This way, your meals will be much tastier!

A set of such placemats can be bought in my store, welcome: https://fairylace.kozinenko.com/product/four-patchwork-placemats-surprise/?removed_item=1

Posted on 6 Comments

How to use fabric scraps

Stool pad from fabric scraps

How to use fabric scraps, or what I can do.

How to use fabric scraps

Hello everyone! If you follow me on social networks, you have seen my new work tatting. These are the seven bookmarks of the Chakras. Ah, making two orders in two weeks was not easy! Eyes and hands are a little tired. So I decided to take a break from lace and clean up my craftroom.

Fabric

I’m sure many of my subscribers own several types of needlework. Therefore, you know that it is impossible to put things in order in the workshop without destroying the “stocks”. But throwing away even a small piece of fabric is IMPOSSIBLE! Do you agree? So, I started with a big box of scraps. I had an idea and it took two days to implement it.

Ironed

First, I ironed all the pieces of fabric. Moreover, I did not select fabrics by texture or color, so as not to waste time.

How to use fabric scraps

Then I cut a lot of squares and rectangles. To speed up and facilitate the process, I used a patchwork ruler as a template. And I got the same width of all the pieces – 2.5 inches. By the way, the roller knife helped me to cope with this work wonderfully!

How to use fabric scraps

Then I sewed small pieces into long strips. Of course, all the seams must be ironed out. I thought that the connection of small pieces would be too colorful, so I prepared long strips of “zebra” fabric.

How to use fabric scraps

Now the fun begins! I sewed all the strips diagonally onto a base of light dense fabric and synthetic winterizer. I also stitched each strip, pinning the layers together. To adjust the fabric while sewing, I use an interstitial fixture. If you liked my special “thimble”, write in the comments!

How to use fabric scraps

And at the end of the work, I sewed strips of black dense fabric along the edges of the “variegated disgrace”. The result of my cleaning in the workshop: minus two bags of fabric scraps, minus two sheets of PVC, minus one old tablecloth, minus a bag of sintepon scraps and plus two empty boxes. You see the result in the photo!

So, I showed how to use fabric scraps. In addition to tatting and sewing, I own many other types of needlework. What kind of needlework do you do? Write about it in the comments, I’m very interested. Support my blog, subscribe and share on social networks, thanks!

Also visit my YouTube channel. Subscribe, comments and likes are welcome! https://www.youtube.com/c/ElenaKozinenko

Posted on Leave a comment

Tatting lace collars

White tatting lace collar with beads.

Tatting lace collars, or 2023 fashion trends.

Tatting lace collars

Hello everyone! Today I found an interesting article about collars on Wikipedia. And I want to share with you for sure! So:

In clothing, a collar is the part of a shirt, dress, coat or blouse that fastens around or frames the neck.
A collar may be permanently attaced to the main body of the garment (e.g. by stitching) or detachable. Oh, I love detachable collars! Because by changing the collars, you can get several different outfits from one dress!

Collars shapes

I also found a table on Wikipedia with the names and descriptions of 66 types of collars, wow! For example, a Peter Pan collar. But I’m sure you all know that collars name. Or, zero collar. This is neckline of shirt without band and collar. Or, zero collar. This is neckline of shirt without band and collar. By the way, it is on such a zero neckline that detachable collars look best.

By the way, you can use a brooch to fasten the collar around the neck. This will add even more chic and elegance to your image.

There is also a type of collar worn as part of clerical clothing called Clerical collar. I may be wrong, but it seems to me that the shape of chokers is very similar to this type of collar.

Also I find collar Pussy Bow very interesting and unusually feminine. This collar tied in a large bow under the wearer’s chin. Particularly associated with Margaret Thatcher in the 1980s. I was very surprised to learn this fact today. Because about 10 years ago I created a little collar with a little bow and named it Pussycat! Haha!

Collars material

I’m afraid you won’t have the patience to read a list of all the materials from which the collars were made.

These are the golden collars-necklaces of the pharaohs of Ancient Egypt.

Or the finest handmade lace in the collars of French kings. It’s a Medici collar.

Also a combination of silk fabric and the finest lace is used.
Nowadays, cotton, denim, guipure, leather various threads are used for collars. Add embroidery, embossing, beads. Of course, the list is far from complete!

In 2023, lace is back in fashion. Probably, not all ladies will want to wear a lace dress. But everyone wants to be at the peak of fashion, I’m sure! So be sure to add some lace collars to your wardrobe. Including tatting collars. It is for the manufacture of tatting or bobbin lace that threads are used. Because they are light and extremely chic.

Tatting lace collars for the dress

You can buy ready-made collars for every taste or make your own according to my master classes. Welcome to my store: https://fairylace.kozinenko.com/?s=collar&post_type=product

Please write your wishes, feedback and comments in the comments. To do this, go to the BEGINNING of the article and click the “Leave a comment” button.

I hope you enjoy my video on YouTube. Like and subscribe! https://www.youtube.com/watch?v=kbPXyJwRHFw&list=UULF3dn4_9pp7tIKA2k564wLBQ&index=45

And in conclusion, a small gift – a tatting collar pattern from Project Gutenberg’s Beeton’s Book of Needlework, by Isabella Beeton.

Posted on 6 Comments

Prayer for Ukraine

Blue and yellow Ukrainian flag waving in the wind, symbol of freedom and prayer for Ukraine, free Pixabay photo, uploaded by FairyLacefromElena

Prayer for Ukraine. My tears and pain are the pain and tears of all the mothers of Ukraine.

Hello, everyone!

I apologize for the “unlace” post. But I can’t be silent.
On 2022 February 24, Russian troops occupied Ukraine. That’s what all the media say. It is not true! Russia invaded Ukraine in 2014, taking over the Crimean parliament and establishing its own dictatorship. The whole world remained silent, believing Putin’s statement that he was “saving” the Russians living in Crimea. Vile lies! He was preparing a military base for an attack on the rest of our country. For the transfer of military equipment, the Crimean bridge was built.

For 8 years, Russian troops have been shelling our Donbass and Lugansk, killing our civilians and depriving them of shelter over their heads. But Putin said – there are no Russian troops there. This is an outright deception! Why did the leaders of European states and America believe him? This silence and non-resistance to evil led to a huge disaster – Russian troops invaded Ukraine. This is a real war. The whole world sees this, but Putin says – I was forced to attack Ukraine so that NATO would not attack Russia. It’s not just a lie, it’s nonsense!

NO WAR

And now the decisive moment has come when every inhabitant of the Earth must make a choice – choose his side. I choose truth, independence and freedom! I choose Ukraine!

Every inhabitant of my country helps the fight against the invaders. Not everyone has to take up arms. It can be a medical bag, a post on the Internet with the TRUTH, and financial assistance.

I will be immensely grateful to everyone who comments on my post, shares a link on social networks or makes a purchase of pattern in my store. Because I send part of the money I earn to support the Ukrainian army.

Welcome: https://fairylace.kozinenko.com/product/earrings-glory-to-ukraine-pattern/

Prayer for Ukraine! Glory to Ukraine!