Posted on 5 Comments

Blue and Yellow Tatting Doilies

Two Blue and Yellow Tatting Doilies made by FairyLacefromElena

Blue and Yellow Tatting Doilies, or vintage shuttle and modern meaning.

Hello everyone!🌸
Do you enjoy receiving gifts? You’ll probably say it’s a silly question — because who doesn’t love presents? 🎁 Oh, I truly adore them!

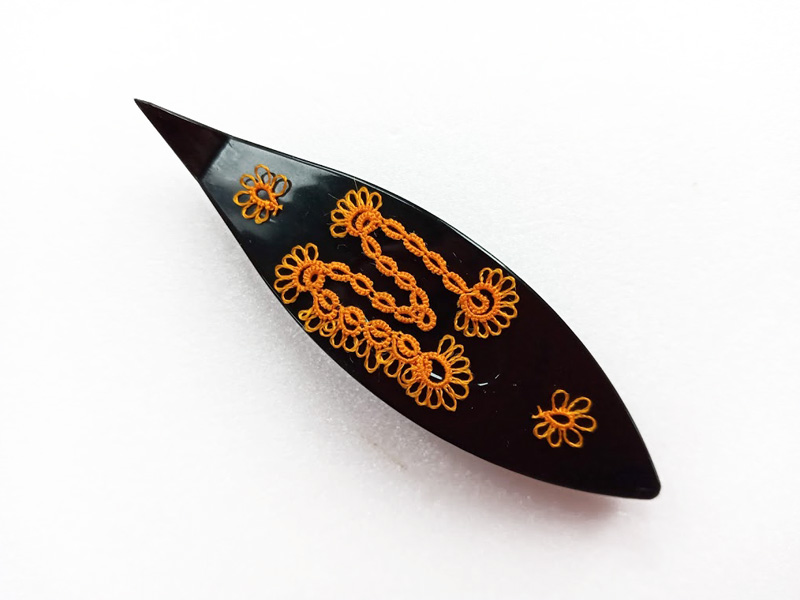
✨ Look at this absolutely amazing tatting shuttle that my dear friend Edna sent me as a gift! 💌 It has the name James Lees & Sons engraved on it.

The James Lees and Sons Co. was an American textile manufacturer founded in Bridgeport, Pennsylvania. The company operated from the early 20th century and specialized in producing yarn, carpets, fabrics, and accessories for handicrafts. In 1956, it was even listed in the Fortune 500, ranking 409th with a revenue of $71.3 million and 3,500 employees. 🧵🏭

But whether these tatting shuttles were made in very small numbers, or whether it was just too long ago, I couldn’t find detailed information about mine. 🤔
👉 If you know anything about tatting shuttles produced by James Lees & Sons, please share in the comments!

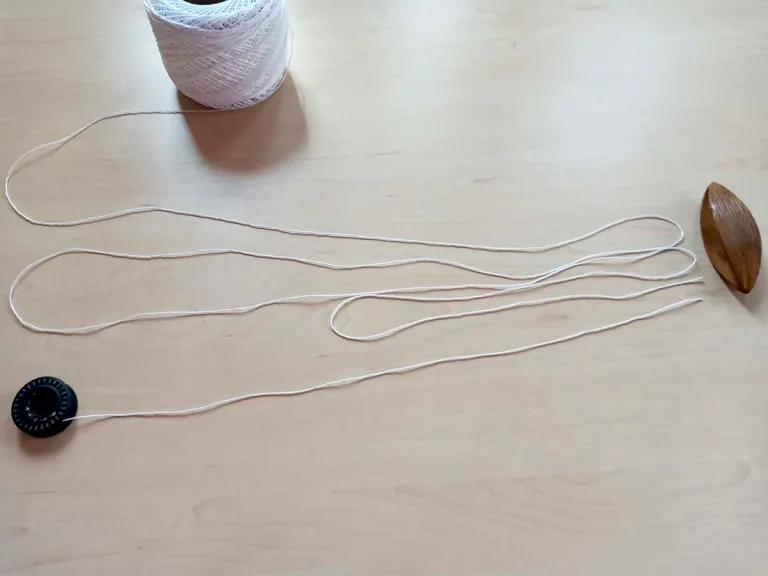
Of course, I couldn’t resist trying this shuttle in action. ✨ It feels so light, comfortable, and pleasant to the touch. Working with beautiful tools is pure joy — it turns every process into true creativity! 🎨🧵

The name of these Blue and Yellow Tatting Doilies

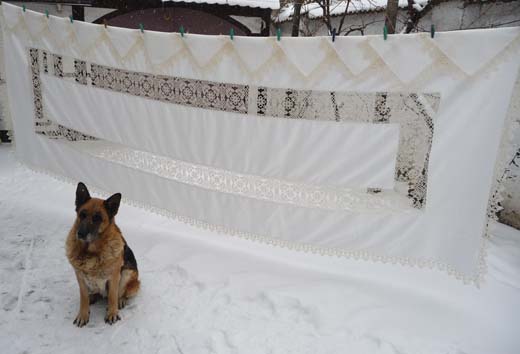
By the way, at the request of my dear friend Edna, I made three doilies with blue and yellow threads. You know that these are the colors of the Ukrainian flag. Two doilies are made according to my own pattern. 🧵Guess what I called this pattern? Of cource, I named it after a wonderful talented lady with a big heart, who constantly helps and supports me and my country in these terrible times. 🌷

Finally, I invite you to watch a short video where I demonstrate this shuttle: 🎥🧵 https://www.youtube.com/shorts/MbDO7qvsxB0

You can also purchase the Edna doily pattern and make not only Blue and Yellow Tatting Doilies, but also your own color version of this pattern! 🧶https://fairylace.kozinenko.com/product/doily-edna-tatting-pattern/

If you enjoyed this, don’t forget to subscribe, leave a comment, ask questions, or share it with your tatting friends! 💌
Happy tatting! 🧶✨

Posted on Leave a comment

Perfect tatting – part 4

Perfect tatting – part 4

Perfect tatting – part 4.

Hello everyone! This is fourth lesson in the series Perfect Tatting. You can read previous part here: https://fairylace.kozinenko.com/perfect-tatting-part-3/

Also my articles will be accompanied by video tutorials. I will add them to my YouTube channel.

Please write in the comments what subtleties you would like to know. Then it will be easier for me to make a lesson plan.

So, today we will talk about how to choose the shuttle size and needle thickness depending on the chosen thread.

TATTING SHUTTLES

Perfect tatting – part 4

I took a photo of four different shuttles and four different balls. Although in fact the size of the shuttle does not matter at all when choosing the thickness of the thread. Because, it all depends on your personal preferences and your convenience. The more threads you need to wind, the larger the shuttle you will take. Of course, this is logical. The same applies to beading. You will just need more space to fit more beads on the shuttle.

But you can tat with any threads, using only one shuttle.

PERFECT TATTING NEEDLES

With needles, everything is completely different. Because here the thickness of the needle is extremely important. The accuracy and beauty of your work depends on it.

I found this table on Pinterest.

Ideal tatting

So, this table was compiled and published in the FB group “Sparkling Light Creation Studio – Fibre Art by Gloria Nelson”.

I also found a classification of tatting needles on the website Handy Hands: https://hhtatting.com/product-category/tatting-needles/

Tatting Needles

The Handy Hands metal tatting needles are specially made to our specifications. Unlike sewing needles, these tatting needles are blunt, have a smaller eye, and are not tapered. They are made of steel and are nickel plated.
1.Yarn Needle 0-0 (chunky weight yarns)
2.Yarn Needle 1-0 (worsted weight yarns)
3.Yarn Needle 2-0 (Speed Cro Sheen and most 100% cottons)
4.Tatting Needle 3-0 (crochet cotton size 10, Pearl Cotton 5 and 3, Knit Cro Sheen and smaller yarns)
5.Tatting Needle 5-0 (crochet cotton thread sizes: 10, 20, and Pearl Cotton 8 and 5)
6.Tatting Needle 7-Fine (crochet cotton thread sizes: 50, 40, 30, 20, and Pearl Cotton 12)
7.Tatting Needle 8-Extra Fine (crochet cotton thread sizes: 100, 80, 70, 60, 50)

But there is one obstacle – the thickness of threads is marked differently by different manufacturers. And then it is difficult for us to use these tables. In this case, I suggest you choose the needle for your thread yourself.

I prepared 4 different needles and mercerized threads Madame Tricot No. 10 for the video. Unfortunately, I could not form a ring using the thinnest needle. So I had to choose from the remaining three options. In my opinion, the middle ring looks perfect!

The video is already uploaded on my channel, welcome: https://www.youtube.com/watch?v=JIXGclqrCgI&list=UULF3dn4_9pp7tIKA2k564wLBQ

Perfect Tatting – Part 4 is finished! Happy perfect tatting!
I hope my previous blog posts will also be useful and interesting: https://fairylace.kozinenko.com/blog/

Posted on 2 Comments

Perfect tatting – part 1.

Square tatting doily

Perfect tatting – part 1.

Hello everyone!  This article begins a series of lessons “Perfect Tatting”. Tricks, subtleties, error correction, new skills – I share my experience.

My articles will be accompanied by video tutorials. I will add them to my YouTube channel.

Please write in the comments what subtleties you would like to know. Then it will be easier for me to make a lesson plan.

Firstly, I want to emphasize that all the techniques that I will talk about are NOT MANDATORY to implement! Everyone has their own opinion and their own “handwriting”! But I will be glad if my experience is useful and interesting to you.

So, ideal tatting, part 1.

Recently I was asked an interesting question: is it necessary to tie the thread to the shuttle?
Look closely: there is almost always a small hole on the shuttle. What is it for?

I am amazed at the talent of the designer who invented such a shape of tatting shuttles. Everything is very logical, ergonomic and practical!

Perfect tatting.Part1.

If you do not secure the thread to the shuttle, you will have to press the thread with your finger. No big deal – you will say! I agree. But I weave a lot and often use nylon and polyester threads in my work. They look so beautiful in jewelry…

If the thread rubs the skin on your finger all the time, you will get a cut and a scar. Believe me, I know. It is very painful. Take care of your hands!

No injuries, no trouble! I guess I should have called this article “Safe Tatting”! LOL
I often see on video when tatters hold the shuttle thread with their little finger. Try “freeing” your finger. The shuttle is designed to be moved freely, like a space shuttle! And hold the shuttle with only two fingers. It looks very elegant, by the way!

And for a good mood I added a knot on a thread for a tatting needle to the video. Of course you will smile! A spontaneous knot is too much! https://www.youtube.com/watch?v=zS6yj9MYFUk

Perfect Tatting – Part 1 is finished! Thank you for your patience!
I hope my previous blog posts will also be useful and interesting: https://fairylace.kozinenko.com/blog/

Posted on 2 Comments

Once I caught a fish alive

Once I caught a fish alive

Once I caught a fish alive, or how to quickly and easily wind the threads in several layers.

All plans go to hell when the air raid signal goes off…
It scares me terribly. Because the consequences of the bombing are always unpredictable and terrible. And every time I seem to crumble into small pieces. This is a very unpleasant feeling, believe me. Each time it becomes more and more difficult “to collect yourself as a whole”. But your kind words, your prayers and thoughts about me and my country help me.
Today, the third time, an air alert has been declared throughout Ukraine. Everyone get to cover now! I managed to shoot material for the video in my studio. And I can mount the video and write an article anywhere (even sitting in the basement, which I don’t have, unfortunately…).
Sorry for such a sad start. I thought for a long time if I could write about the war in my needlework blog. Tatting, sewing, embroidery, knitting, macrame, all my creativity is my life. But this terrible reality is now also my life, alas.

I caught a fish alive

So, I wanted to remind you of a nursery rhyme. Probably, in every language, children count one-two-three-four-five, read a poem or sing a song.

Once I caught a fish alive

One, two, three, four, five,
Once I caught a fish alive.
Six, seven, eight, nine, ten,
Then I let it go again.

Why did you let it go?
Because he bit my finger so.
Which finger did it bite?
This little finger on my right.

Surely you will be surprised and ask me: why a nursery rhyme? We’ve come to wind the threads! The fact is that winding threads in 2, 3, 4, 5 and even 6 layers is as easy as singing a song.

So, all you need is a ball of thread that you need to rewind, and an empty spool from the sewing machine. I was lucky, on my Bernina the bobbin reel is enlarged. Therefore, more thread is wound on this bobbin. I’ll be honest with you, I don’t like working with multiple layers of thread. But sometimes I just don’t have threads of the right color with the right thickness. For example, for jewelry set Danuta, I wound metal embroidery threads in three layers. The pattern for this set is available in my store: https://fairylace.kozinenko.com/product/tatting-pattern-set-danuta/

So, step one:

Wind the threads from the ball onto the spool. I do this on a sewing machine.

Two layers

It’s elementary, Watson! Two threads in one.

Three layers

I caught a fish alive

You only need a ball. Make a loop, forming three strands. Tie the end of the thread and loop to the shuttle. Gradually winding three threads on the hook, thread the ball of thread into the loop. Ah, I’m not sure I can explain clearly. Therefore, it is better to watch the video, please (link at the end of the article).

Four layers

In this case, you need to go back to winding in three layers and simply add thread from the spool. Thus, in one step you get 4 layers at once, hooray!

Five layers

 caught a fish alive

You only need a ball threads. We do the same as winding in three layers. But now we need two loops of different lengths. Oh, I won’t even try to write how to do it. And again, I suggest watching the video.

Accordingly, for six layers, you need a winding option for five layers plus one thread from the spool. And this “song” can go on forever!

I am very grateful to you for your patience! Now finally a link to the video. Don’t forget to subscribe to my YouTube channel. And also I will be very grateful for following my blog and comments. https://youtu.be/q53Ejc9gI60

Thanks!

Posted on 6 Comments

Cro-tatting Lesson 1

Lavender cro-tatting lace sample showing basic double stitches, handmade by FairyLacefromElena

Cro-tatting Lesson 1. A bit of history and also basic knots.

Hello everyone!  My regular readers, you certainly know how much I love tatting. This is a hobby for me, a passion, an antidepressant and an opportunity to support my Ukraine in this difficult time. In addition, I try to popularize this amazing needlework technique. And today I’m starting a series of cro-tatting lessons.

What is cro-tatting

Crochet combines tatting needle with crochet. The cro-tatting tool is a needle with a hook on the end. I’m sure you can read the full article on tatting on wikipedia. Many people find cro-tatting more difficult than crocheting or tatting.

Some tatting instructors recommend using a tatting needle and a crochet hook. But I haven’t tried it. Perhaps because I have the perfect tool (in my opinion) – Toshiko Takashima hook.

Unfortunately, this type of tatting is quite rare. And completely undeserved, in my opinion. In addition, cro-tatting are easy to unravel if you make a mistake. You just need to pull the end of the thread, haha! I know, supporters of tatting by shuttle would certainly appreciate it!

Base knots

Cro-tatting lesson 1

This photo shows that all the rings are made using the classic tatting technique. That is, the rings are made up of double stitches (ds). And the chains are crocheted and consist of air loops (al). Perhaps because of the intricacies of the translation, I again confuse the terminology. So write me in the comments, please, if I’m wrong (to do this, click on the Leave a comment button at the BEGINNING of the article).

For cro-tatting lesson 1, I made a video demonstrating the base knots. Of course, if you know how to tat with a needle, it will be very easy for you to make a double stitches. The main difficulty lies in the formation of the ring. But with just a little practice, you’ll get the hang of it. I decided to show you two ways to form a ring. Personally, I prefer the first way. Because this way the ring turns out to be more symmetrical (it seems to me).

In the recording, cro-tatting Ring looks the same as a shuttle or needle tatting. For example, R: 16.
English term for the chain is “single crochet” and in abbreviation “C: 7 sc”. Although in Ukrainian this term is called “air loop” and is denoted, for example, as C: 7al.

https://www.youtube.com/watch?v=rdd7EHAM9lI&list=UULF3dn4_9pp7tIKA2k564wLBQ

And also subscribe to my YouTube channel and blog. I will try to make new video tutorials and detailed articles on the topic of cro-tatting in the near future. Thanks in advance for your comments, questions and suggestions!

📚 Continue learning with https://fairylace.kozinenko.com/cro-tatting-lesson-2/

🧵 Frequently Asked Questions

Q: What tool do I need for cro-tatting?
A: You’ll need a special cro-tatting hook — a hybrid of a crochet hook and a tatting needle. You can find it in my shop here: https://fairylace.kozinenko.com/product/set-of-3-cro-tatting-hooks/

Q: Is cro-tatting the same as tatting?
A: Not exactly! Cro-tatting combines crochet and tatting techniques. You use a small hook instead of a shuttle to form stitches.

Q: Can beginners try cro-tatting?
A: Absolutely! This first lesson will help you master the double stitch — the foundation of all tatting work.

Posted on 2 Comments

Tatting with netting needle

Round Mandala tatting lace doily, handmade with netting needle by FairyLacefromElena, showcasing original pattern and delicate craftsmanship

Tatting with netting needle, or how I use unusual tools.

Hello everyone! Thanks everyone for supporting my blog! Also, I thank you for the many answers to my question about the tatting tools you use. Today I want to tell you in detail about the wonderful netting needle tool.

So, first, a little story.
When I started tatting, I gradually mastered new tools and new techniques. Oh, this is very interesting! Besides, new knowledge does not allow our brain to “stop”, ha ha!
Once I saw amazing photos of Celtic patterns and decided I needed to do it. But how to do it? You will understand that the shuttle cannot be threaded through very small closed pieces. Therefore, another tool I needed. I used a weaving needle as a shuttle. I also tried long plastic celtic weave shuttles. It all works, of course. You will probably agree with me that the Internet is a super invention. How else would I see the mesh weaving kit? Unfortunately, then in our country there was not such a variety of accessories for needlework. And we have not even heard of online shopping!

So, I saw what I needed. I even found out the name of this instrument and told my sister about it. You cannot even imagine my delight and my gratitude to my little sister when I received a package from her with gifts. Oh, it was a real treasure! I unpacked and took out threads, stabilizers, scissors, tatting needles, templates for kumihimo and so on (the list is very long). And at the bottom of the box, I saw two netting needle kits!

Tatting with netting needle

I liked the set on the left better. because the ends of the tool are neater here and it is easy to wind the thread around them.

Tatting with netting needle

The needle has a small hole for tying the beginning of the thread.

Tatting with netting needle

But it turned out I can use this needle for tatting with beads too. This is very convenient because a huge amount of booster threads can be placed on this needle.

Tatting with netting needle

You can watch a small video of how I tat using this tool. https://youtu.be/3Fn-Urybu_A

Please note that when working with this tool, I use the second method for the shuttle. You can also see several tat methods on my channel. https://www.youtube.com/watch?v=ISTEQI1ud1k&list=UU3dn4_9pp7tIKA2k564wLBQ&index=6

Finally, I used igloo mesh to create my Summer Mood collection. By the way, all patterns are available in my store, welcome: https://fairylace.kozinenko.com/?s=summer+mood+pattern&post_type=product

In addition, you can get the perfect connection with long picots using a netting needle. https://www.youtube.com/watch?v=qWPPlAbps5I&list=UU3dn4_9pp7tIKA2k564wLBQ&index=21

Please subscribe to my blog, comment, ask questions. Trust me, your support is very important to me!

Posted on 18 Comments

How to stiffen tatting lace

How to stiffen tatting lace

How to stiffen tatting lace, everything I found on the internet and my personal experience. But I would sooooo much like to see your comments on my posts. Trust me, feedback is very important. After all, this is the only way I can understand how interesting my articles are. I am very interested to know if my experience was helpful to someone. So subscribe to my blog. Comment and ask questions. I will be happy to help with tips!

 Hello everyone! Thank you, dear friends, for new subscriptions. Your support helps me improve my blog and store!

Please be patient. Because the article will be too long. But I added pictures for fun! So, let’s begin! As beautiful as the pattern is, the finished tatting product almost always needs to be fixed. I mean giving stiffness and stability to the lace. All tatters know if the lace is not fixed, it looks sloppy. But we should always strive for excellence. Do you agree?

Apart from my own experience, I have found many articles on the Internet on this topic. There are many solutions. Among which are absolutely unexpected, ha ha! It turns out that you can make the lace stiffer: sugar syrup, starch, hairspray, nail polish, PVA glue, varnish for resin, embroidery fixing agent, and even candle wax. I’ve seen a few more experiments. But they did not interest me. So let’s talk a little more about each method.

Sugar syrup for to stiffen tatting lace

I don’t like using sugar syrup. It’s hot and uncomfortable. In addition, sugar lures pests who will eat delicious lace with pleasure!

Starch for to stiffen tatting lace

You can use the powdered kind that is dissolved in water. You will have to get the object totally wet with the starch and then pressed with a hot iron.

Or you can use the pressurized starch sprays that are available in the laundry section. There is a drawback to this method though. It isn’t recommended to use starch for white objects as it will yellow over time.

Hairspray for to stiffen tatting lace

It is interesting to experiment with hairspray. I have tried spraying a strong hold polish on the earrings. But after a few days the varnish peeled off. Therefore, the earrings lost their rigidity and shine, alas. But this method works well with pieces for greeting cards or framed pieces. Moreover, you can use glitter polish. This is what you need for Christmas!

Nail polish for to stiffen tatting lace

I have not tried using clear nail polish. But maybe you tried it? Then share your experience with us in the comments, please.

PVA glue for to stiffen tatting lace

is great for doilies and center pieces. Mix the glue with water. The proportions may vary. If you use a lot of glue, the solution will be too thick. You may be disappointed with the thin film on the back of the product. So the glue is absolutely not suitable for colored threads, only for light ones (white, ivory, etc.). And I think you should not use glue for the products to wear. These are collars, chokers, jewelry, clothing. So I don’t really like this method. And don’t forget! Do not iron! It will darken if you stroke it.

Varnish for resin


I did an experiment with varnish for resin. But the result did not make me very happy. Because I got insufficient rigidity of the earrings. you can also notice traces of dried varnish on the leaf on the right. I think that in this case it is better to use the tatting in resin method. I wrote about this in detail in my previous posts.

Spray for securing embroidery


I don’t use this for tatting. In my opinion, these funds are too expensive. And sooooo expensive for big projects. And also scares me DANGER: Extremely flammable. Fumes are harmful. Content under pressure. Keep out of reach of children.

Embroidery stabilizer solution


This is my favorite way. Read more about this in my article here: https://fairylace.kozinenko.com/cute-tatting-ring-final/

This is how I dispose of the remains of the embroidery stabilizers. I also like that these materials are harmless and environmentally friendly.

Candle wax for to stiffen tatting lace


This is a completely unexpected way for me! I was very surprised. Read more about this on the JEDDAH MOM blog. But come back to me at once! My story is not over. We continue! https://www.jeddahmom.com/how-to-stiffen-a-doily-with-candle-wax-2/

How to soak the finished product for to stiffen tatting lace

I have seen many videos showing the complete immersion of a small piece of tatting into a container of solution. Perhaps this works for small items. Provided that there are no long picots in the lace. Ha! Have you tried this trick on a large item? I tried it once. Now you can cry with me. For I have hopelessly ruined my long work on the bag. The lace should NOT be deformed during the application of the solution.

Therefore, I do not put tatting into the solution. On the contrary, I put the tatting on a flat surface and saturate with the solution. Of course, it is convenient to use a brush for small items.

It is very convenient to work with a spray. But in this case, some of the solution will not get on the product. And be sure to blot the wet product with a towel to remove excess solution.

I use a simple and “reliable” product – a cotton ball. With this ball, I can spread the picot out during the soaking process. I often don’t even need to use needles.

Where to place tatting lace for stiffen

It all depends on the size of the finished product. For example, earrings, snowflakes, bells can be placed on a table or windowsill. In any case, find a place where they will not interfere with you while drying. There are two important points. Try to keep out the sun and dust! To do this, cover the damp item with a plastic container and a towel. I do this for tatting in resin too.

But I have to place very large projects on the floor. When I was finishing the borders for the table linen set, my family was uncomfortable for a while. By the way, do not forget to lay polyethylene or oilcloth under your product BEFORE applying the solution.

And one more important question. Do you use needles for fixation? I don’t have a definite answer here. Because it all depends on the pattern. Of course, you cannot do without needles if there are long picots in the pattern. Or in cases where you need to achieve the perfect shape. For example, for a box.

Thanks for reading my opus! Perhaps I didn’t remember everything. You probably know other methods like to stiffen tatting lace. Then write about it in the comments, please. Your experience is very valuable!

Posted on 6 Comments

Measuring sticks or picot gauge

White tatting lace doily fragment with long picots of various lengths on black background, handmade by #FairyLacefromElena

Measuring sticks or picot gauge. How to make neat long picots. What tool is better to use for this.

Hello everyone! In early autumn, I finished creating my Summer Mood collection. After the blog post, many readers asked me which measuring sticks for long picots I used. Therefore, I decided to talk in detail on this topic. So, measuring sticks or picot gauge. I will share my experience and my opinion. Your opinion may be different, of course. Therefore, I ask you to share your opinion in the comments, please.

First, by tradition, I must start with history. But I don’t want to waste your time on long historical sentences. It is absolutely clear to me that tatting measuring sticks have been used for a long time. The next photo confirms this.

Photo signed: Antique bone tatting spatulas.

Very interesting, measuring sticks were called spatulas ?!

There are a wide variety of picot tools out there these days.

There is a variant of combining gauge for tatting needles and picots . I don’t like this kind of tool. In my opinion, it is too uncomfortable and cumbersome for weaving picot. Possibly just for measurement.

In my opinion, such sets are much more convenient. But these sticks are handy for tatting shuttles. For tatting with a needle, the wide ends get in the way. Anyway, for me.

The ideal option is straight plastic sticks of different widths. I found this picture on the Internet.

My measuring sticks for long picot

When I bought a set of mesh needles, I was very happy. Because this set includes three plastic sticks. They are long enough, smooth, comfortable. But only three sizes. And the package went sooooo long. And I need a lot of picot gauge of different sizes and urgently! To you too?

For example, to create this collar, I used 10 strips of different widths.

I took thick cardboard and cut out 10 strips of the desired width. The length of the stripes is whatever is convenient for you. I have signed a number on each strip. This number indicates the width of the strip in millimeters. Then I covered each strip with scotch tape for better glide. This method is perfect! You can make as many measuring sticks as you like, quickly and easily. Is not it?

Another option is to make spatulas (haha) from used plastic cards. But you have to try, because cutting such a card neatly and neatly is not very easy. But you get a graceful, smooth and durable strip.

Also, I don’t throw away ANY plastic sticks. For example, ice cream sticks. It’s a shame they only have one size.

Helpful advice for use measuring sticks

Pay attention to how the measuring stick is positioned during weaving. The strip can be parallel or perpendicular to the work. This will determine how long the picot will turn out in the finished form.

For example, in this photo, the cardboard strip is located perpendicular to the work. The shuttle and ball threads are located on both sides of the strip. Therefore, in the finished form, the picot will turn out to be two times shorter (in this version, 7, 5 millimeters). By the way, this method is suitable for weaving only one picot at a time.

But if you want to make several picots in a row, you need to position the stick perpendicularly. And in this case, the finished picots will be the same length as the measuring stick is wide.

The same applies to tatting with a needle.

I invite you to check out my pattern patterns using long picots. I hope you will enjoy. Especially, off 10% for you! Coupon code OFF10HAPPYPATTERN is valid until December 31st. Welcome! https://fairylace.kozinenko.com/product-category/patterns-tutorials/patterns-and-tutorials/

I also hope my video will be interesting and useful to you. https://www.youtube.com/watch?v=Of-fmKKNp4A&list=UU3dn4_9pp7tIKA2k564wLBQ

Subscribe to my blog, comment, ask questions. I will be happy to help.

Posted on 4 Comments

Long picots

Green, red, and white tatting lace bells with long picots and beads hanging on a pine branch, handmade by #FairyLacefromElena

How to make straight long picots.

Hello everyone! First, I want to thank everyone for your prayers and support. My husband is doing better. The new cardiogram showed only one systole. My dear hubby will have another checkup next week. And I hope everything will be fine.

And now about something even more pleasant. 🙂 I have already written in previous posts about my hobby for long picots. Yes, I created a new collection based on this method. This is Summer mood. https://fairylace.kozinenko.com/product/summer-mood-collection/

So, you asked what picot gauge I use. You can take a “tatting needle and picot gauge”. But I do not like bulky tools. I use plastic strips of different widths or homemade cardboard templates. Because you can make them as many as you like, any width and length! https://fairylace.kozinenko.com/2019/10/22/additional-tools-for-tatting/

Also, I needed 10 strips of different widths to make the collar necklace “Sea Glass”! https://fairylace.kozinenko.com/product/sea-glass-tatting-pattern/

Detachable blue collar necklace for Dress Sia Glass

I’m putting together a collection of platinum stripes! Because I like long gauge. After all, this is very convenient for weaving several picots in a row. But this is in my opinion, of course. I made a video for you how to make even long picots. And of course I show 4 ways.

First

Tatting with a shuttle.

Second

Tatting with a needle.

The third

Cro-tatting.

The fourth

This my favorite tatting tool – the netting needle. Don’t forget to come back to me after watching the video, please! https://www.youtube.com/watch?v=Of-fmKKNp4A&t=20s

I hope you enjoy tat the long picots. It’s so exciting, isn’t it? In addition, I always call for the expansion of knowledge and skills. My great-grandfather used to say: to know and be able to – not to carry, but in life it will come in handy. Oh, sorry, I don’t know the English equivalent of this proverb!
Here is another pattern with long picots. This cute Christmas bell is easy to make just by following the instructions! Welcome! https://fairylace.kozinenko.com/product/christmas-bell-pattern/

Subscribe to my blog. Comment and ask questions. I will be happy to help with tips!

Posted on 2 Comments

How to make a personalized tatting shuttle

Black tatting shuttle with lace letter M in orange thread by FairyLacefromElena

How to make a personalized tatting shuttle?

Hello everyone! My granddaughter graduated from second grade (all the marks are on top, of course!). After such a busy year, the child should rest, right? And now my Maria is relaxing about sea with her parents. Therefore, I can devote more time to my tatting.

I told in one of the previous posts how to choose tatting tools.https://fairylace.kozinenko.com/2019/10/18/how-to-choose-tools-for-tatting/

I admit, I like to use shuttles the most. Because I thought that there are many beginner tattoos and masters of this art who also love to use shuttles. And yes, I consider tatting art, do you agree? Therefore, I decided to create unusual shuttles. Let it be “lace for lace.”

Collection of shuttles

So I thought, creating my first collection of shuttles.

These were shuttles with flowers using the tatting technique. There are 154 knots in each flower! To weave these mini pieces, I used the thin embroidery threads. This is part of my stock! I’m not a threadsholik ( ha-ha-ha! ), I just love different colors!

But how to make a personalized tatting shuttle? For this, initials are needed. Many attempts, a few torn threads, and as a result, a collection of personalized shuttles is ready, cheers!

How to make a personalized tatting shuttle

Perhaps you will appreciate the filigree of my work by watching the video. I tried to show with what thin threads letters are made. Do not worry, my hands are not so scary really! This is a very close-up shot. https://youtu.be/qZP7IEWKJjQ

What color shuttles do you like more? Perhaps you have suggestions for choosing thread colors. Write in the comments which combination of shuttle and letter is your favorite. These may be unexpected and fresh decisions, I am sure!

You can see and buy ready-made shuttles in my store: https://fairylace.kozinenko.com/product-category/patterns-tutorials/tatting-tools/

Take care of yourself!