Posted on 2 Comments

Work on bugs

Illustrative video FairyLacefromElena how to fix a mistake in the picot connection

Work on bugs, or never fall into despair.

Hello everyone! Today I want to thank everyone who thinks of me, prays for my country and supports us in this terrible time. So I just can’t imagine how one can cope with depression or despair alone.

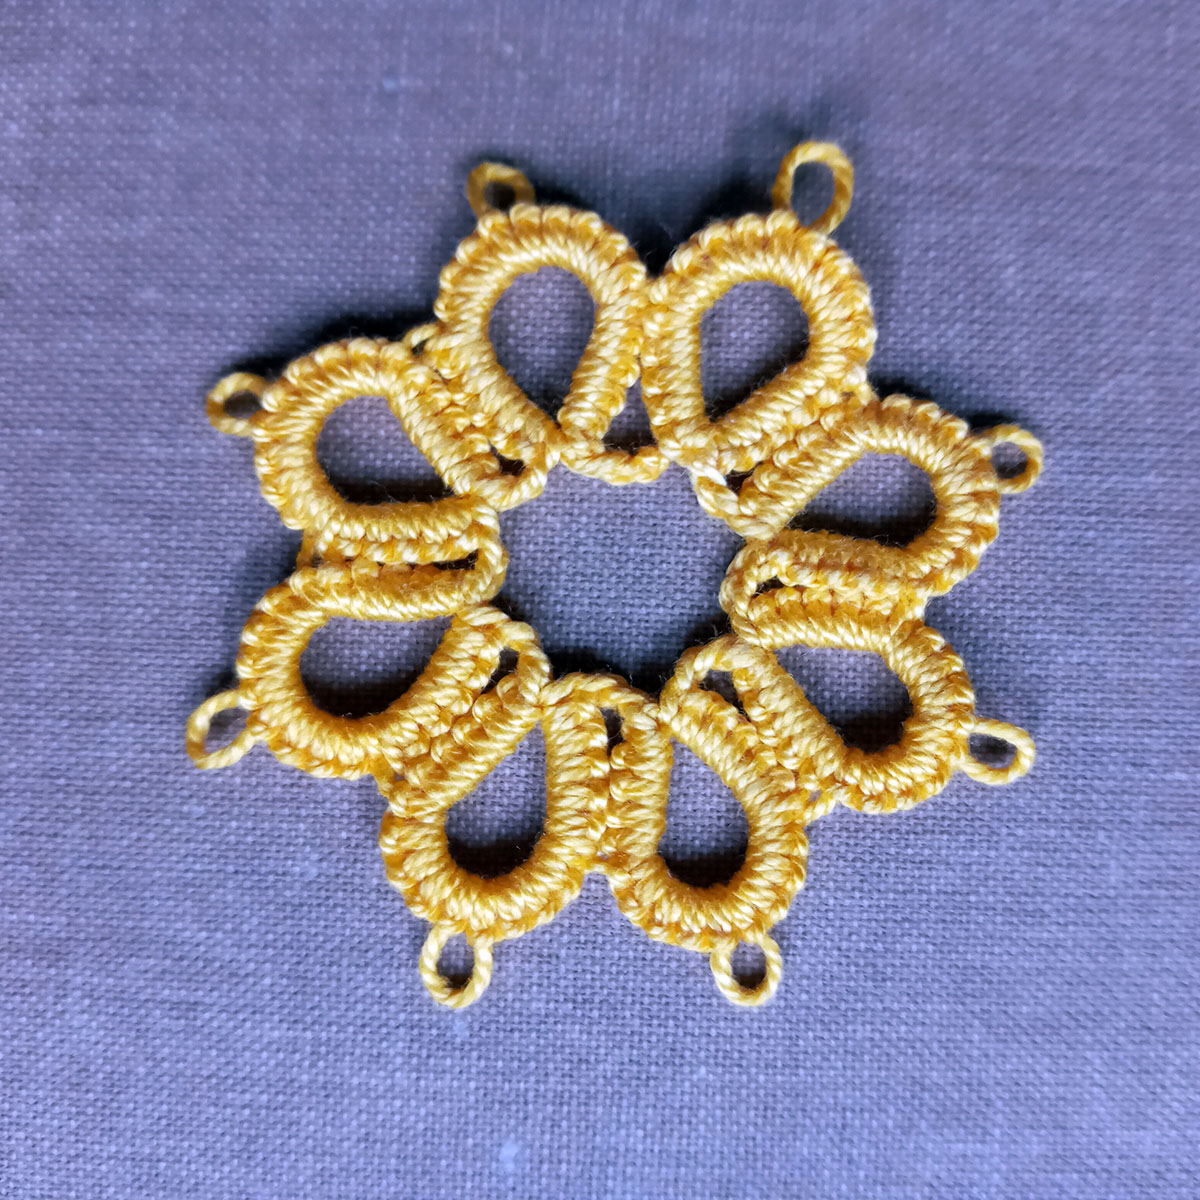
Yesterday I had a psychologically very difficult day. 400th day of open occupation, bombing and destruction of my country. Yes, my nerves can not stand it, alas. Although I try to do my favorite thing – tatting. But this is impossible. After all, creativity requires a special state of mind. Do you agree?

Ah, I had to reach out to FB tatting group members for support and prayers. My dears! I am extremely touched by your words and prayers. Also I low bow to everyone for not letting me fall into despair!

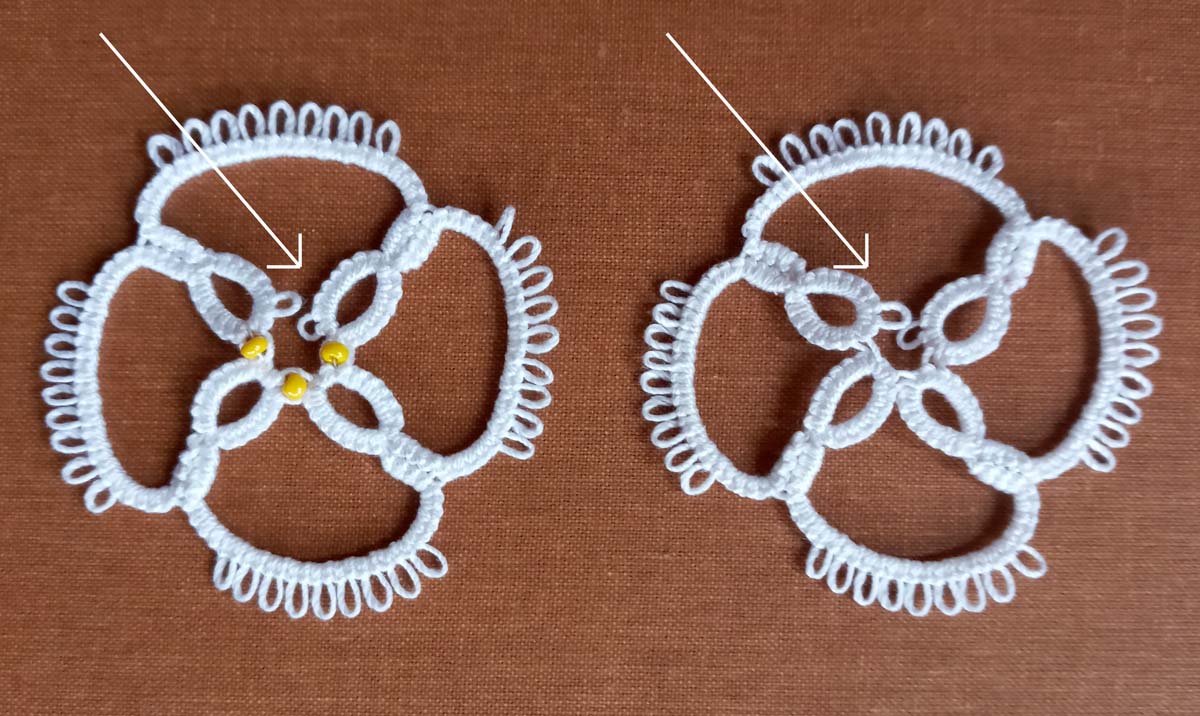
Fixing the bug connecting picots

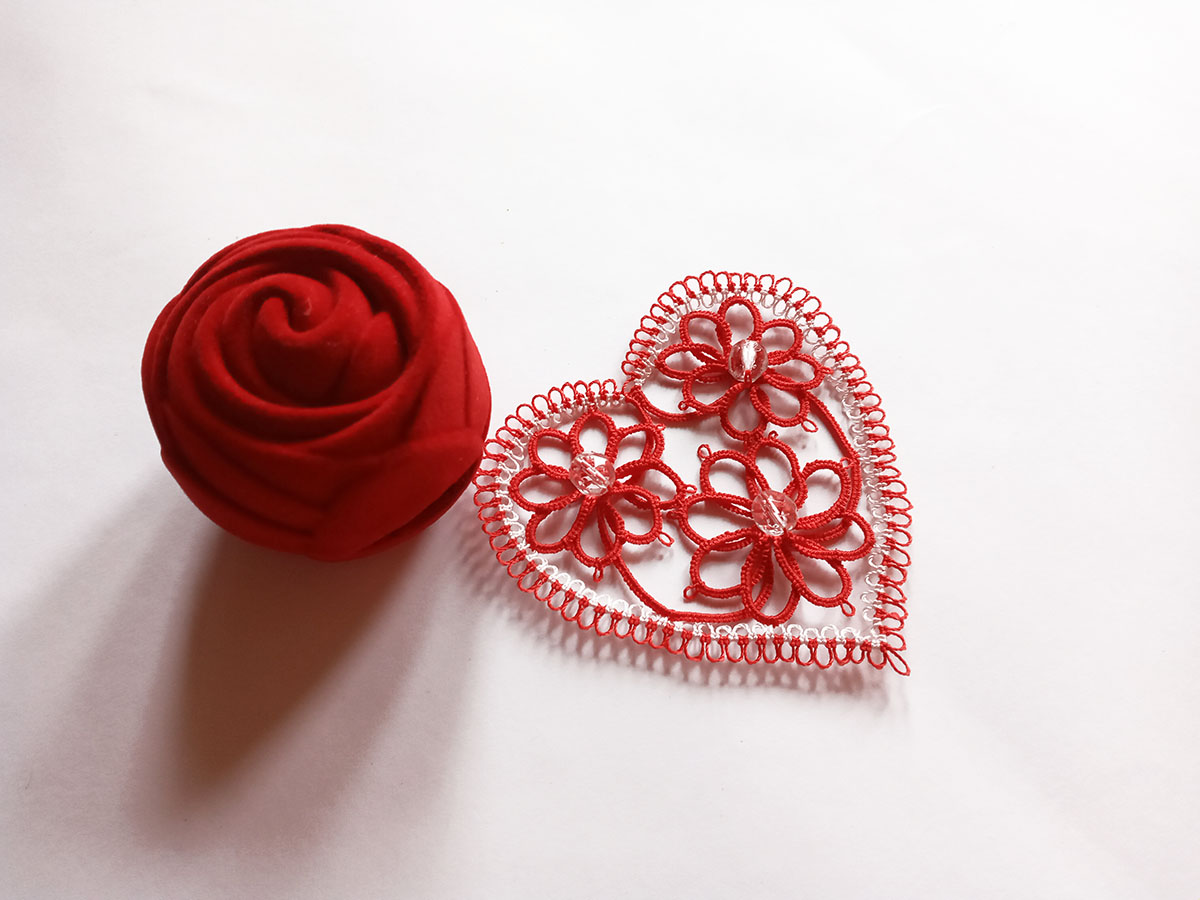
Unfortunately, circumstances do not always give me the opportunity to be an active participant in social networks. But I’m trying! Recently I saw a post with a photo of an error in the finished tatting product and the question is whether it can be fixed. Of cource, all needleworkers know how much time, work, focus and diligence we put into each of our handmade products. And then, finally, when you can with delight say “tadaaam!” , you discover an unfortunate mistake. Ah, I forgot to connect the two elements with picots according to the scheme. What to do? How to fix? Throw everything away and start over? Well, how can you not fall into despair.

But my article today is titled: Work on bugs, or never fall into despair. So, the main thing is not to succumb to negative emotions. As you know, there are two ways out of any situation, one of which is correct, ha ha! So what can we do? First, you can throw away this work and do it all over again. But that would be just the wrong way out. Therefore, I suggest taking a sewing needle and a thin thread of the same color as our product. This way you simply sew each missing picot to the ring (or chain, if it fits the pattern). Of course, it is difficult to explain this process in words. However, we have an assistant – YouTube channel! My new video on this topic is ready to watch, welcome! https://www.youtube.com/watch?v=2waGQ_elnk8&list=UULF3dn4_9pp7tIKA2k564wLBQ

Please subscribe to my blog, comment and share on social networks. And also check my store: https://fairylace.kozinenko.com/

Thank you!

Posted on 2 Comments

Cro-tatting lesson 2

Cro-tatting. Lesson 2

Cro-tatting lesson 2, or how easy and simple it is to make a closed motive.

Hello everyone! This article is a continuation of Lesson 1. Please check the link: https://fairylace.kozinenko.com/cro-tatting-lesson-1/

Today I want to show you how to make a simple closed motif. After all, tatters are constantly faced with such elements! Of course, you use flowers, medallions, rosettes, small squares or triangles in your work. I know it’s not always easy to connect the last element to the first one in such fragments. Especially often this question worries novice needleworkers. By the way, I advise you to start mastering the closed motif with a piece that contains at least 5-6 Rings. You ask why? Becouse in this case It is more convenient to rotate the finished part of the work for joining.

Of course, I made a short video. Although I made this video using a tatting hook, the principle of connecting the rings into a closed motif will be interesting and useful for lovers of the shuttle and the needle also. I’m sure words can’t explain everything. It’s good that there is an opportunity to find a video on YouTube that you will like and be useful to you! The Internet has brought into our lives the opportunity to learn whatever your heart desires. But be careful! I urge everyone not to get completely dependent on the World Wide Web! Haha! Sorry, I digress.

So, today I suggest you make a small motif of eight rings and eight chains. For beginners, I advise choosing high-quality #10 threads. And it is better if you take threads of light shades. Oh, believe me, dark threads (especially black ones) are very tiring for the eyes.

This is a graphic diagram and instructions. You can easily copy this picture (this is JPG file).

And I will be glad for your comments, wishes and subscriptions here and on my YouTube channel. You can watch the video Cro-tatting lesson 2 here, welcome: https://www.youtube.com/watch?v=mmClyW-P0gM&list=UULF3dn4_9pp7tIKA2k564wLBQ

Posted on 6 Comments

Cro-tatting Lesson 1

Lavender cro-tatting lace sample showing basic double stitches, handmade by FairyLacefromElena

Cro-tatting Lesson 1. A bit of history and also basic knots.

Hello everyone!  My regular readers, you certainly know how much I love tatting. This is a hobby for me, a passion, an antidepressant and an opportunity to support my Ukraine in this difficult time. In addition, I try to popularize this amazing needlework technique. And today I’m starting a series of cro-tatting lessons.

What is cro-tatting

Crochet combines tatting needle with crochet. The cro-tatting tool is a needle with a hook on the end. I’m sure you can read the full article on tatting on wikipedia. Many people find cro-tatting more difficult than crocheting or tatting.

Some tatting instructors recommend using a tatting needle and a crochet hook. But I haven’t tried it. Perhaps because I have the perfect tool (in my opinion) – Toshiko Takashima hook.

Unfortunately, this type of tatting is quite rare. And completely undeserved, in my opinion. In addition, cro-tatting are easy to unravel if you make a mistake. You just need to pull the end of the thread, haha! I know, supporters of tatting by shuttle would certainly appreciate it!

Base knots

Cro-tatting lesson 1

This photo shows that all the rings are made using the classic tatting technique. That is, the rings are made up of double stitches (ds). And the chains are crocheted and consist of air loops (al). Perhaps because of the intricacies of the translation, I again confuse the terminology. So write me in the comments, please, if I’m wrong (to do this, click on the Leave a comment button at the BEGINNING of the article).

For cro-tatting lesson 1, I made a video demonstrating the base knots. Of course, if you know how to tat with a needle, it will be very easy for you to make a double stitches. The main difficulty lies in the formation of the ring. But with just a little practice, you’ll get the hang of it. I decided to show you two ways to form a ring. Personally, I prefer the first way. Because this way the ring turns out to be more symmetrical (it seems to me).

In the recording, cro-tatting Ring looks the same as a shuttle or needle tatting. For example, R: 16.
English term for the chain is “single crochet” and in abbreviation “C: 7 sc”. Although in Ukrainian this term is called “air loop” and is denoted, for example, as C: 7al.

https://www.youtube.com/watch?v=rdd7EHAM9lI&list=UULF3dn4_9pp7tIKA2k564wLBQ

And also subscribe to my YouTube channel and blog. I will try to make new video tutorials and detailed articles on the topic of cro-tatting in the near future. Thanks in advance for your comments, questions and suggestions!

📚 Continue learning with https://fairylace.kozinenko.com/cro-tatting-lesson-2/

🧵 Frequently Asked Questions

Q: What tool do I need for cro-tatting?
A: You’ll need a special cro-tatting hook — a hybrid of a crochet hook and a tatting needle. You can find it in my shop here: https://fairylace.kozinenko.com/product/set-of-3-cro-tatting-hooks/

Q: Is cro-tatting the same as tatting?
A: Not exactly! Cro-tatting combines crochet and tatting techniques. You use a small hook instead of a shuttle to form stitches.

Q: Can beginners try cro-tatting?
A: Absolutely! This first lesson will help you master the double stitch — the foundation of all tatting work.

Posted on Leave a comment

Tatting lace collars

White tatting lace collar with beads.

Tatting lace collars, or 2023 fashion trends.

Tatting lace collars

Hello everyone! Today I found an interesting article about collars on Wikipedia. And I want to share with you for sure! So:

In clothing, a collar is the part of a shirt, dress, coat or blouse that fastens around or frames the neck.
A collar may be permanently attaced to the main body of the garment (e.g. by stitching) or detachable. Oh, I love detachable collars! Because by changing the collars, you can get several different outfits from one dress!

Collars shapes

I also found a table on Wikipedia with the names and descriptions of 66 types of collars, wow! For example, a Peter Pan collar. But I’m sure you all know that collars name. Or, zero collar. This is neckline of shirt without band and collar. Or, zero collar. This is neckline of shirt without band and collar. By the way, it is on such a zero neckline that detachable collars look best.

By the way, you can use a brooch to fasten the collar around the neck. This will add even more chic and elegance to your image.

There is also a type of collar worn as part of clerical clothing called Clerical collar. I may be wrong, but it seems to me that the shape of chokers is very similar to this type of collar.

Also I find collar Pussy Bow very interesting and unusually feminine. This collar tied in a large bow under the wearer’s chin. Particularly associated with Margaret Thatcher in the 1980s. I was very surprised to learn this fact today. Because about 10 years ago I created a little collar with a little bow and named it Pussycat! Haha!

Collars material

I’m afraid you won’t have the patience to read a list of all the materials from which the collars were made.

These are the golden collars-necklaces of the pharaohs of Ancient Egypt.

Or the finest handmade lace in the collars of French kings. It’s a Medici collar.

Also a combination of silk fabric and the finest lace is used.
Nowadays, cotton, denim, guipure, leather various threads are used for collars. Add embroidery, embossing, beads. Of course, the list is far from complete!

In 2023, lace is back in fashion. Probably, not all ladies will want to wear a lace dress. But everyone wants to be at the peak of fashion, I’m sure! So be sure to add some lace collars to your wardrobe. Including tatting collars. It is for the manufacture of tatting or bobbin lace that threads are used. Because they are light and extremely chic.

Tatting lace collars for the dress

You can buy ready-made collars for every taste or make your own according to my master classes. Welcome to my store: https://fairylace.kozinenko.com/?s=collar&post_type=product

Please write your wishes, feedback and comments in the comments. To do this, go to the BEGINNING of the article and click the “Leave a comment” button.

I hope you enjoy my video on YouTube. Like and subscribe! https://www.youtube.com/watch?v=kbPXyJwRHFw&list=UULF3dn4_9pp7tIKA2k564wLBQ&index=45

And in conclusion, a small gift – a tatting collar pattern from Project Gutenberg’s Beeton’s Book of Needlework, by Isabella Beeton.

Posted on 14 Comments

Happy Valentine’s Day!

Handmade Tatting Lace, Red Heart.

Happy Valentine’s Day, or why I love doing custom orders.

Hello everyone!  Today, on Valentine’s Day, I couldn’t ignore the topic of hearts, of course! We all know that the image of a heart is a symbol of love. This is explained by the fact that love serves as a connecting element in the world. Therefore, by creating a mirror image of the deuce, they get what is considered a symbol of love. The heart is the perfect image of love as the force that binds the world. That is why they speak of two halves of the heart.

Happy Valentine's Day!
red lace heart, embroidery FSL

I really enjoy making lacy hearts. By the way, my patterns are not always symmetrical. But I think it gives a special charm to the hearts.

I also enjoy weaving hearts according to the patterns of other masters. For example, a simple but very cute heart pattern from Handy Hands.

I especially like to weave lace for custom orders. Because when I create a product for a certain client, I think about this customer all the time. I imagine how happy my customer will be when he opens the box with the order. Oh, I always try to please and surprise my customers.

Today I finished solving another problem (ha-ha! not mathematical!).
Given: one pattern and two balls of pink and light green thread, shuttles and scissors.
Required: Make 12 different hearts in the same pattern.
Rate how I coped with this task! Yes, I got 12 different hearts. In addition, I can make 12 more options !

I will be grateful to you for comments and remarks. This will help me make my blog more interesting and useful. You can write comments by returning to the BEGINNING of the post and clicking on the word COMMENTS.

Happy Valentine’s Day! I wish you happiness, love and peace, my dear readers. And also I invite you to watch the video clip on my YouTube channel, welcome! https://www.youtube.com/watch?v=xFztNo5OwL4&list=UULF3dn4_9pp7tIKA2k564wLBQ&index=11

Posted on 4 Comments

Tatting Josephine knot

Handmade tatting lace snowflake with Josephine knots

Tatting Josephine knot, or laziness is the engine of progress.

Hello, everyone! Let’s talk about laziness. Is it really true to say that laziness is the engine of progress? But what about creative impulses or bouts of vanity? As an unselfish desire to benefit humanity or a thirst for enrichment? Yes, no one has canceled human passions! But let’s briefly “go over” the history.

Once upon a time, primitive people climbed tall trees to pick fruits. But one “lazy person” did not want to climb up the hard bark. He picked up a stick, threw it up and – ta-daaaam! – knocked down a juicy sweet fruit. So the ancient man learned to use a stick as the first tool.

Years passed, humanity developed. Cities were built, trade arose. Oh, how difficult it is to deliver goods on your own shoulders. And again, some “lazy person” decided to attach round supports to the box and forced the donkey to drag this improvised cart. I imagine what a sensation this procession made at the old fair!

Well, I hope you get my point! And of course, they appreciated the sense of humor! Now I’m smoothly moving on to my own laziness, ha ha! My regular readers know that I really like to “complicate” my work. I’m too lazy to wind the thread on a small shuttle, so I try to take larger shuttles. By the way, this makes it possible not to increase the thread during operation. And this is my main goal, because I hate to hide the ends of the threads. I am horrified at the mere thought that by the end of the last knot I will have to hide 50 (or 150) tails of threads! This is especially true for multi-row patterns.

Of course, I didn’t “invent the wheel” when I started using false picot, split ring and split chain to go to the next row without cutting the thread. My subscribers must have watched the video tutorials on my YouTube channel. https://www.youtube.com/channel/UC3dn4_9pp7tIKA2k564wLBQ

But while creating a new snowflake, I thought, why not make the same transition using a combined ring of Josephine knots? This snowflake is part of a Christmas garland. https://fairylace.kozinenko.com/product/pattern-easy-twist/

I couldn’t find any links on the internet for this. Maybe I was looking bad, what do you think? It is also possible that this technique has the correct name. Write in the comments please. After all, the terminology in different languages has certain differences. Subscribe to my blog! And also watch the video of Josephine split ring, welcome:https://www.youtube.com/watch?v=MXjpLw9d4C4&list=UULF3dn4_9pp7tIKA2k564wLBQ&index=1

Posted on 2 Comments

Bracelet with cute story

Blue tatting lace bracelet with beads. Handmade by FairyLacefromElena

Bracelet with cute story, or how I was looking for a name for a new bracelet.

When I was picking threads for this bracelet, I imagined a cute Barbie doll. Barbie style suggests just such delicate, romantic and soft colors. But I can’t call my bracelet Barbie, because it could be copyright infringement. I always urge masters to treat copyrights of any artist reverently and honestly. So I went to the internet, haha! By the way, at the same time I learned some interesting facts. You probably know how I love to learn new interesting stories.

Bracelet with cute story

Some facts about Barbie

Barbie first appeared at the children’s goods fair in New York (1959). Ruth and Elliot Handler created this amazing doll. It is believed that the prototype of the famous doll was Bild Lilly, the heroine of erotic comics published in the newspaper “Bild Zeitung” (Germany). Barbie’s full fictional name is Barbara Millicent Roberts.

The first Barbie cost $3. Ah, I can’t even imagine how much a collectible Barbie can cost today!

Nowadays, there are many models of the famous doll and her family and friends. Also huge number of all kinds of accessories, computer games about Barbie are also sold. In 2004, the cartoon “Barbie and the Nutcracker” was filmed. In my opinion, few toys can compete in popularity with this blonde Barbara!

I think you will also like my new bracelet with this cute story. By the way, you can make such a bracelet according to my master class. https://fairylace.kozinenko.com/product/pattern-celtic-bracelet-ballerina/

I also invite you to visit and subscribe to my YouTube channel, welcome: https://www.youtube.com/watch?v=t8pA49htn9U&list=UU3dn4_9pp7tIKA2k564wLBQ

I have to admit that this post was not easy for me. It is hard not to think about grief and misfortune in my country. And I am deeply grateful to everyone who supports and prays for our free, strong and independent Ukraine! Thank you my dear friends!

Posted on Leave a comment

To do or not to do, that is the question

Red tatting bracelet with white beads

To do or not to do, that is the question! Or again about the front and back sides of tatting.

Hello, everyone! Today I want to touch again on the topic of front and back side of tatting. Ah, don’t get angry and don’t throw slippers at me! This dispute reminded me of the dispute between midgets from the novel by Jonathan Swift. On which side should the egg be cracked? I don’t think it matters. Because it is important to get to the delicious middle! Of course, every tatter is free to do as you like. But how I always want to get a “delicious”, beautiful, tender and perfect result!

I personally prefer to always distinguish between the front and back of my work. It’s probably a habit. This is especially true when you need to connect rows of different colors. I am sure you will agree with me, because if the connection is wrong, the product may not look very beautiful. But we strive for perfection, don’t we?

By the way, I was inspired to write this post by my new pattern, in which I connect the rows of white and red: https://fairylace.kozinenko.com/product/fish-heart-tatting-pattern/

To do or not to do the front and back sides of tatting

So, look closely at the photo.

In the first case, the connection is correct. Light threads do not peek out between the green ones.

And in the second case, the light thread is a small strip between the green ones.

But sometimes, you may need just such “wrong” strokes. After all, the fantasy of tatters is limitless and who knows what else we can come up with! So, decide for yourself, to do or not to do the front or back side of tatting! And as another argument, watch my video, please. Subscribe to my YouTube channel and follow my blog, welcome! https://www.youtube.com/watch?v=98FYbzTfzZE&list=UU3dn4_9pp7tIKA2k564wLBQ

Posted on 24 Comments

Shuttle tatting for needle

Shuttle tatting lace motif for needle tatting, handmade by FairyLacefromElena, perfect for tutorials and learning new techniques

Shuttle tatting for needle. Free snowflake sample.

I am often asked if it is possible to use patterns for a shuttle when working with a needle, or vice versa. Yes, of course, such patterns have very small differences. And now I will try to show you these differences.

I created a snowflake especially for this article. The pattern is free, of course. And you can download the PDF file by following this link: https://drive.google.com/file/d/1De4s0JAmXflqJ9K_hlU-kVw_OQto4dRG/view?usp=share_link

Hopefully this will be a nice gift for all tatters (no matter what tool you use!)

So, you’ll need a white thread (thread thickness doesn’t really matter, but I used # 40), a shuttle or needle (whichever you prefer), a crochet hook (for easy and neat connection), and scissors. You can also use a 4, 6, and 8 mm picot gauge. Also, you may be interested in reading an article on my blog about which picot gauge I use.

I have divided the page into three columns, as you will see next. In the left column there is an instruction for the shuttle, in the right one for the needle. The central column is occupied by graphic diagram and photo of process. Thus, you will clearly see that the same pattern is used for both methods.

How to make tatting with shuttle and needle

By the way, I didn’t think of a name for this snowflake. Please write your options in the comments!

Shuttle tatting for needle

If you have any questions, I will answer in the comments without fail.

Shuttle or needle tatting

Hopefully this makes it easier for you to navigate the patterns. After all, we examined in detail the topic this theme!

Now you can check out my store, what if you like a design that you previously thought was impossible ?! https://fairylace.kozinenko.com/product-category/patterns-tutorials/

My social media pages:

My YouTube channel, welcome: https://www.youtube.com/watch?v=3Fn-Urybu_A&list=UU3dn4_9pp7tIKA2k564wLBQ

Happy tatting! Happy Holidays!

Posted on 2 Comments

Tatting with netting needle

Round Mandala tatting lace doily, handmade with netting needle by FairyLacefromElena, showcasing original pattern and delicate craftsmanship

Tatting with netting needle, or how I use unusual tools.

Hello everyone! Thanks everyone for supporting my blog! Also, I thank you for the many answers to my question about the tatting tools you use. Today I want to tell you in detail about the wonderful netting needle tool.

So, first, a little story.
When I started tatting, I gradually mastered new tools and new techniques. Oh, this is very interesting! Besides, new knowledge does not allow our brain to “stop”, ha ha!
Once I saw amazing photos of Celtic patterns and decided I needed to do it. But how to do it? You will understand that the shuttle cannot be threaded through very small closed pieces. Therefore, another tool I needed. I used a weaving needle as a shuttle. I also tried long plastic celtic weave shuttles. It all works, of course. You will probably agree with me that the Internet is a super invention. How else would I see the mesh weaving kit? Unfortunately, then in our country there was not such a variety of accessories for needlework. And we have not even heard of online shopping!

So, I saw what I needed. I even found out the name of this instrument and told my sister about it. You cannot even imagine my delight and my gratitude to my little sister when I received a package from her with gifts. Oh, it was a real treasure! I unpacked and took out threads, stabilizers, scissors, tatting needles, templates for kumihimo and so on (the list is very long). And at the bottom of the box, I saw two netting needle kits!

Tatting with netting needle

I liked the set on the left better. because the ends of the tool are neater here and it is easy to wind the thread around them.

Tatting with netting needle

The needle has a small hole for tying the beginning of the thread.

Tatting with netting needle

But it turned out I can use this needle for tatting with beads too. This is very convenient because a huge amount of booster threads can be placed on this needle.

Tatting with netting needle

You can watch a small video of how I tat using this tool. https://youtu.be/3Fn-Urybu_A

Please note that when working with this tool, I use the second method for the shuttle. You can also see several tat methods on my channel. https://www.youtube.com/watch?v=ISTEQI1ud1k&list=UU3dn4_9pp7tIKA2k564wLBQ&index=6

Finally, I used igloo mesh to create my Summer Mood collection. By the way, all patterns are available in my store, welcome: https://fairylace.kozinenko.com/?s=summer+mood+pattern&post_type=product

In addition, you can get the perfect connection with long picots using a netting needle. https://www.youtube.com/watch?v=qWPPlAbps5I&list=UU3dn4_9pp7tIKA2k564wLBQ&index=21

Please subscribe to my blog, comment, ask questions. Trust me, your support is very important to me!